Framing in Studio
 Updated
by Russell B.
Updated
by Russell B.
There is an Xactware Xpert Tip that might help with part of this process. After selecting play, select the full-screen icon to make the video full-screen.
See our XpertTips library for more Xpert Tips.
The document below covers how to use the framing option in XactRemodel and XactRestore Studio.
![]() Please note that framing items are added at the level group, not within a specific item’s group. For example, framed walls for a room called Room 1 on the Main Level have the framing items added to the Main Level group. The exception is for decks, which are added to the specific deck’s group.
Please note that framing items are added at the level group, not within a specific item’s group. For example, framed walls for a room called Room 1 on the Main Level have the framing items added to the Main Level group. The exception is for decks, which are added to the specific deck’s group.
Show Framing
To view framing items in Studio, follow the steps below.
- Within Studio, select Level Properties.
- Open the View menu.
- Select Framing.
Note: Alternatively, press the Control, Shift, and F key at the same time. To show deck framing select Deck Framing.
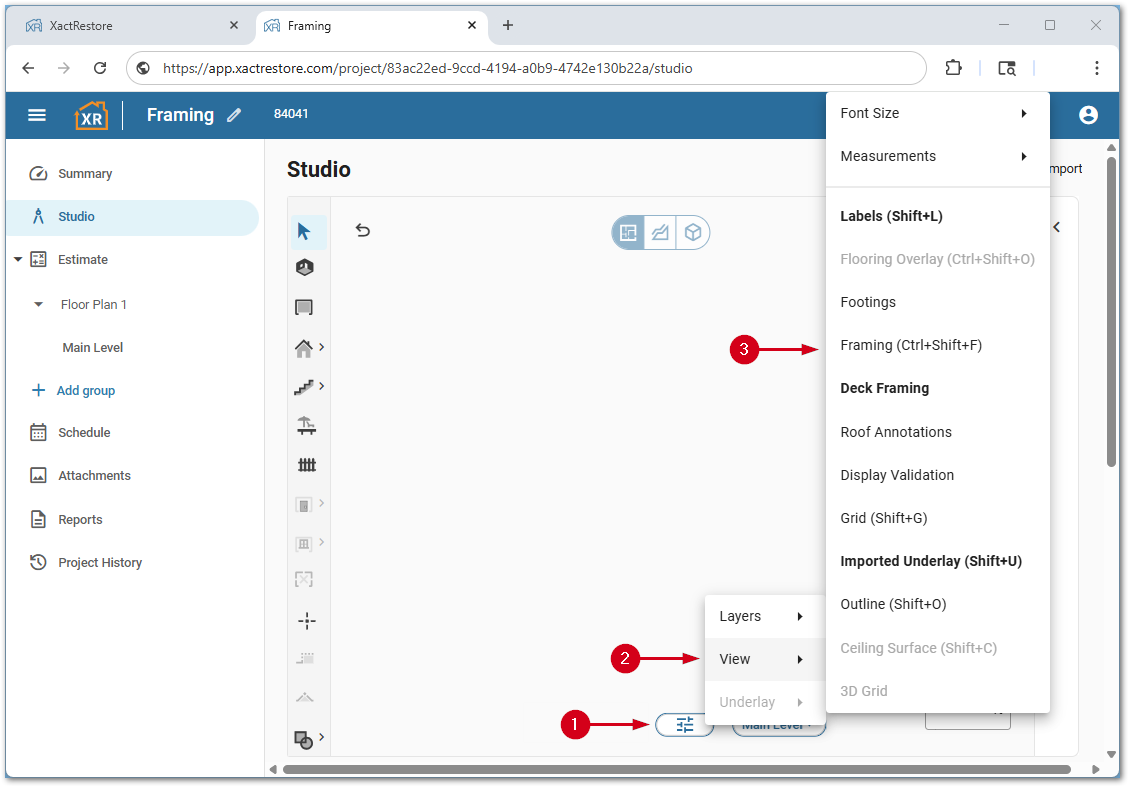
Framing items are now shown.
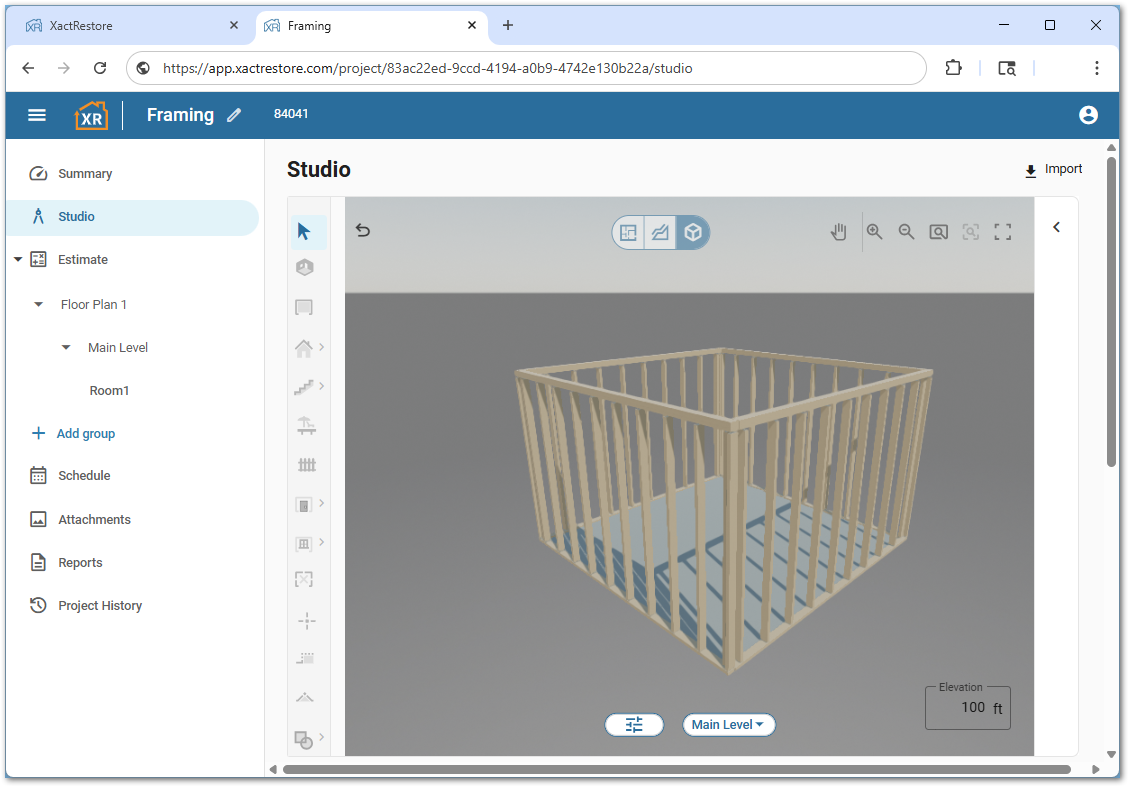
Framing is also visible in 3D view.
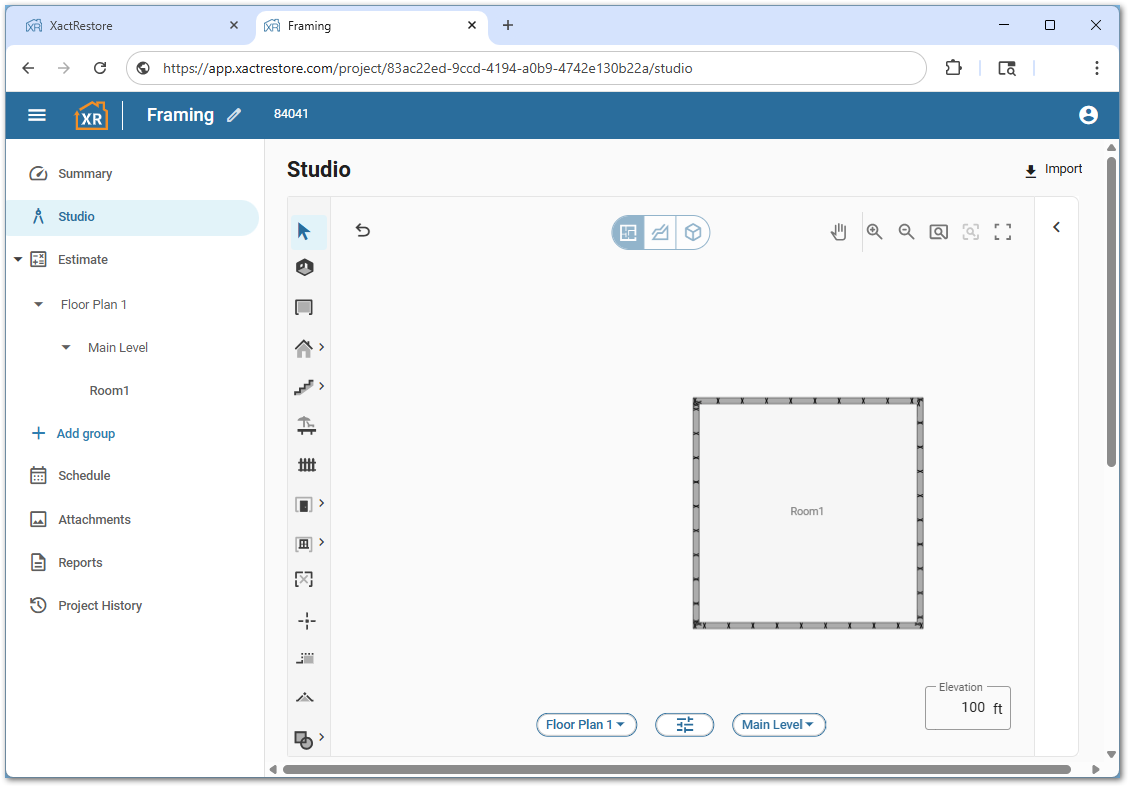
Rooms
Follow the steps below to add framing to rooms.
- Within Studio, select the room(s) to frame.
- Select Properties.
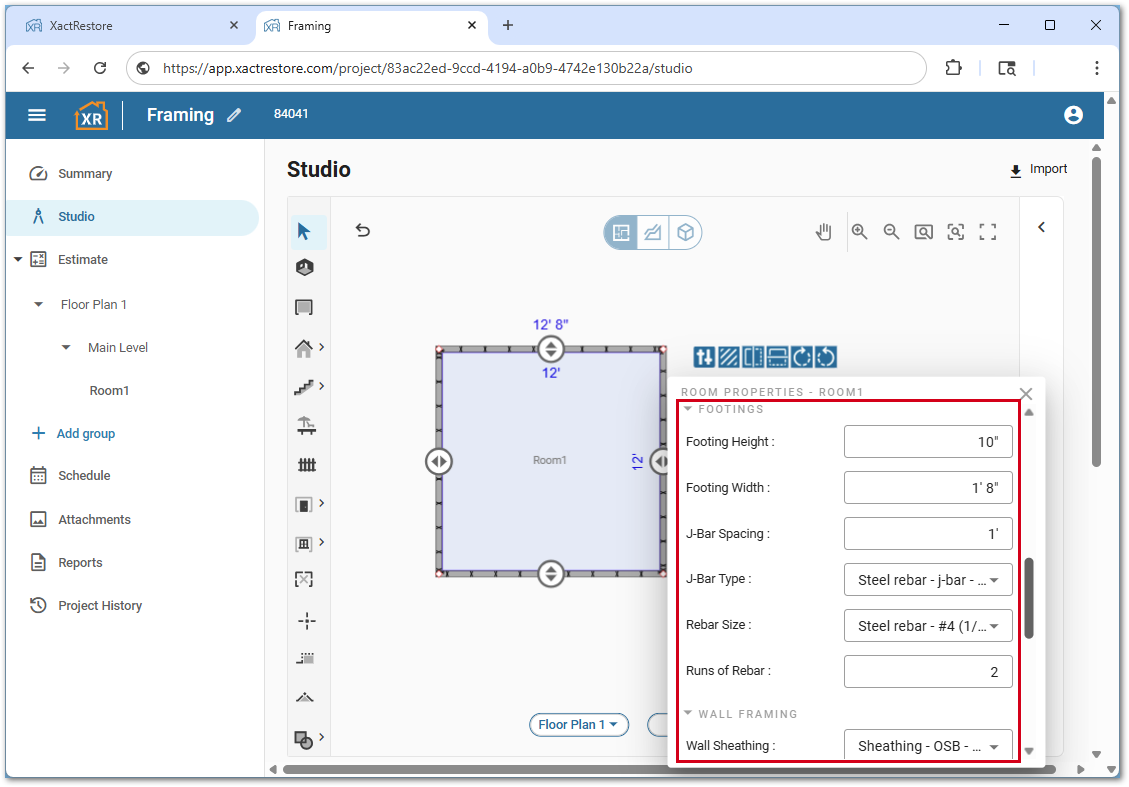
- Select the desired Floor, Wall, or Footing framing option from the menu.
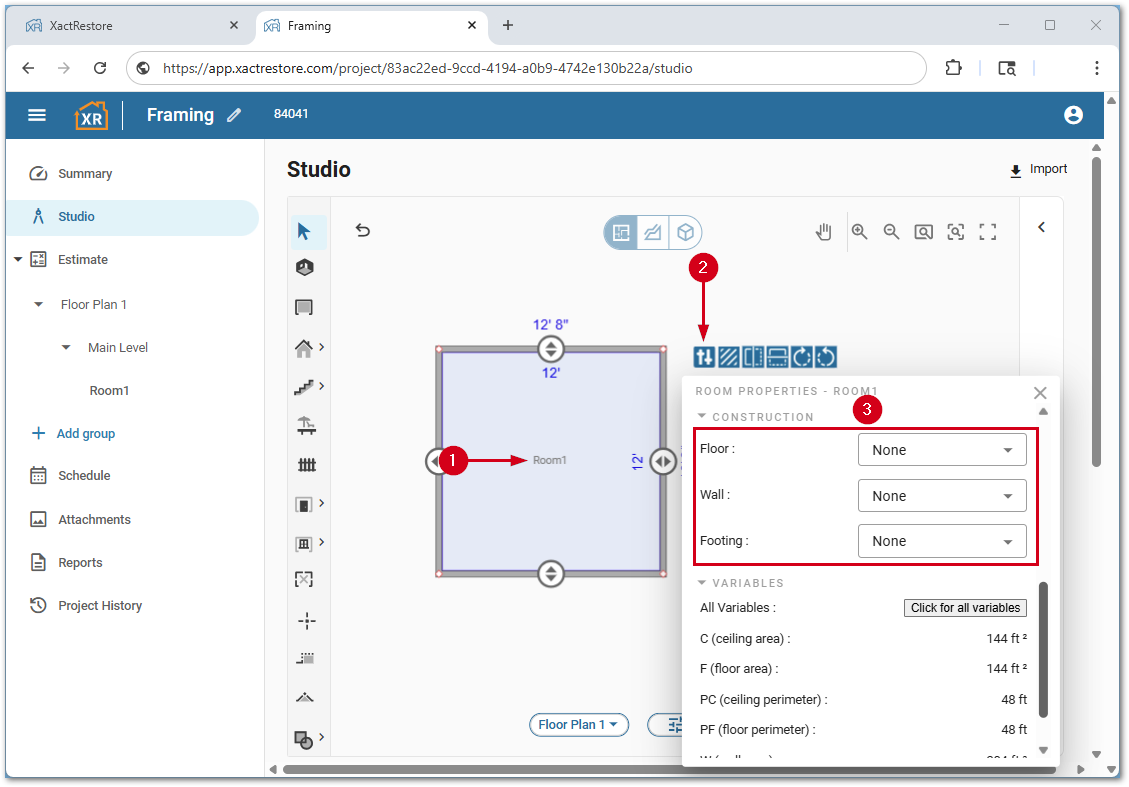
A new framing section is added based on the option selected in step 3 where additional details can be selected.
Stairs
Follow the steps below to add framing to staircases.
- Within Studio, select the staircase(s) to frame.
- Select Properties.
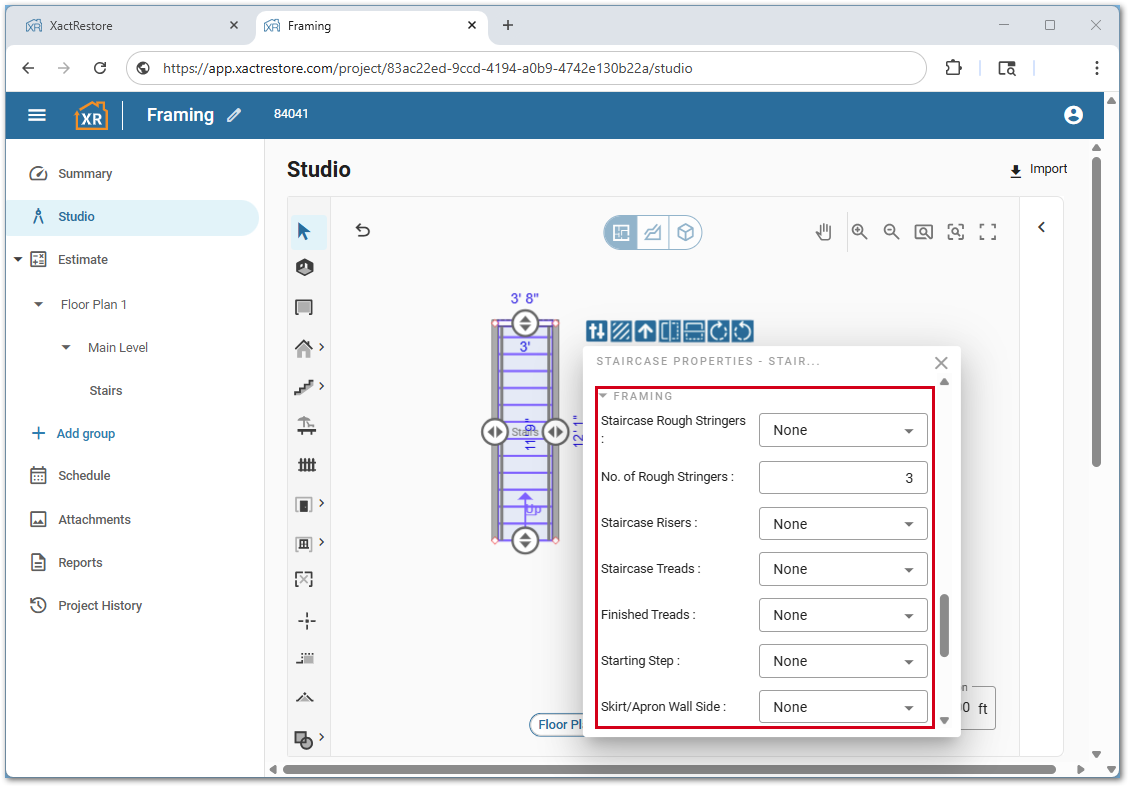
- Select the desired Staircase Framing option from the menu.
Note: You can add floor, wall, and footing items to staircases, as well.
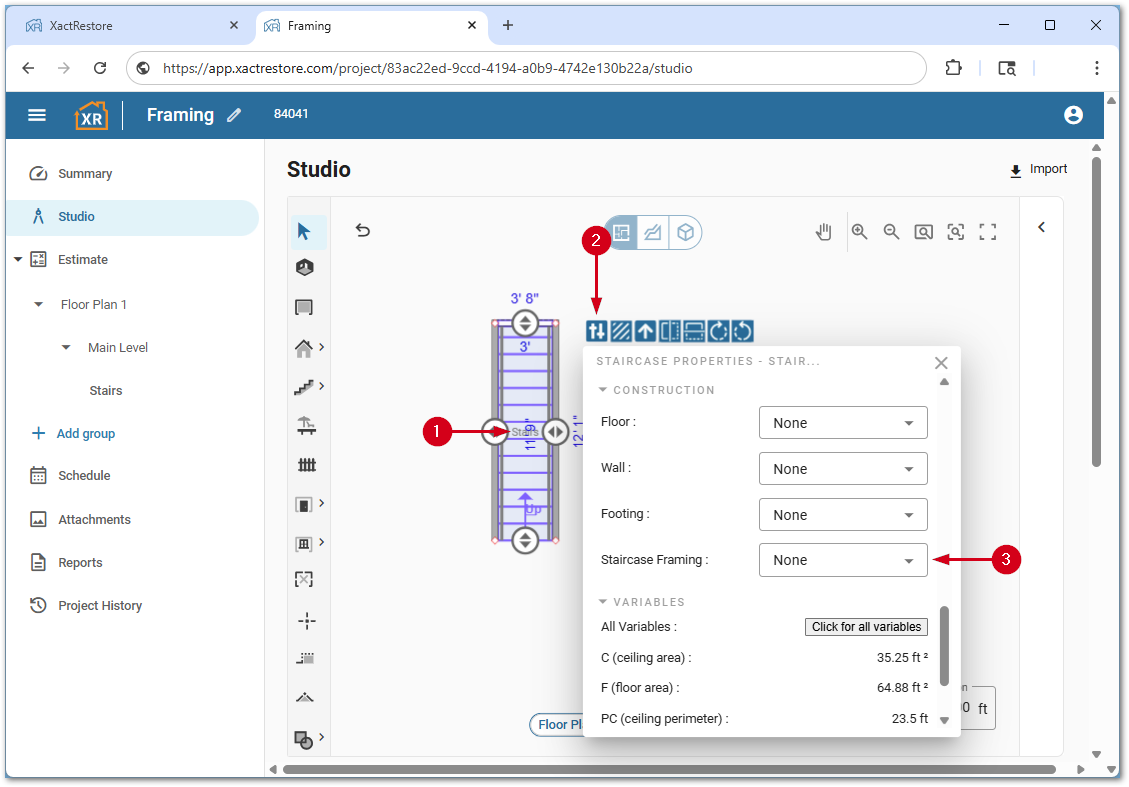
A new framing section is added based on the option selected in step 3 where you can select additional details.
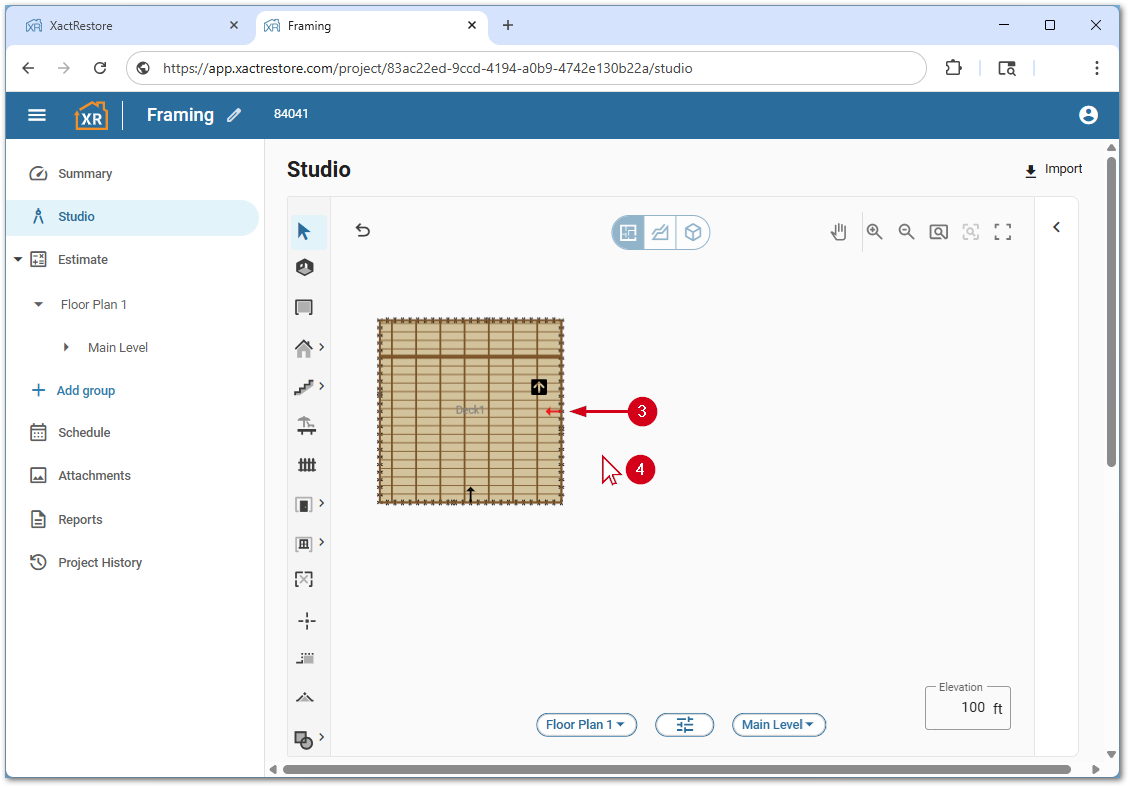
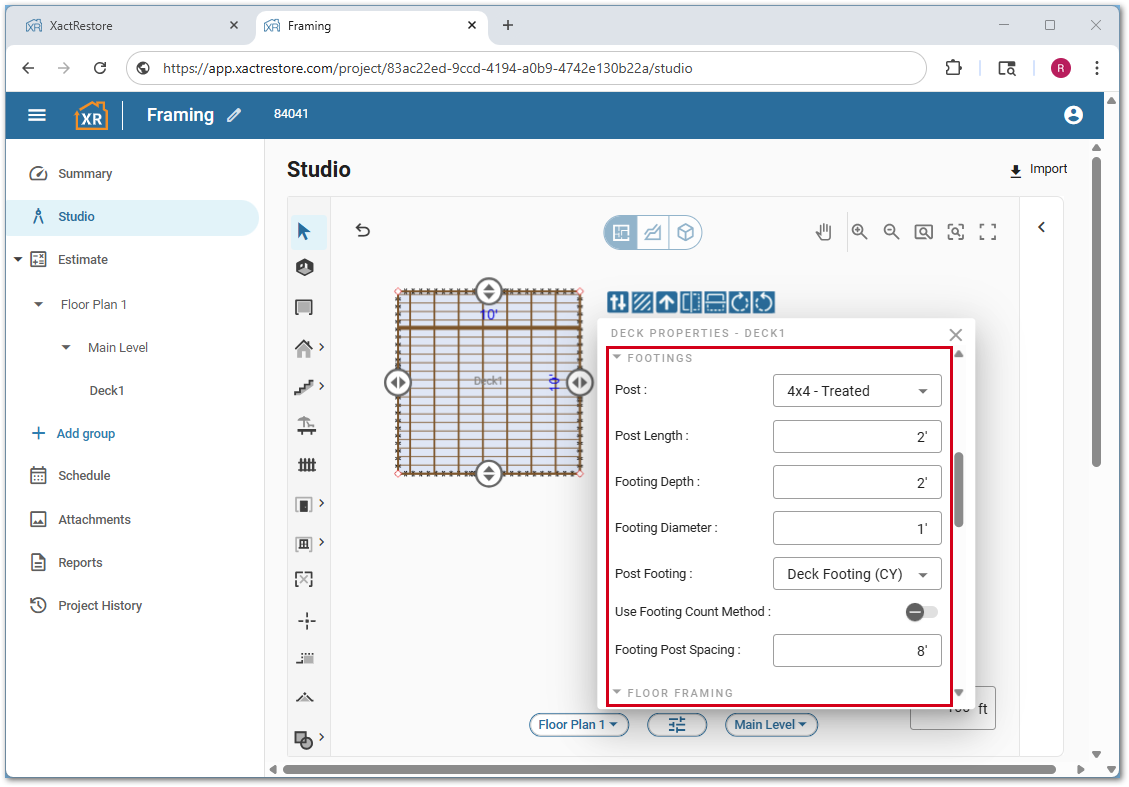
Decks
Follow the steps below to add framing to decks.
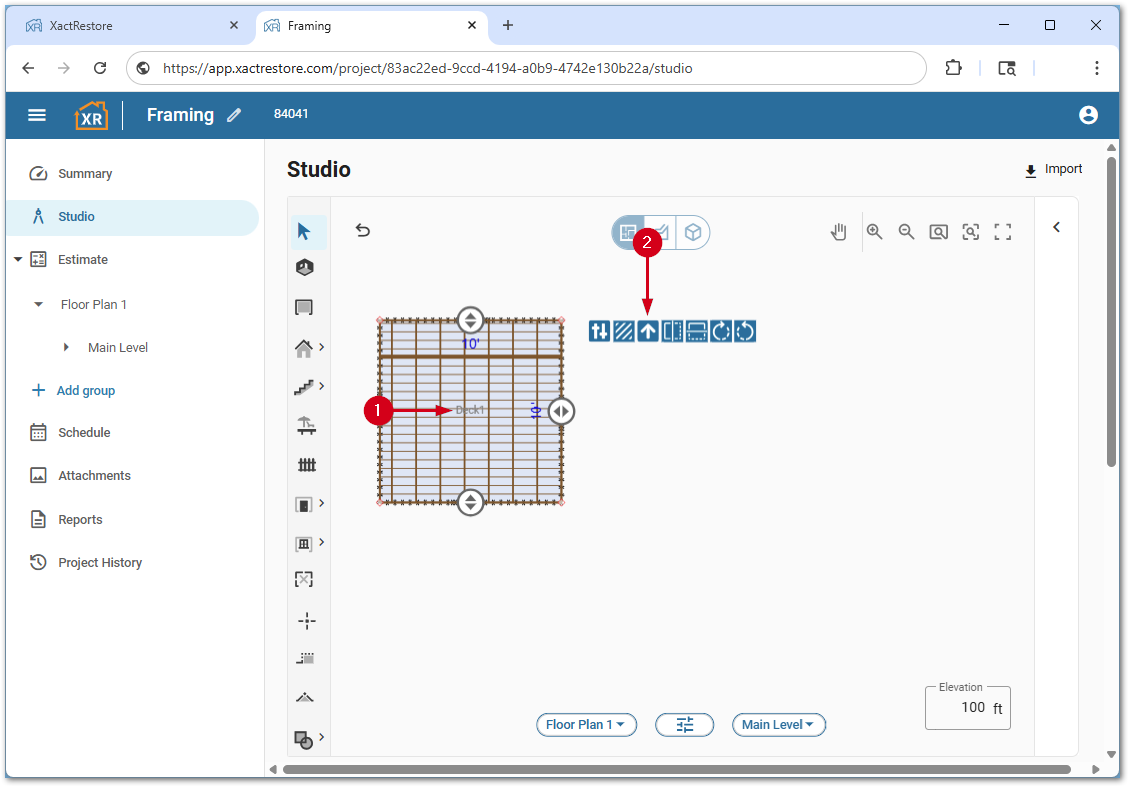
- Within Studio, select the deck(s) to frame.
- Select Properties.
- Select Framed in either the Deck or Railing (or both) menus.
Note: Selecting deck framing also offers the option to add deck footings.
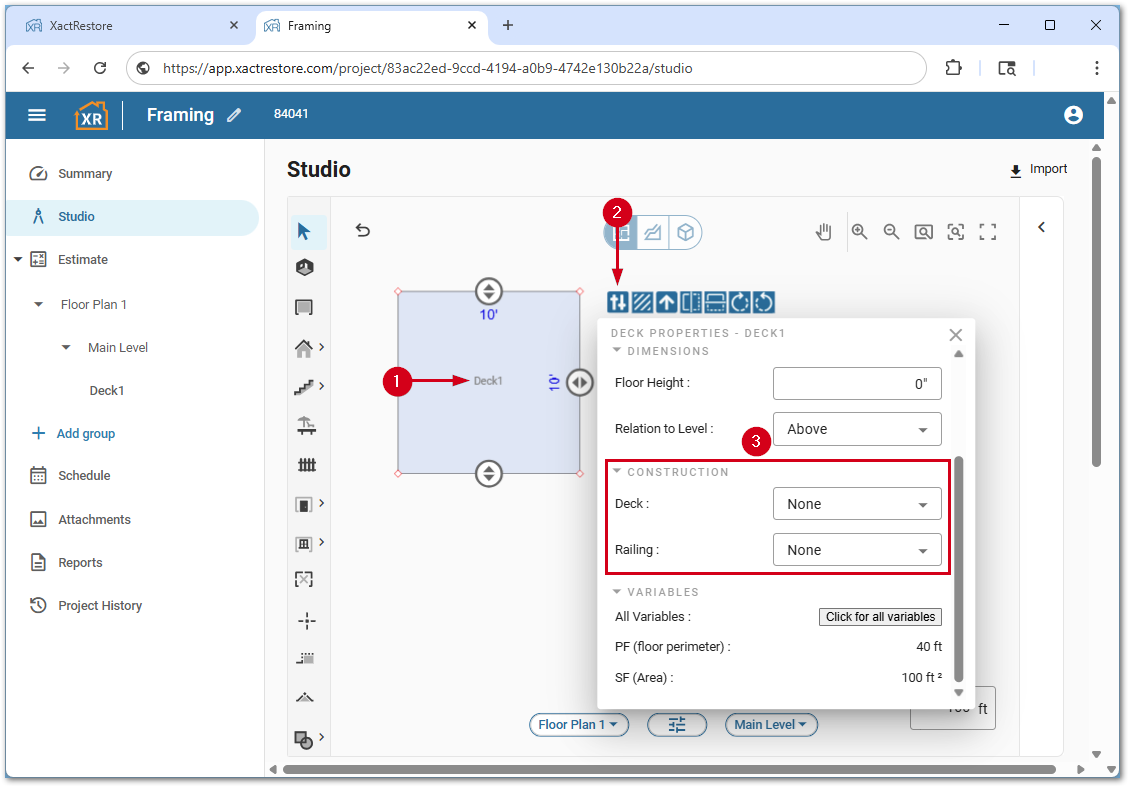
A new framing section is added based on the option selected in step 3 where you can select additional details.
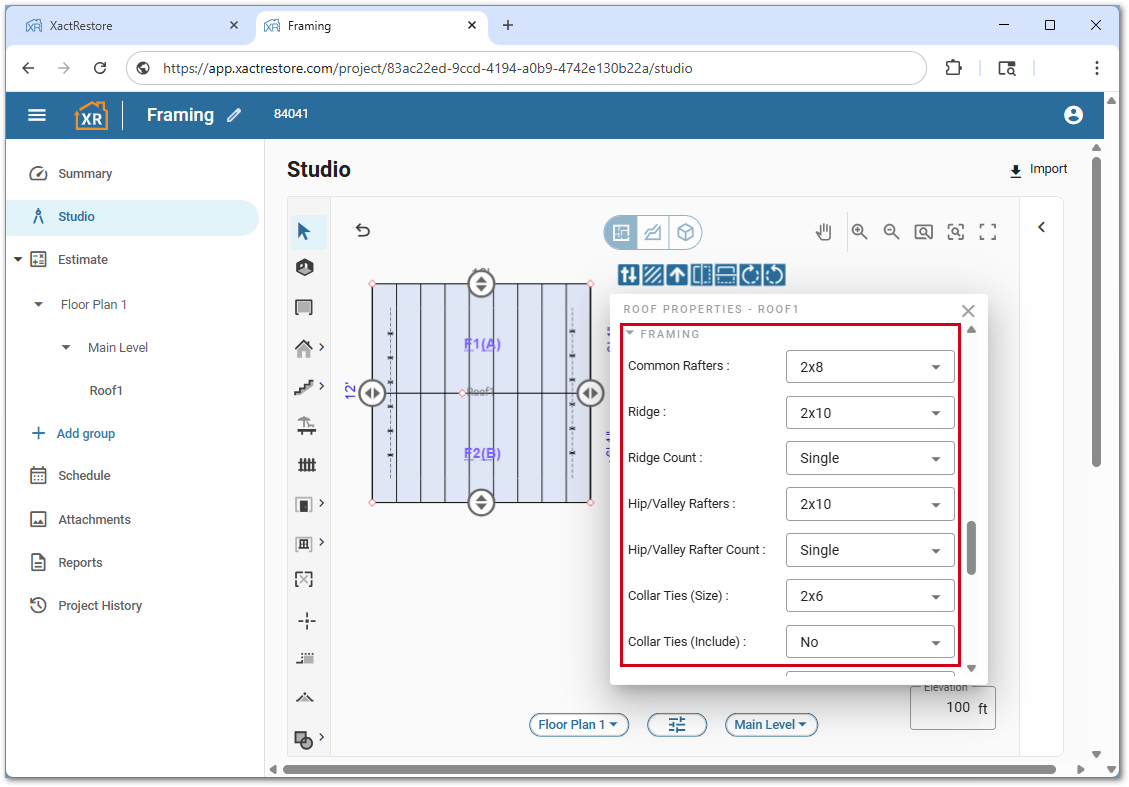
Roofs
Follow the steps below to add framing to roofs.
- Within Studio, select the roof(s) to frame.
- Select Properties.
- Select the desired Roof Framing or Roof Wall framing option from the menu.
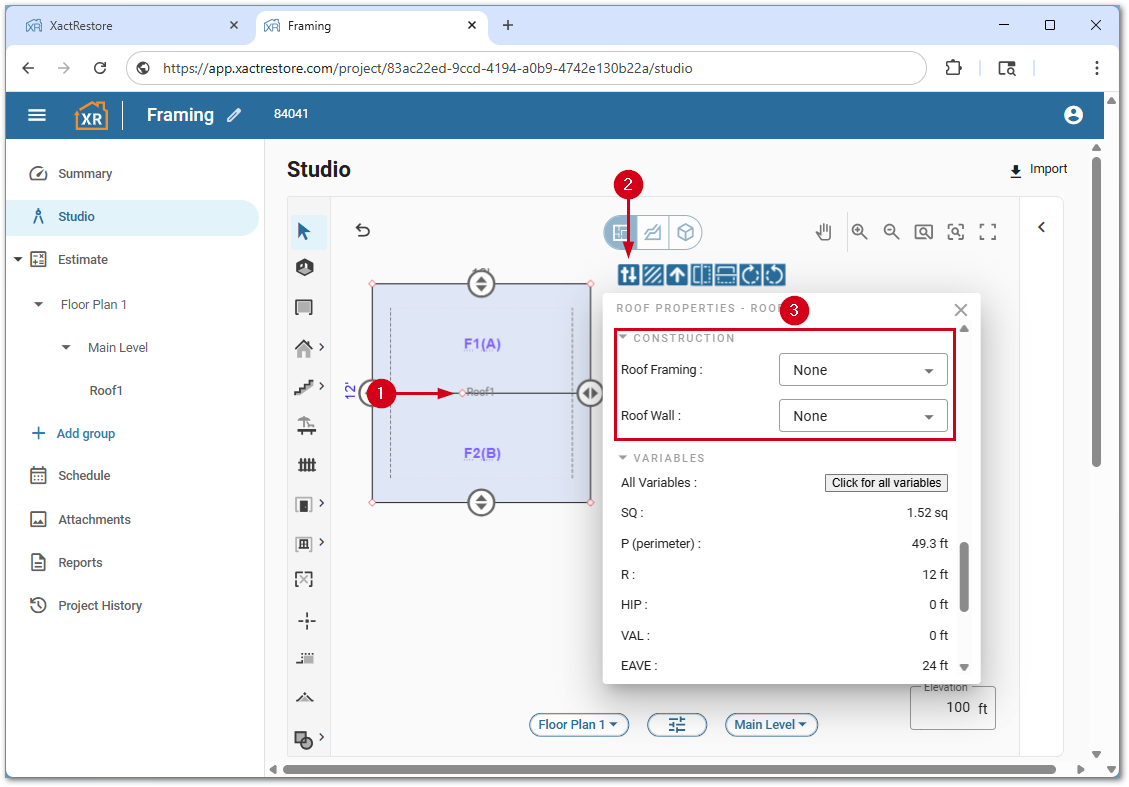
A new framing section will be added based on the option selected in step 3 where additional details can be selected.
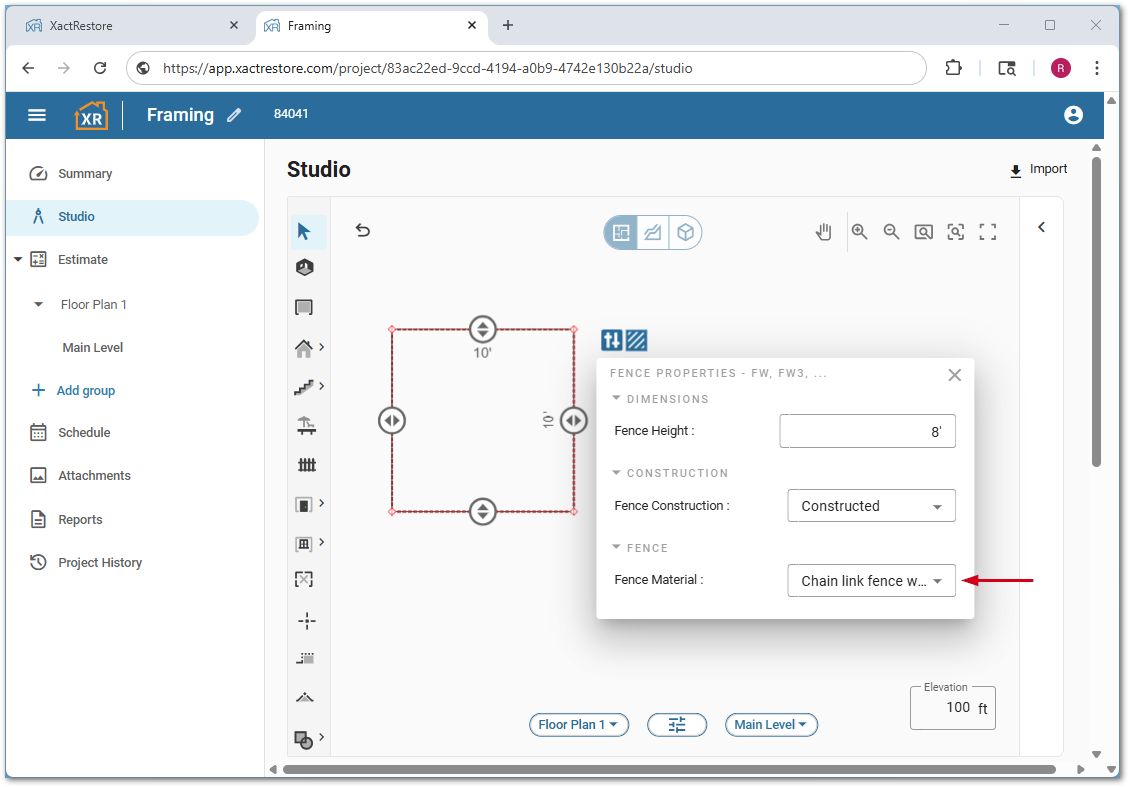
Fences
Follow the steps below to add framing to fences.
- Within Studio, select the desired fence segment(s) to frame.
- Select Properties.
- Select Constructed in the Fence Construction menus.
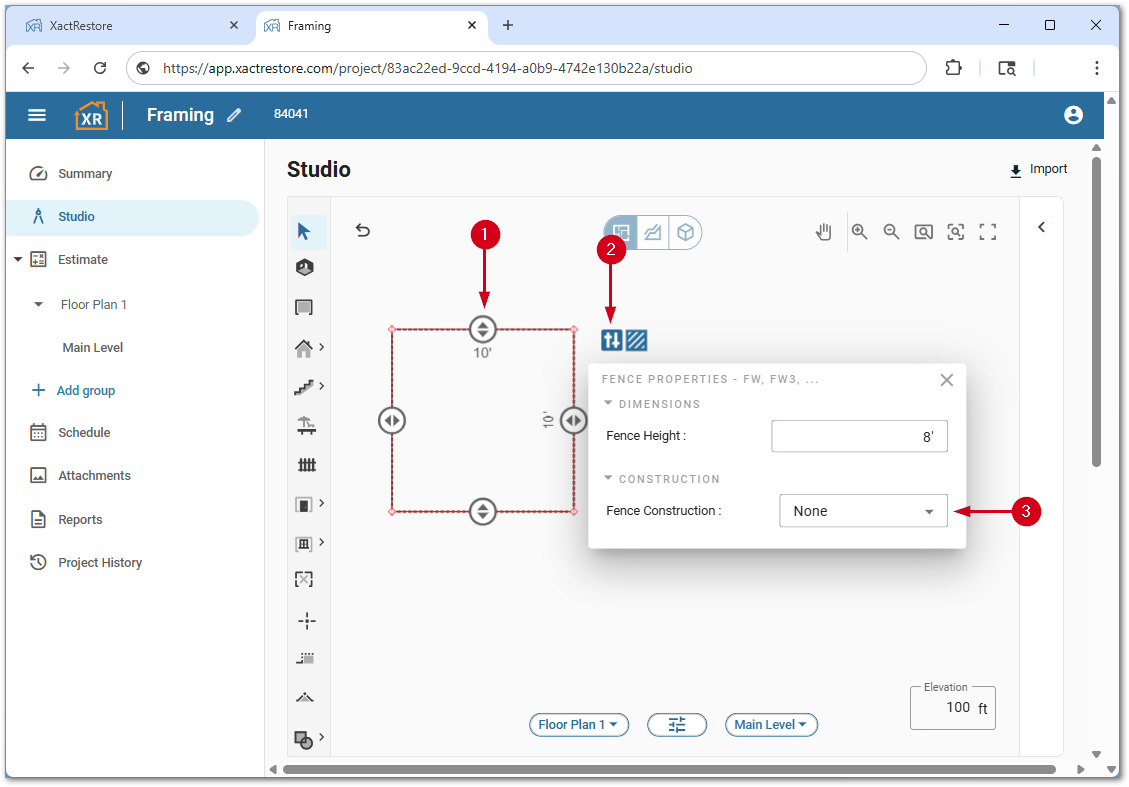
A new fence section will be added based on the option selected in step 3 where additional details can be selected.
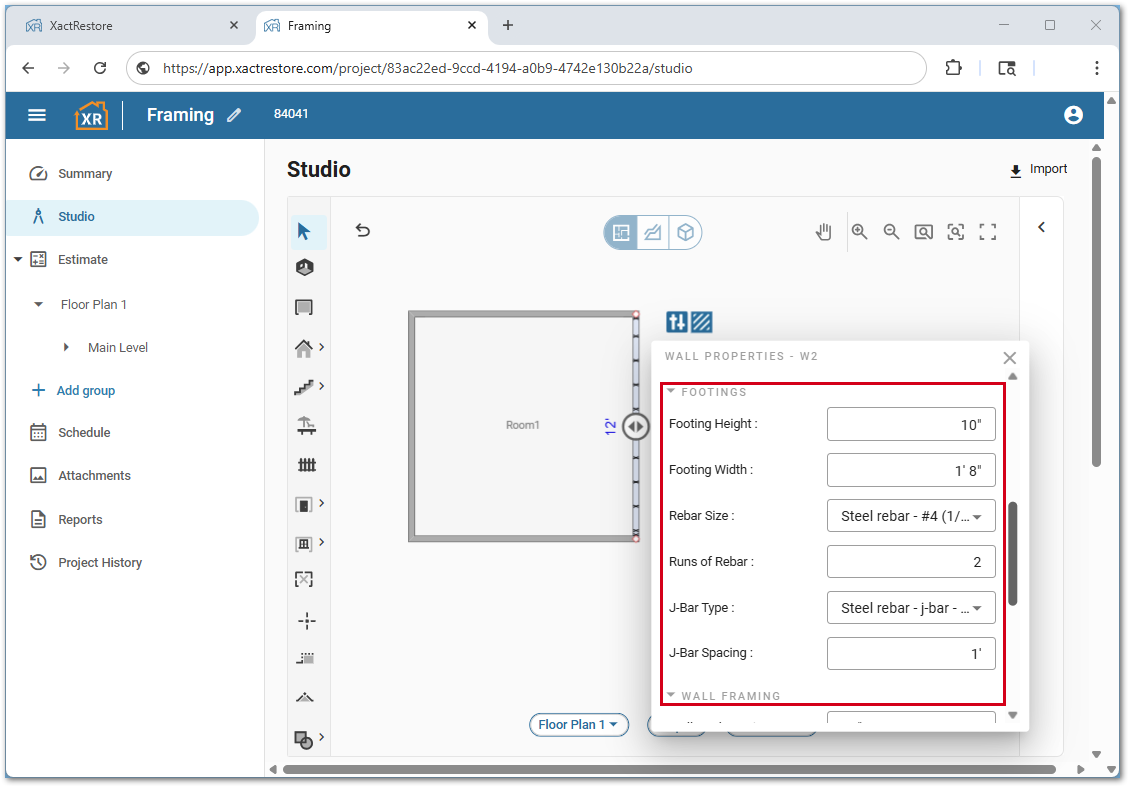
Exterior walls
Exterior walls are first framed using room framing. In larger sketches, where multiple framed rooms create an exterior wall, you cannot edit the sheathing property from the main properties menu. To edit sheathing, select and edit the exterior walls separately from the rest of the room properties.
- Within Studio, select the exterior wall(s) to frame.
- Select Properties.
- Select the desired Wall or Footing framing option from the menu.
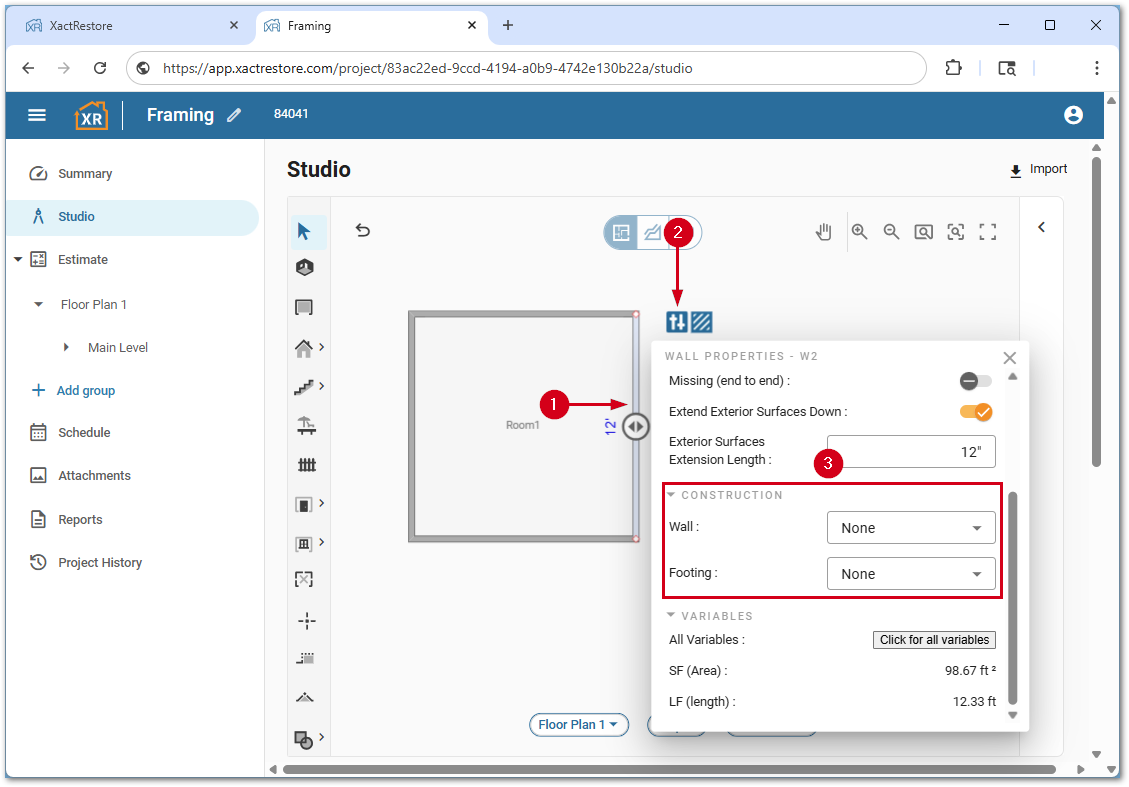
A new framing section will be added based on the option selected in step 3 where additional details can be selected.
Orientation tool for framing
The orientation tool allows you to orient flooring, deck, or roofing framing in a different direction if needed.
- Select the desired framed item.
- Select Orientation.
- Hover the cursor over the wall perpendicular to the direction the framing should run.
Note: As the cursor hovers, red arrows appear to indicate the direction.
- Select the cursor. This changes the orientation of the framing.