Getting Started
Frequently asked questions (FAQ)
System requirements
Company info
Adjustments in XactRemodel and XactRestore
My Pricing
Line Item and Pricing Data
Create report statements
Create a project
Contact Support
XactRemodel and XactRestore subscription levels
XR Mobile overview
Unable to view quick estimates
Manage users and roles
Custom quick estimates
XactAI
Accounts and Contacts
Projects
Project Overview
Project summary
Reprice a project or change a tax jurisdiction
Export projects to Direct Supplier
Import contacts in XR Mobile
Project history log
Recover deleted projects
Groups
Line Items
Add line items from within an estimate
Reorder and delete line items
Line item details
Line item quantity calculations
Edit components
Add a line item note
Use the Verisk XactRestore connector in Claude
Duplicate line items, groups, floorplans, and projects
AI Estimator
Studio
Getting Started
Studio overview
Share floor plans
Build an estimate
Import image underlays in Studio
Level properties
Manage multiple floor plans in Studio
Reference objects
Tools
View sketch in 3D in Studio
Working with levels
Rename a sketch in XactRemodel and XactRestore Studio
Framing in Studio
Rooms
Room basics
Room properties
Subgroups
Square Break tool
Create a vaulted or attic ceiling
Ceilings
Stairs
Vertex tool
Openings
Roofs
Snap line tool
Zoom controls in Studio
Annotations
Add line items in Studio
Rotate an object
Scheduling
Attachments
Reports
Integrations
Release Notes
Account management
Cancel or change a subscription
Account Deletion
Subscribe to XactRemodel or XactRestore
Update account information
Transferring from XactRemodel Desktop
XactRestore
Field docs
Field docs - Admin
Field docs initial job setup
Add levels in Field docs
Add rooms in Field docs
Add equipment in Field docs
Reporting in Field docs
Field Docs completion and final review
Take daily readings in Field docs
Pick up equipment in Field docs
XactRestore now available!
Set project dates
Type of loss
Import Xactimate estimates (ESX) in to XactRemodel and XactRestore
Manage users and roles in XactRemodel and XactRestore
Lead creation in XactRestore
XactRestore Pro integration with XactAnalysis
- All Categories
- Studio
- Getting Started
- Level properties
Level properties
 Updated
by Russell B.
Updated
by Russell B.
In addition to working with levels in a floorplan, XactRemodel and XactRestore Studio allows you to quickly access level properties to enhance the sketch experience to your specifications. Three main options are available in the Properties menu: Layers, View, and Underlay.
Layers
The Layers menu allows you to show or hide specific things on the Studio screen. This does not impact what is shown or hidden in reports, and if you click out of Studio and back into it, the settings are not retained.
Follow the steps below to access the Layers menu.
- Within Studio, select the View Properties icon.
- Hover over Layers.
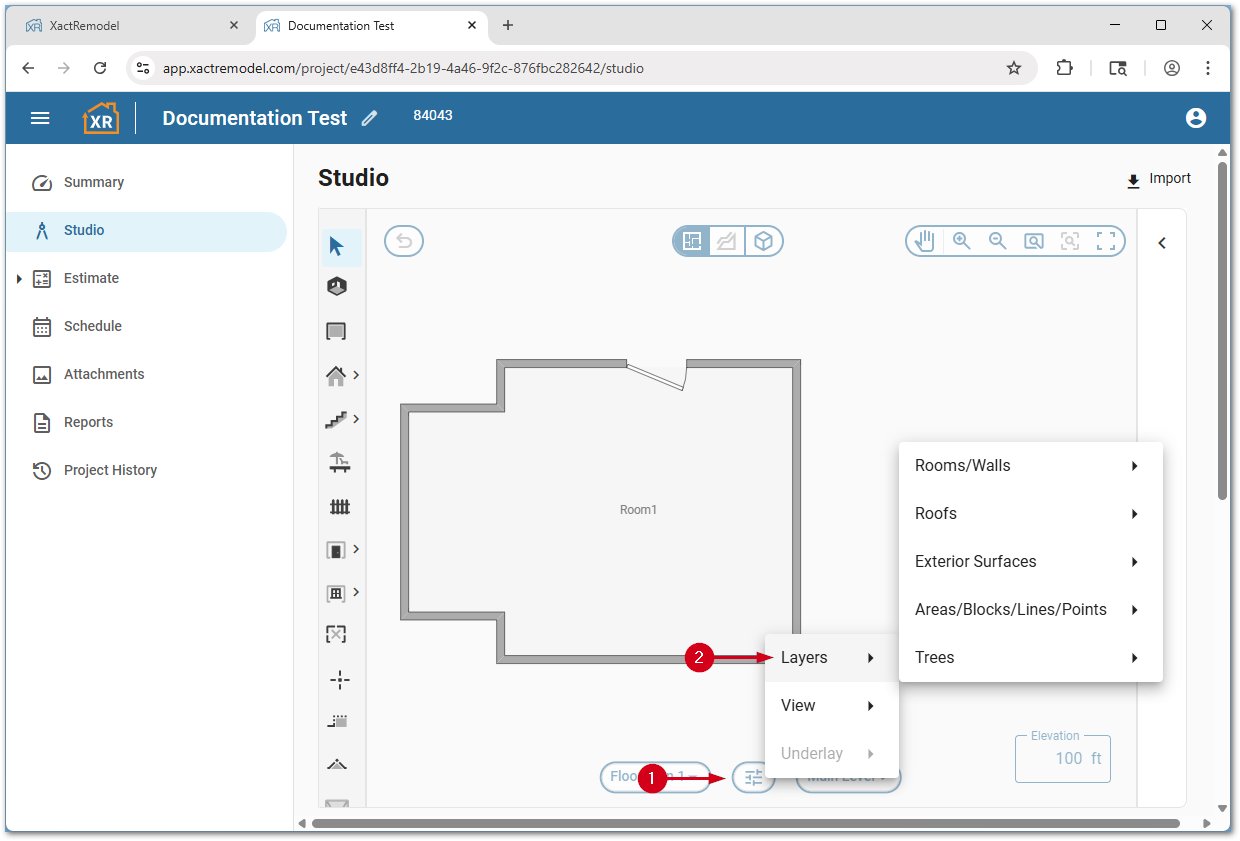
You are able to show fully, show an outline of, or hide rooms or walls, roofs, exterior surfaces, reference areas, blocks, lines, points, or trees.
View
The View menu allows you to control what is shown in the Studio screen. Like the Layers options, these settings do not impact what is shown in reports, but the changes made here persist if you click out of and back into Studio.
Follow the steps below to access the View menu.
- Within Studio, select the View Properties icon.
- Hover over View.
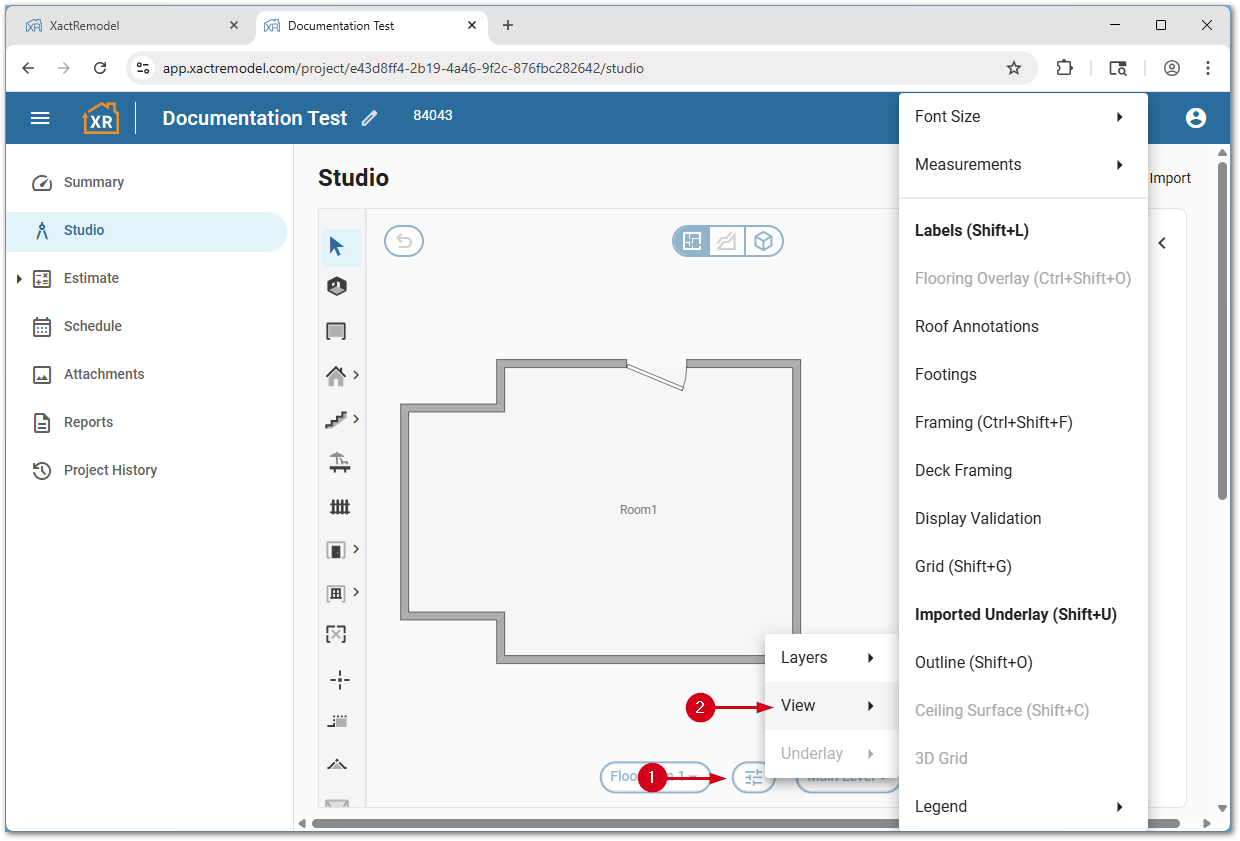
Several options are available including font size, measurement size, labels, flooring overlay, roof annotations, footings, framing, deck framing, display validation, a grid, an imported underlay, outlines, ceiling surfaces, 3D grids, and the legend.
Certain view options have keyboard shortcuts listed next to them that can be entered without opening the menu.
Underlay
For assistance using the Underlay tool, see our Import image as underlay document.