Adjustments in XactRemodel and XactRestore

Before, the only adjustment available in XactRemodel and XactRestore was markup, but now there are two additional options: margin and discount.
Administrators have the ability to set up adjustment presets, and these can be applied to existing and new projects. Once applied, they can be further customized if needed.
Note: Margins or markups and discounts can be built into line items or shown as a separate line item in the proposal or invoice report. For more information, see our Proposal report or Invoice report documents.
Setup price adjustment presets
Apply price adjustment presets
Explaining markup vs margin
Markup vs margin
Listed below are two examples using the two different methods to calculate a selling price. If the cost of an item is $25, the formulas below calculate the selling prices using a 20% markup percentage and a 20% margin percentage:
- For a 20% markup, the formula is: Cost x 120% = $25.00 x 1.20 = $30.00 Selling Price
- For a 20% margin, the formula is: Cost ÷ (100% - % Margin) = $25 ÷ (1.00 - 0.20) = $25 ÷ 0.80 = $31.25 Selling Price
Percent markup is calculated on a cost basis (i.e., the markup is expressed as a percentage of the cost). Percent margin is calculated on a selling price basis (i.e., the margin is expressed as a percentage of the selling price).
It can also be shown as follows:
- Cost of the product: $10. Margin or Markup dollar amount: $2. Selling Price: $12.
- Percent markup is calculated on a Cost basis: Markup $ ÷ Cost = $2 ÷ $10 = .20, or 20%
- Percent margin is calculated on a Selling Price basis: Margin $ ÷ Selling Price = $2 ÷ $12 = .1666, or 16.67%
Setup price adjustment presets
Create new price adjustment presets
Follow the steps below to create price adjustment presets.
- Select Admin.
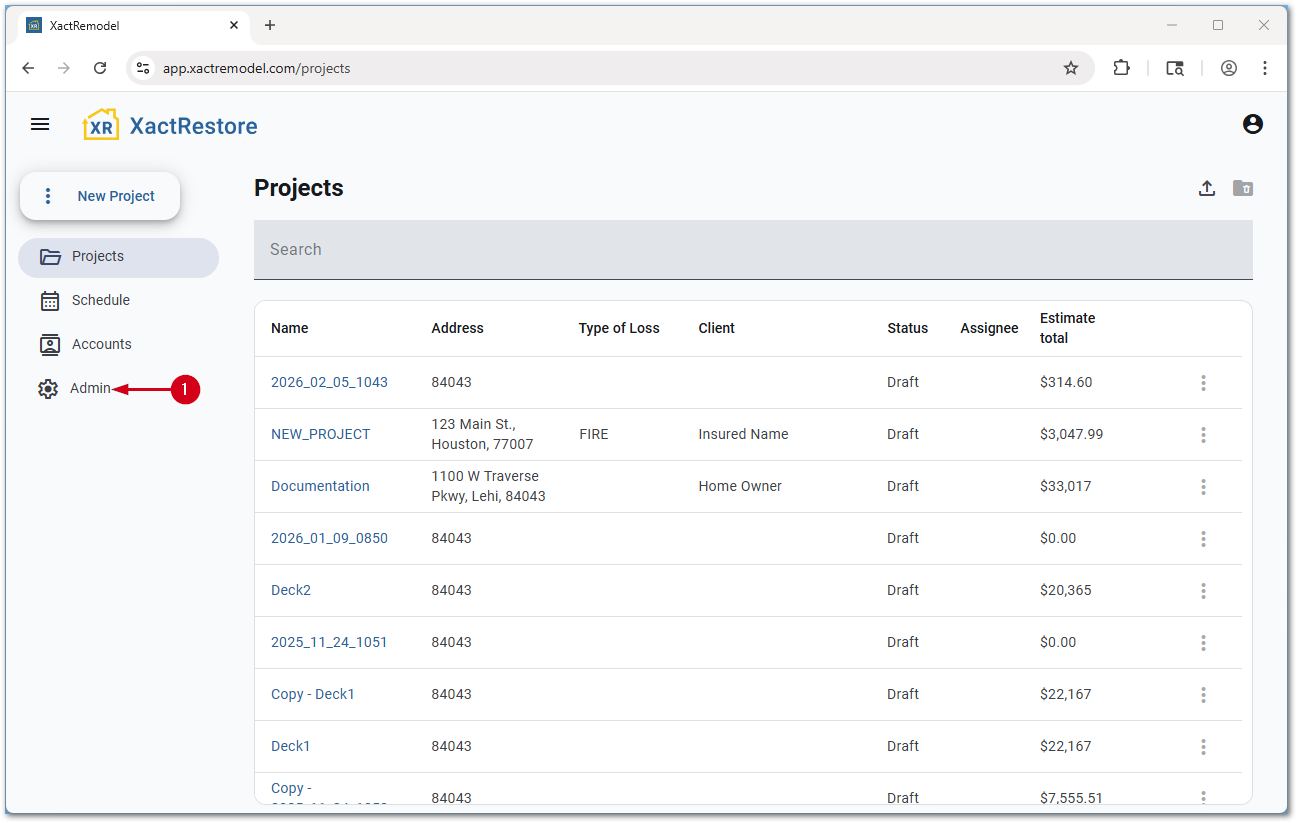
- Select Pricing.
- Select Price adjustments.
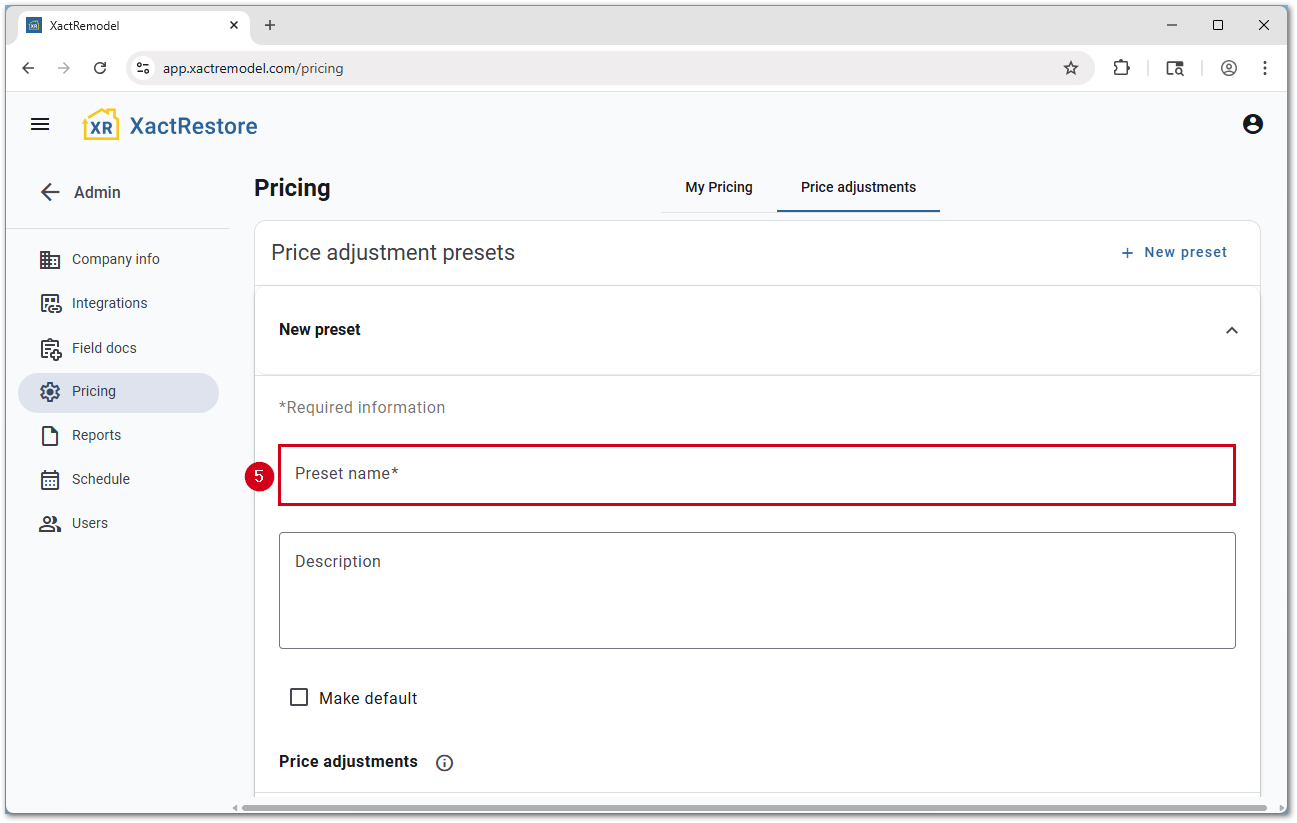
- Select New preset.

- Enter a Preset name.
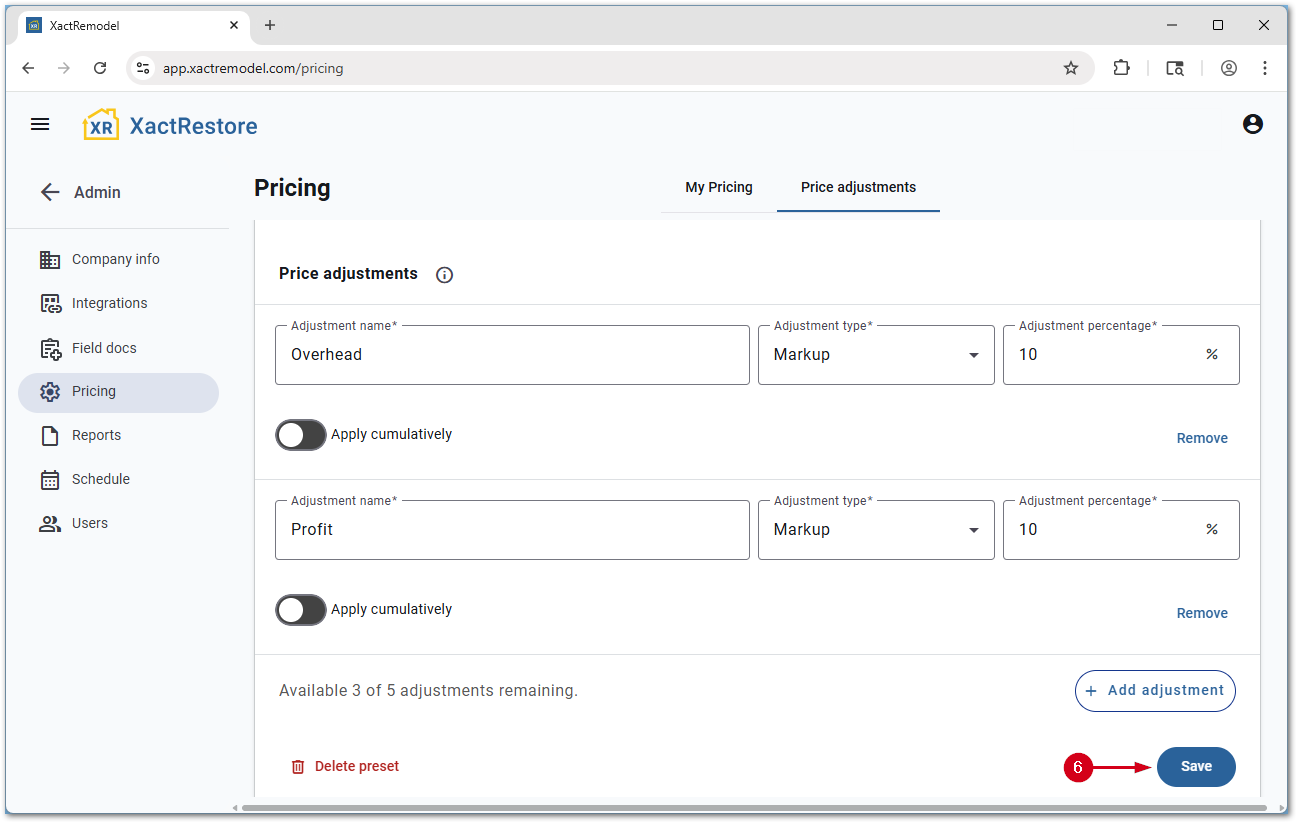
- Enter a price adjustment.
- Adjustment name: The name shown on reporting and in projects.
- Adjustment type: The type of adjustment being applied.
- Adjustment percentage: The percentage of the adjustment.
- Apply cumulatively: When there are multiple adjustments, sets if these adjustments apply on top of each other. Additional information shows when this is switched on.
Note: Up to five adjustments can be added. Repeat this step for each additional adjustment.- Once all adjustments have been added, select Save.
Note: Optionally, add an adjustment description and select if the price adjustment preset should be the default option before selecting save.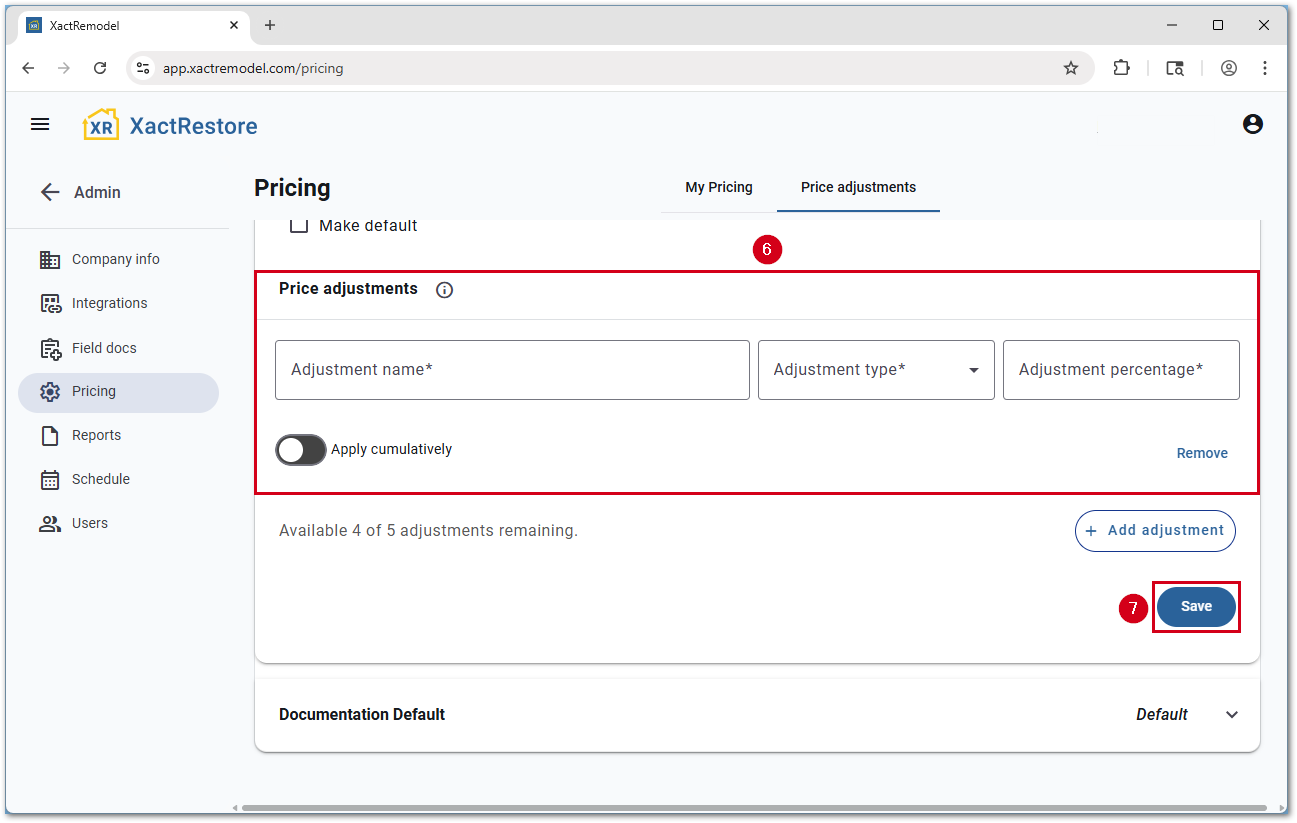
Edit existing price adjustment presets
To edit an existing price adjustment preset, follow the steps below.
- Select Admin.
- Select Pricing.
- Select Price Adjustments.
- Select the price adjustment preset to edit.

- Make the desired changes.
- Select Save.
Delete price adjustment presets
To edit an existing price adjustment preset, follow the steps below.
- Select Admin.
- Select Pricing.
- Select Price Adjustments.
- Select the price adjustment preset to delete.
- Select Delete preset.
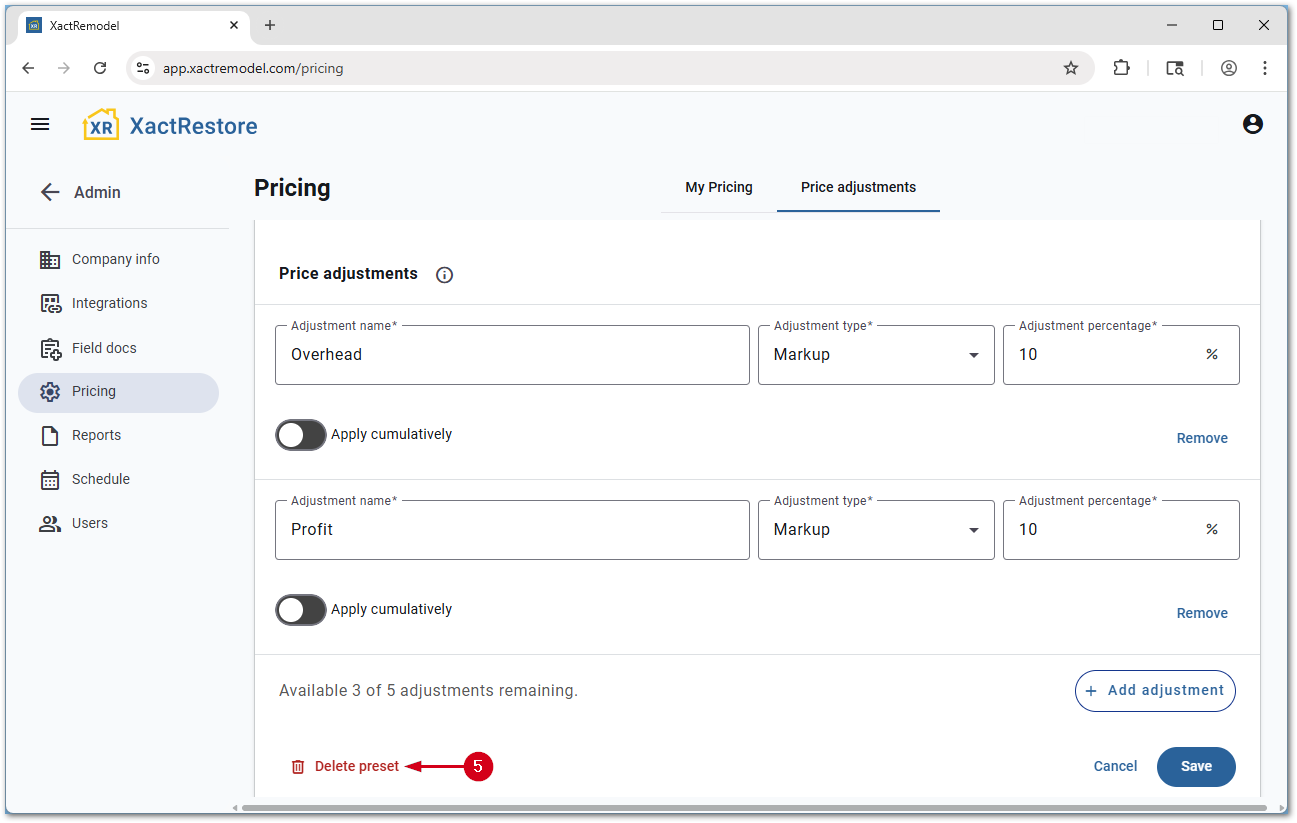
- Select Delete.
Note: Presets cannot be undeleted.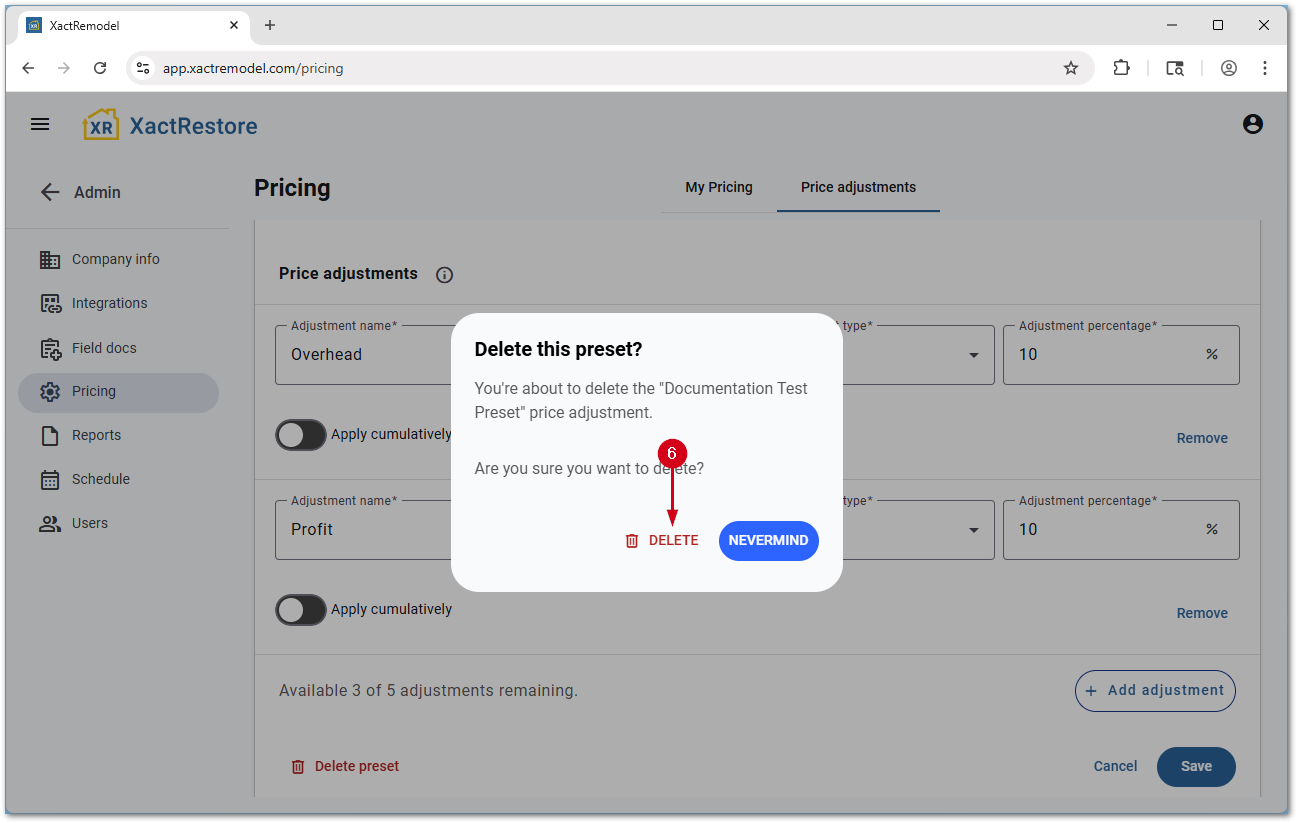
Apply price adjustment presets
Apply a price adjustment preset to a project
Once price adjustment presets have been created, these can be applied within a job.
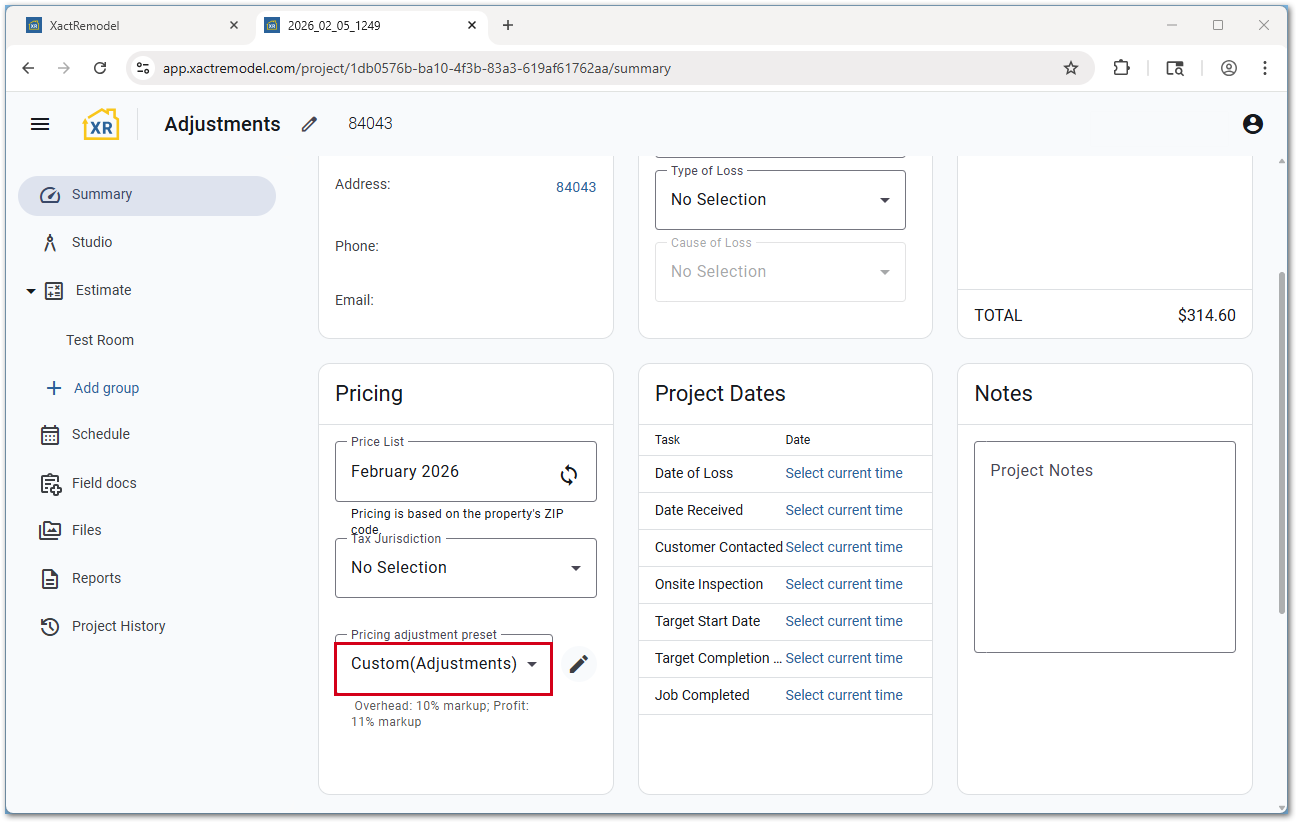
- Within a job, select the desired option from the Pricing adjustment preset from the drop-down menu.
Note: A quick preview of the adjustment(s) present in the preset are listed below the name of the preset. The No Selection option can be used to remove all adjustments from a project.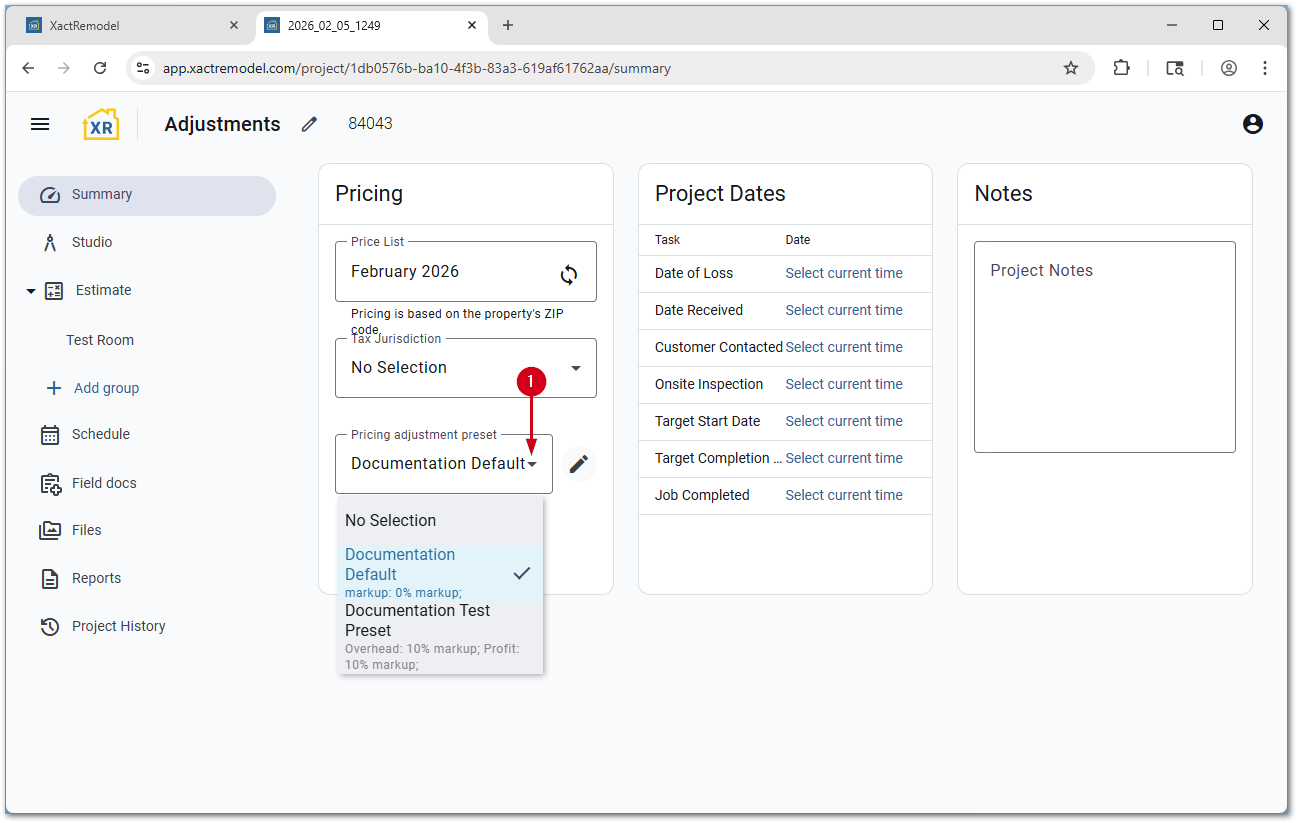
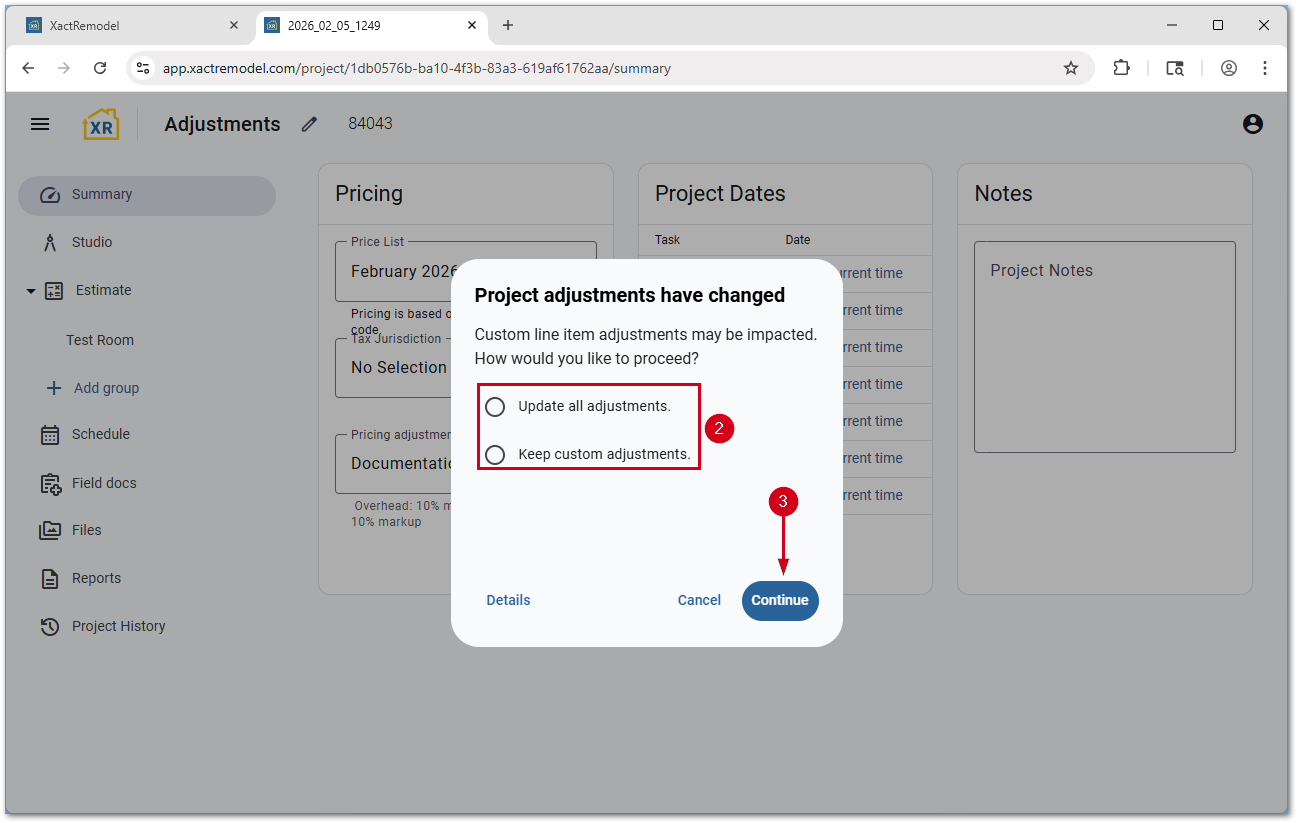
- Select a custom line item adjustment setting.
- Update all adjustments: Items with custom pricing will be reverted to price list or pricing overrides from My Pricing.
- Keep custom adjustments: Custom priced items will not be changed.
- Select Continue.
Edit a price adjustment on a line item basis
Once a preset has been applied, line items still can be overridden if needed.
Note: If a line item needs an additional adjustment type, either edit the pricing default to include a 0% adjustment for the type required or follow the steps in the below section to customize a preset on a project-by-project basis.
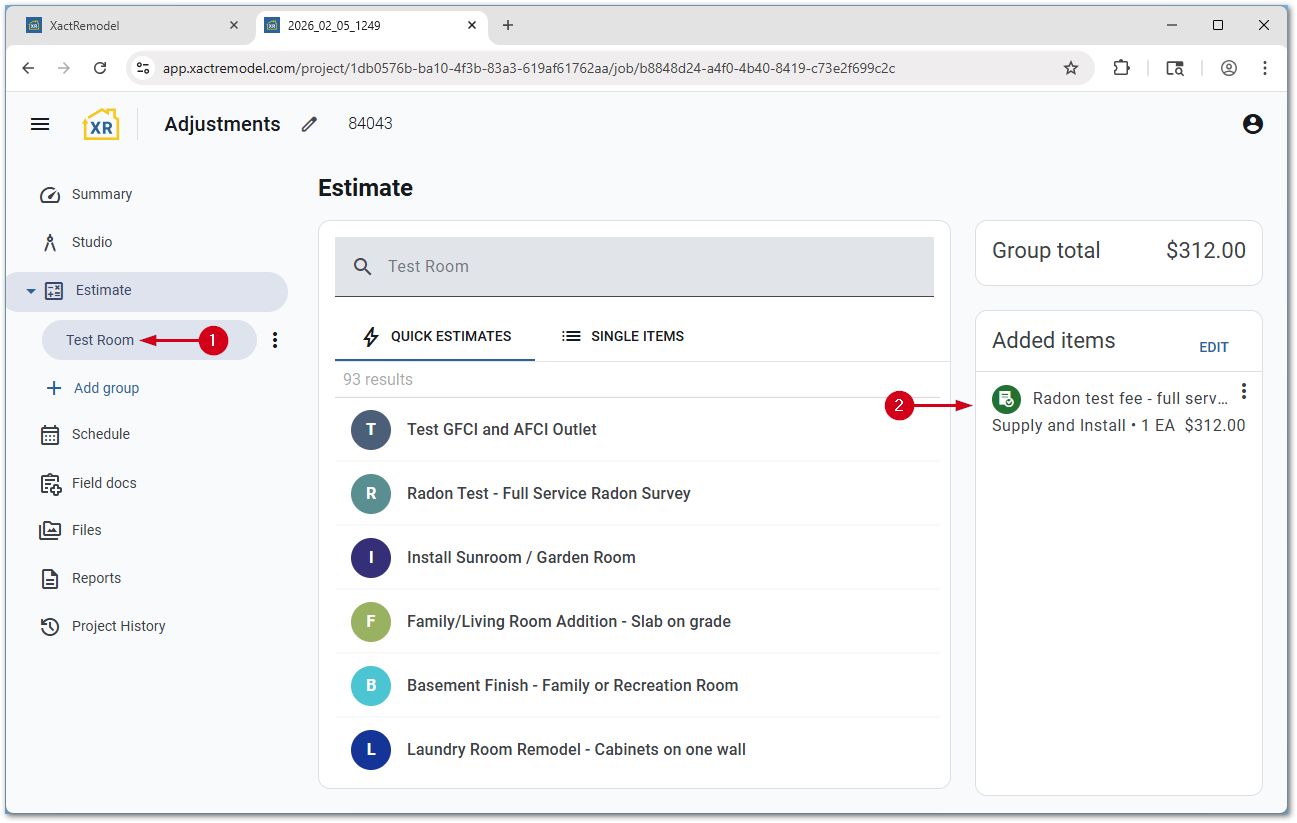
- From within a project, select the group with the item to edit.
- Select the line item.
- Select Adjustments.
- Make any desired changes.
- Select Save Changes.
IMPORTANT: Selecting outside of the edit item popup will close without saving.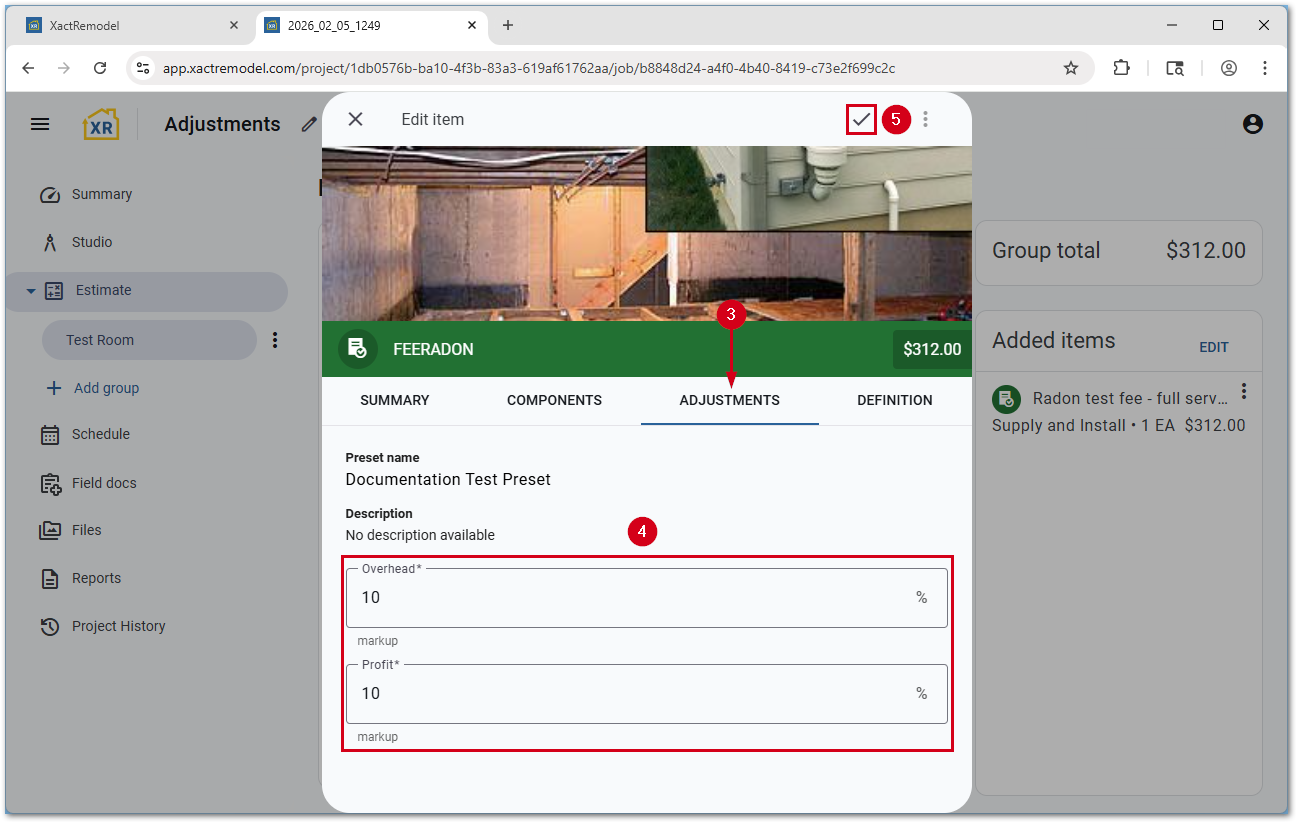
Customize a price adjustment within a project
If needed, a preset can be adjusted on a project-by-project basis. This can be helpful when specific items need to have a new adjustment type, such as a discount, added to them.
Note: In the example scenario above, a 0% discount adjustment can be added using the steps below then any line items that need the adjustment can be applied using the steps in the section above.
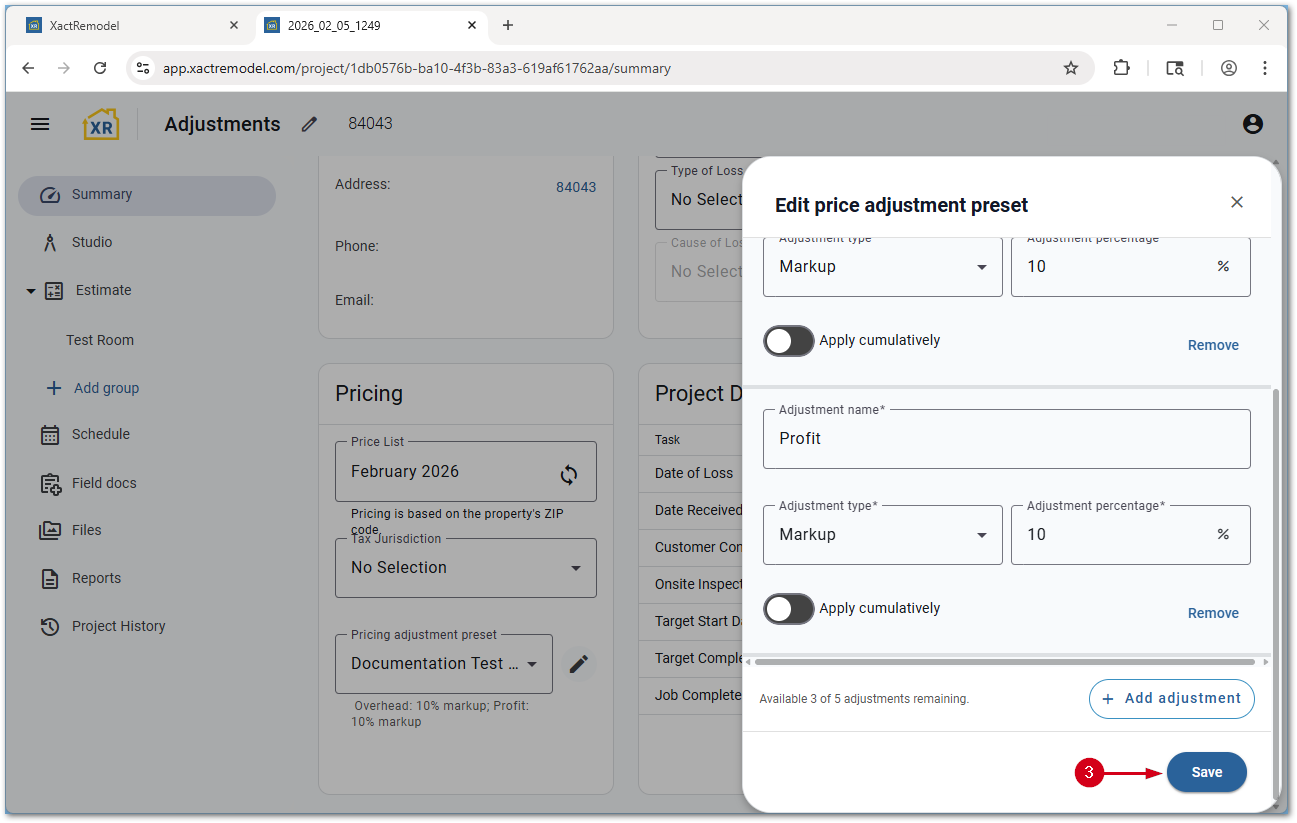
- From the project summary page, select the pencil icon next to the pricing adjustment preset. The Edit price adjustment preset section opens.
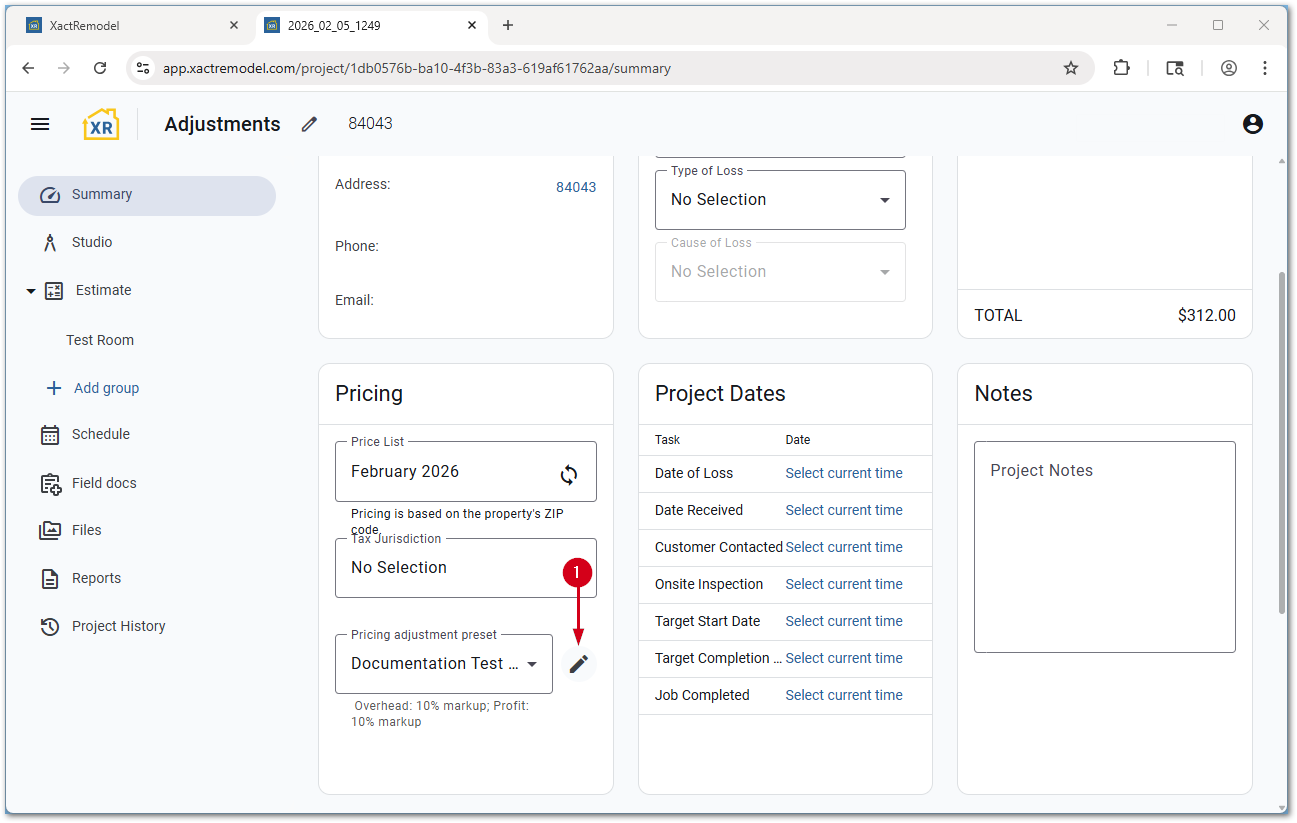
- Make any desired changes.
- Select Save. The Edit price adjustment preset section closes.
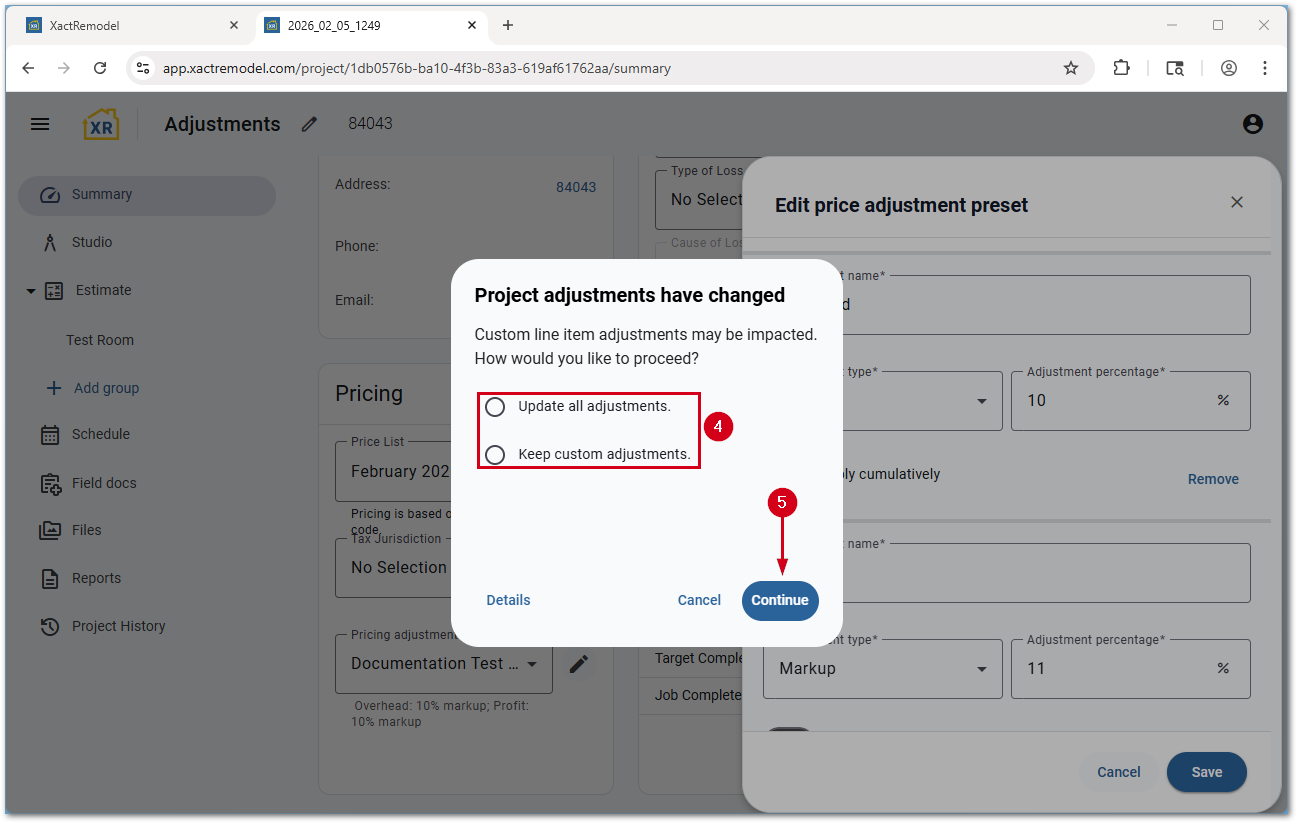
- Select a custom line item adjustment setting.
- Update all adjustments: Items with custom pricing will be reverted to price list or pricing overrides from My Pricing.
- Keep custom adjustments: Custom priced items will not be changed.
- Select Continue.
The pricing adjustment preset now shows as Custom with the project name in parenthesis.