Import image underlays in Studio

There is an Xactware Xpert Tip that might help with part of this process. After selecting play, select the full-screen icon to make the video full-screen.
See our XpertTips library for more Xpert Tips.
The image underlay feature allows users to upload an image of a floor plan directly onto the canvas in Studio within XactRemodel and XactRestore. This allows users to draw over the image using the tools in Studio to create a floor plan with accurate measurements for quicker and more precise estimates.
Show or hide the underlay image
Import an underlay image
Follow the steps below to import an underlay image in XactRemodel and XactRestore Studio.
- From within a project, select Studio.
Note: If the menu is hidden, select the menu icon in the top left corner.
- Select Import.
- Select Underlay Image.

- Select the desired image.
- Select Open.

- Select one end of a line with a known length.
Note: It is recommended to use the longest known length.
- Select the second end of the line.

- Enter the line length.
- Select OK.

- Select OK.

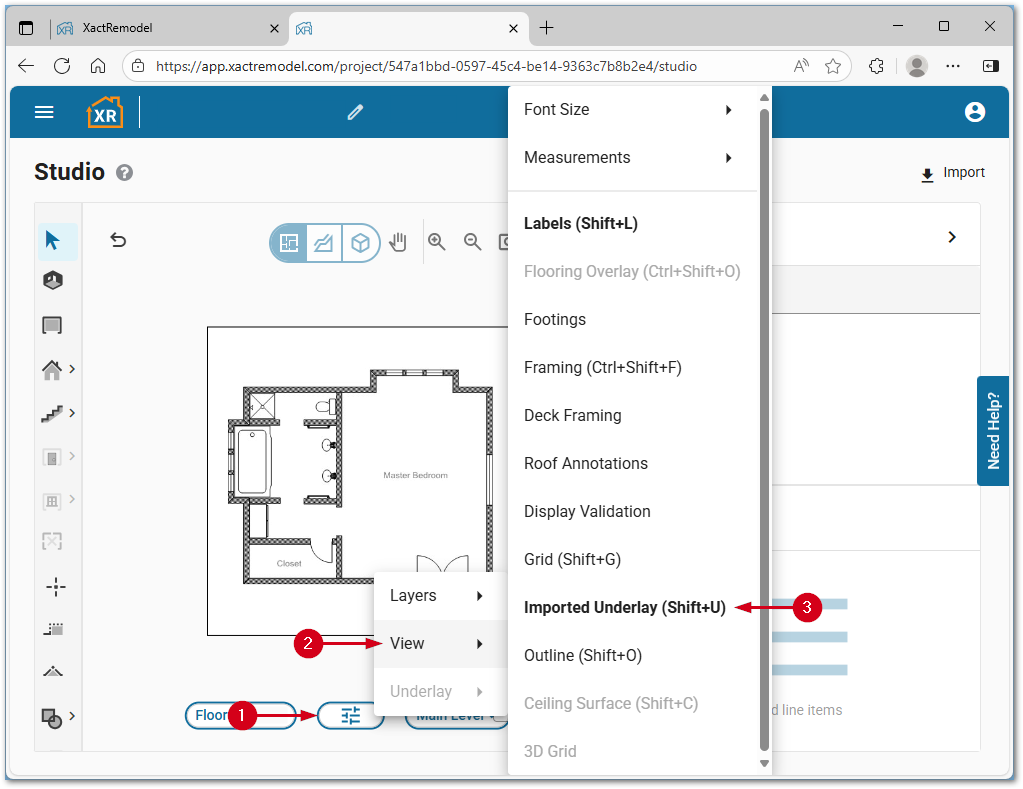
Show or hide the underlay image
Follow the steps below to show or hide an underlay image in XactRemodel and XactRestore Studio.
- Within the Studio tab of a project, select the Level Properties icon.
- Select View.
- Select Imported underlay.
Note: Alternatively, press the Shift and U keys to toggle the image from show to hide.
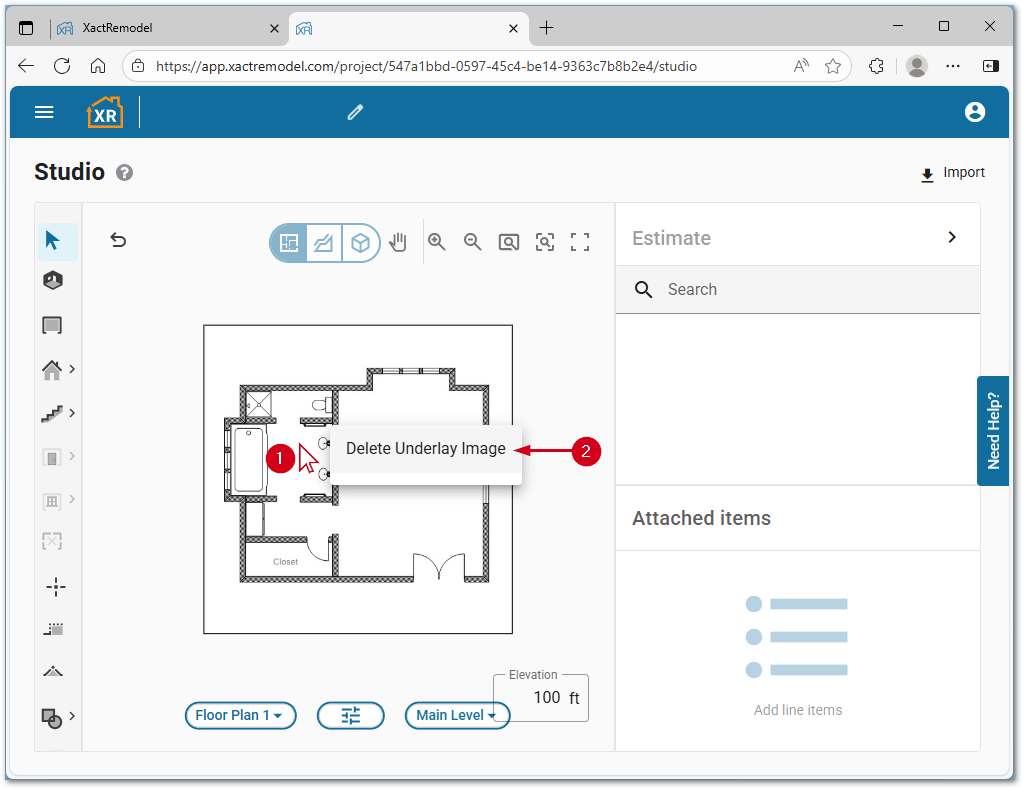
Remove the underlay image
Follow the steps below to remove an underlay image in XactRemodel and XactRestore Studio.
- Within the Studio tab of a project, right-click the underlay image.
- Select Delete Underlay Image.