Stairs
 Updated
by Russell B.
Updated
by Russell B.
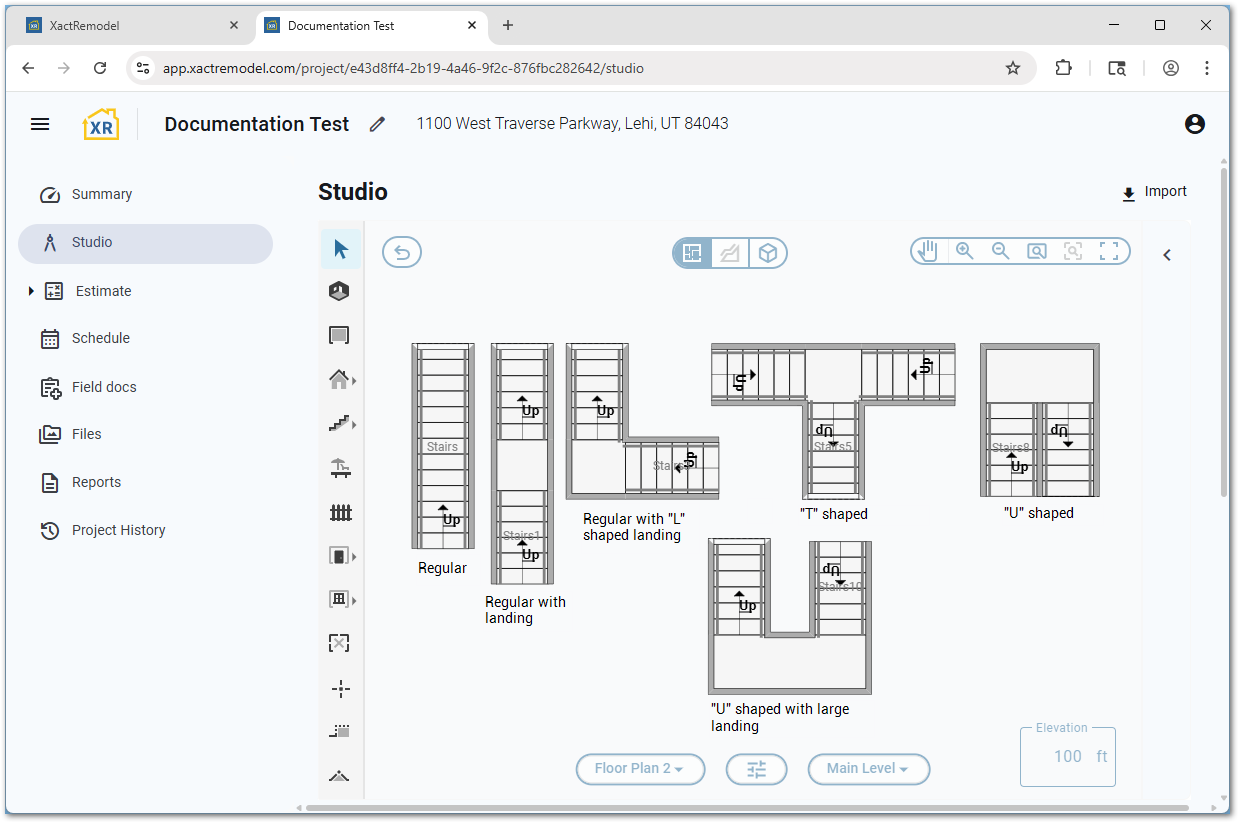
The Stairs tool within XactRemodel and XactRestore Studio allows you to add the following types of staircases on the Studio canvas, in addition to custom staircases.
Note: 3D view is useful to visualize staircases. For assistance switching to 3D view, see our View sketch in 3D in Studio document.
- Regular
- Regular with landing
- Regular with an "L" shaped landing
- "T" shaped
- "U" shaped
- "U" shaped with large landing
Add default staircases
You can add default staircases using one of the preset options within the staircase tool.
- Within a project, select Studio.
- Select the arrow next to the staircase tool.
Note: Selecting the tool directly loads the last used type of staircase, or on a brand-new project, a custom staircase.
- Select the desired type of staircase.
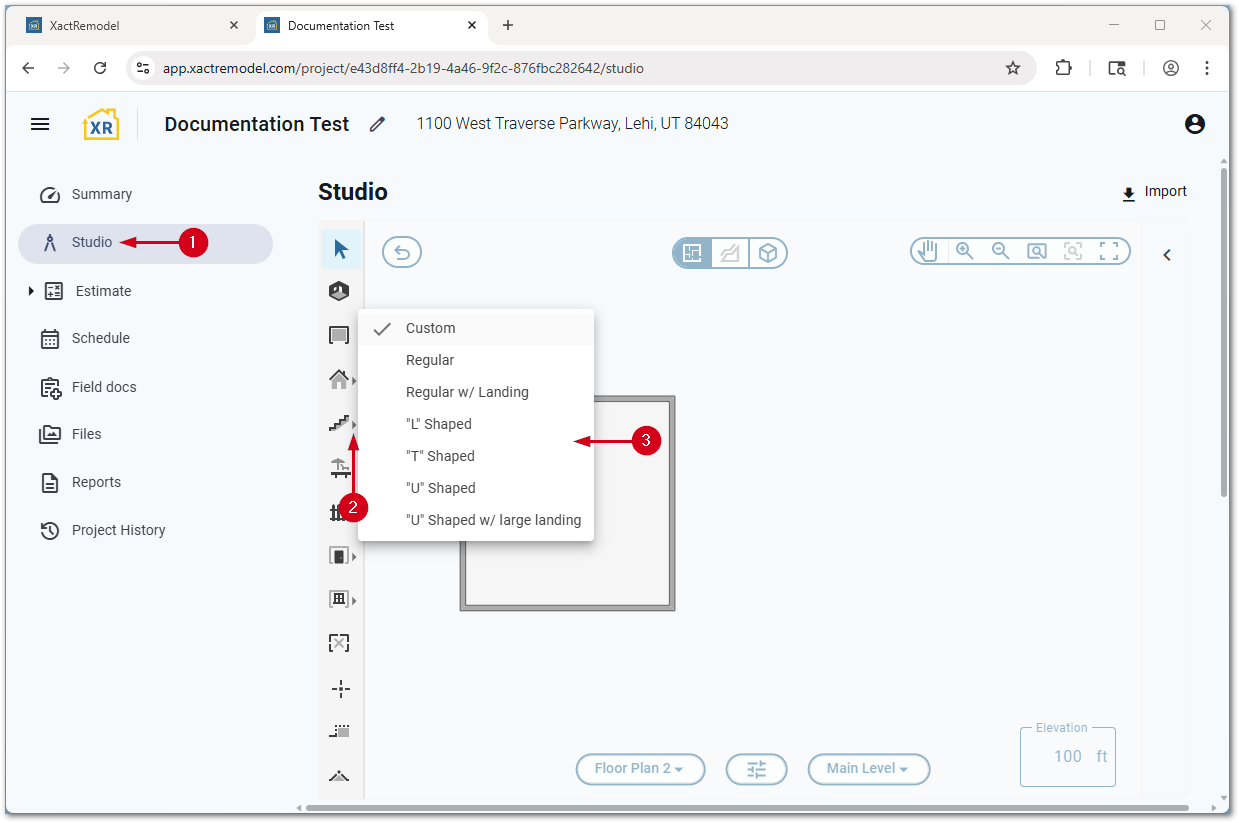
- Place the staircase in the desired location.
Note: The Tab key is used to rotate an object clockwise and press the Shift and Tab keys to rotate an object counterclockwise. You can only add default staircases outside a room.
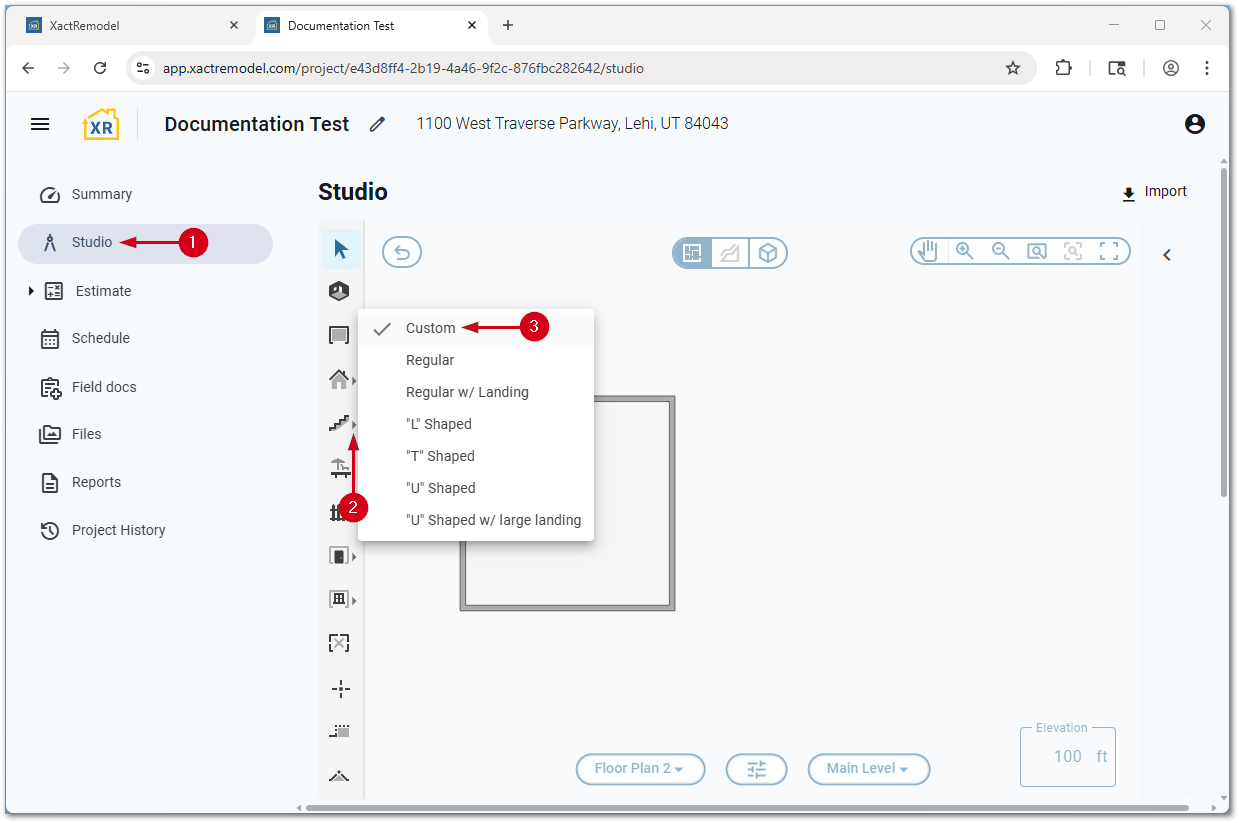
Add custom staircases
You can draw custom staircases in the Studio canvas by following the steps below.
- Within a project, select Studio.
- Select the arrow next to the staircase tool.
Note: Selecting the tool directly loads the last used type of staircase, or on a brand-new project, a custom staircase. Alternatively, press the C key on the keyboard.
- Select Custom.
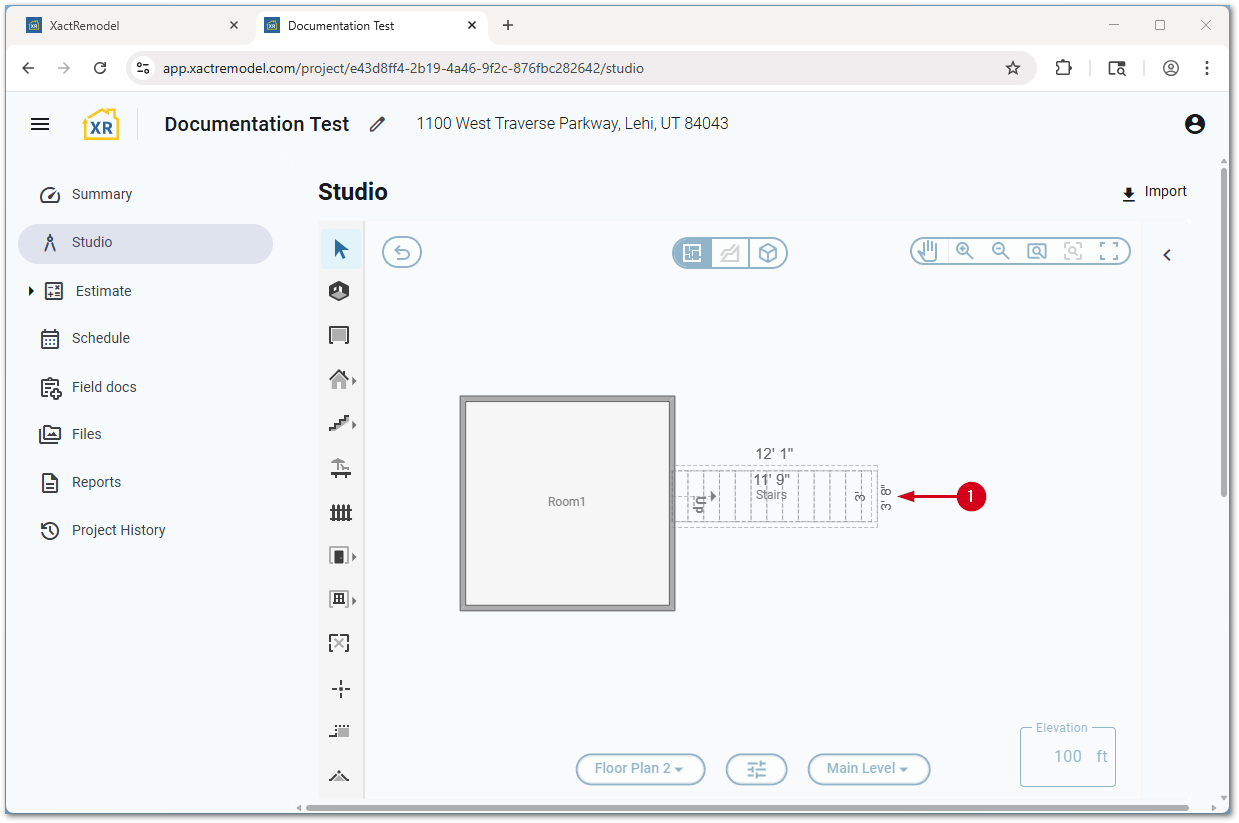
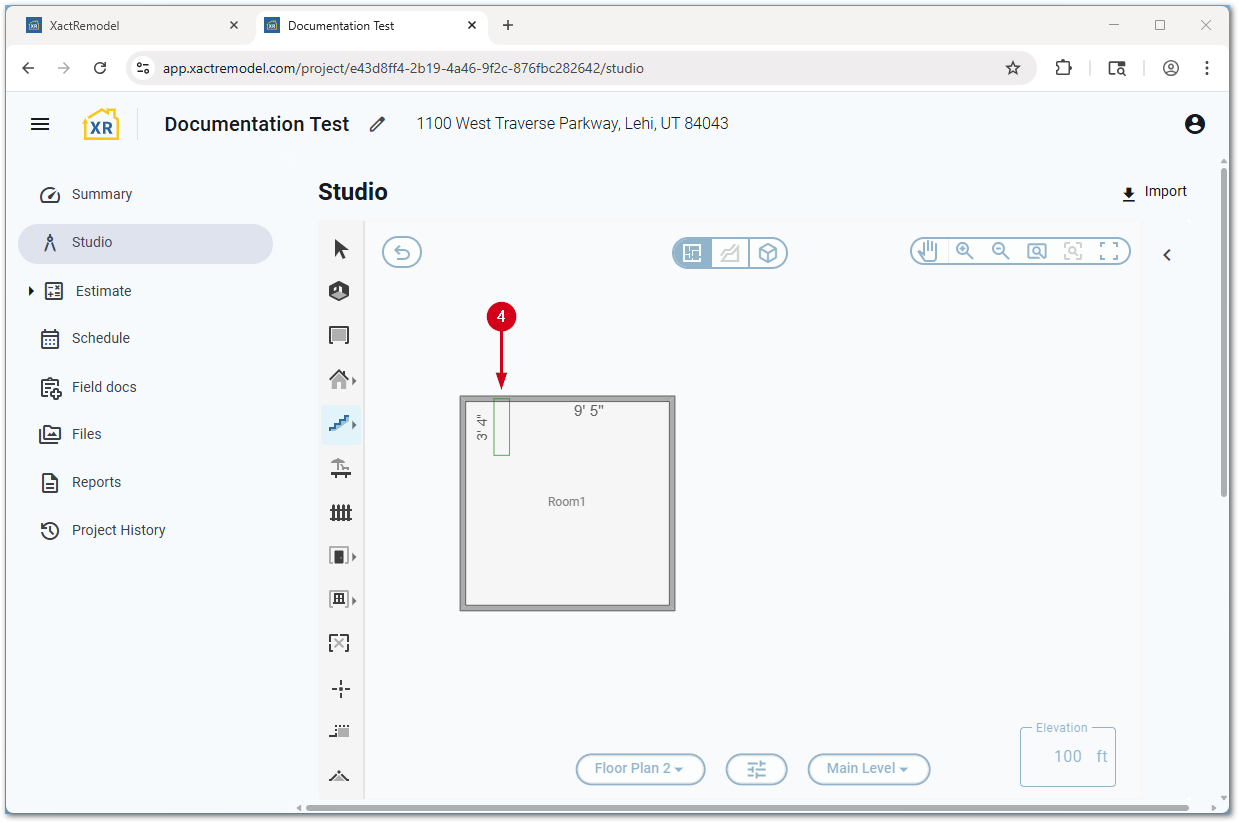
- Click the left mouse button at the desired location on the Studio canvas to place the first 3’ 4” tread.
Note: The Tab key is used to rotate an object clockwise and press the Shift and Tab keys to rotate an object counterclockwise.
- Move the mouse to extend the staircase.
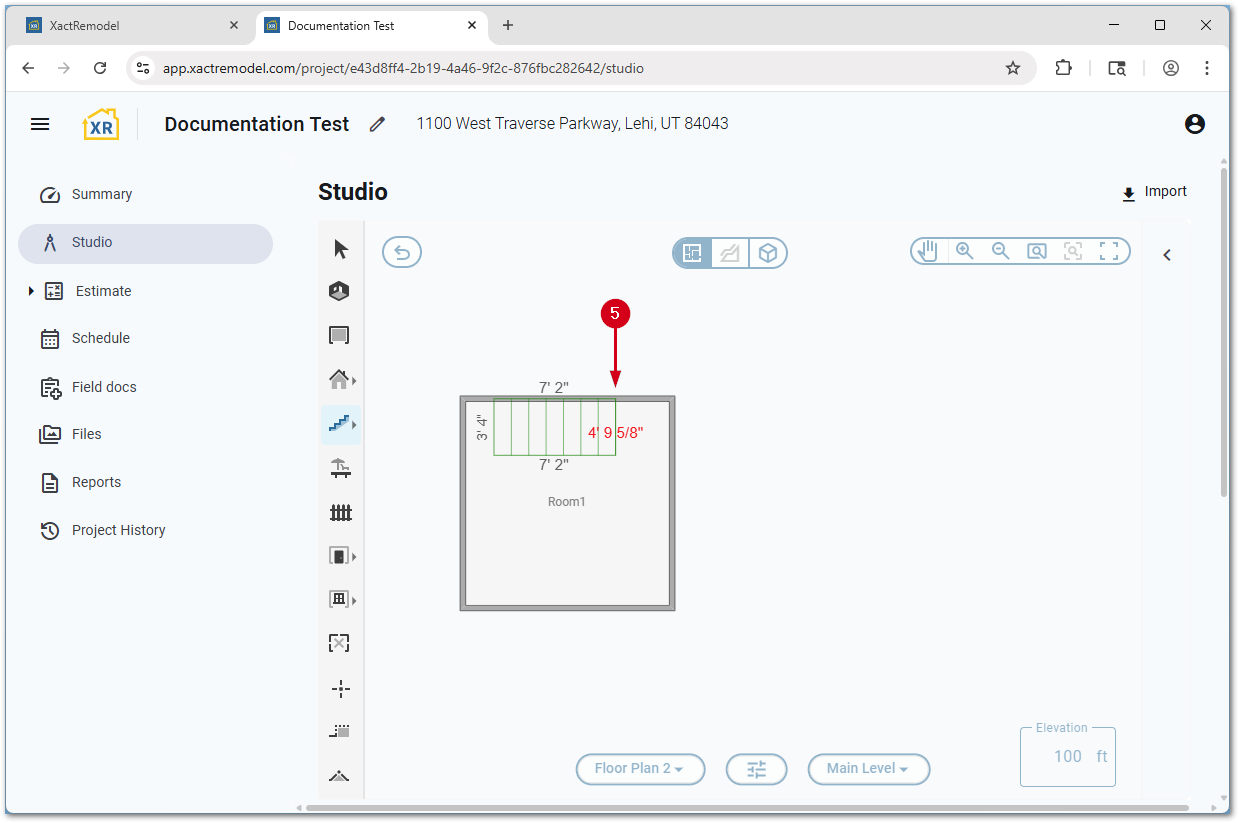
- Click the left mouse button to place the staircase.
- When drawing a custom staircase within a room, the stairs briefly pause if a default landing size fits. Click three times to place the stairs with the default landing size.
- For a custom staircase outside a room, click once to start a landing, then click again to add it. Move the mouse to add steps after a landing or double-click to save the staircase. Select an existing stair tread or press the Escape key to draw a custom staircase without a landing.
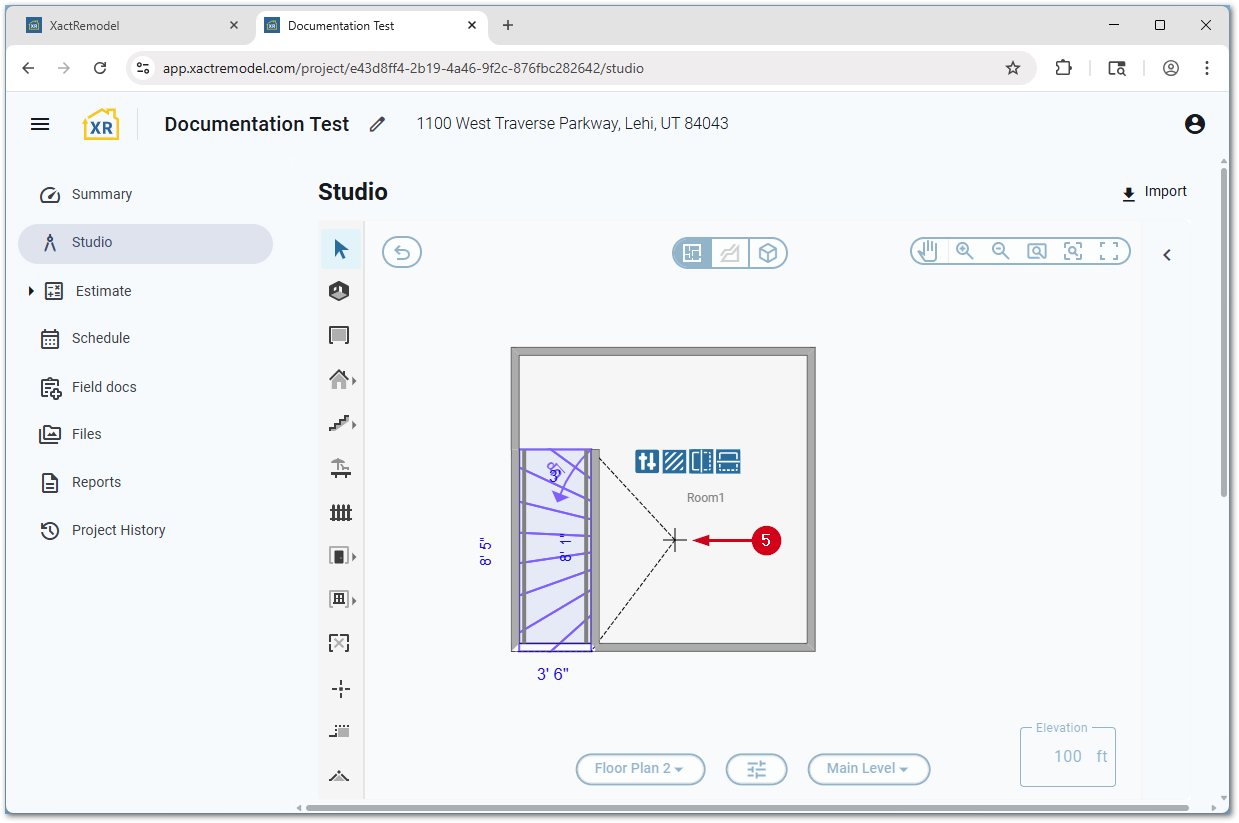
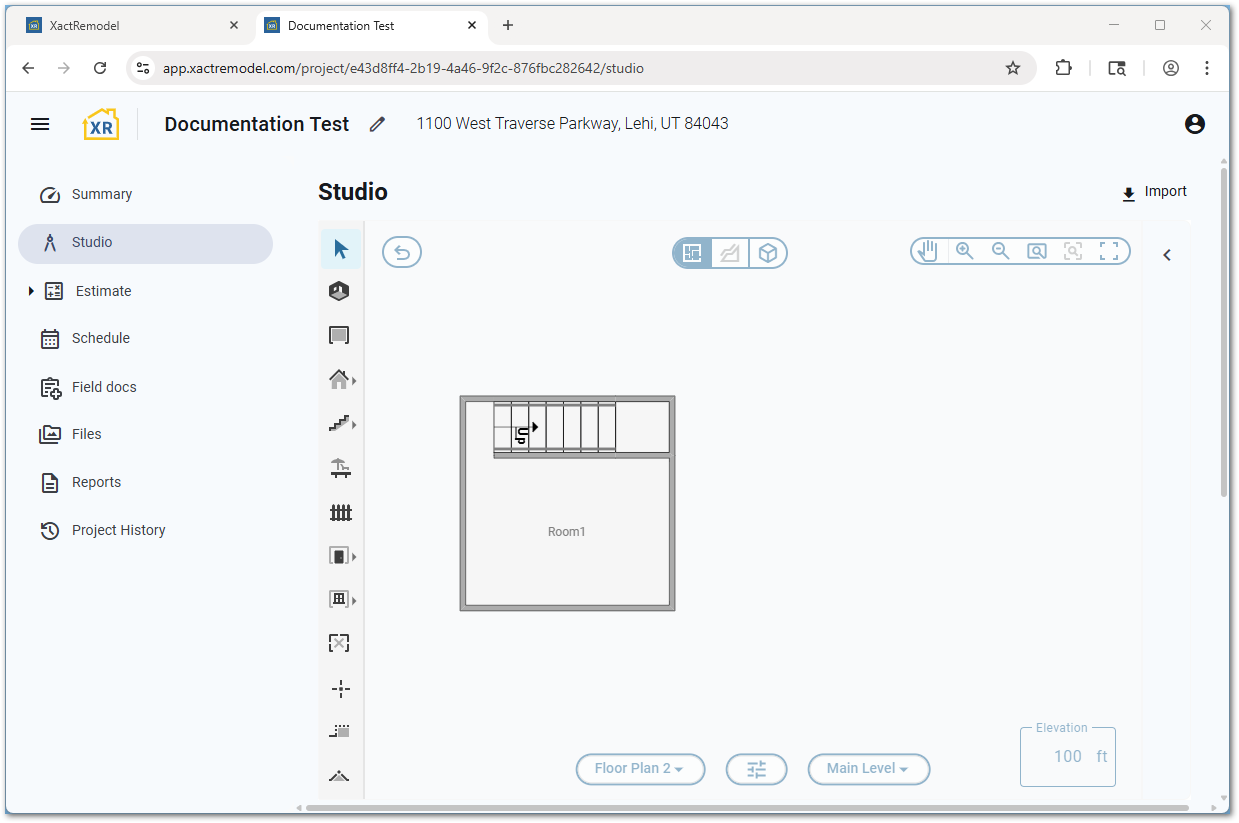
The image below shows a completed custom staircase following the steps in the first bullet in step 6.
Properties
Staircase properties
When selecting a staircase, the properties window offers several options.
- Select the desired staircase.
- Select the Properties… icon.
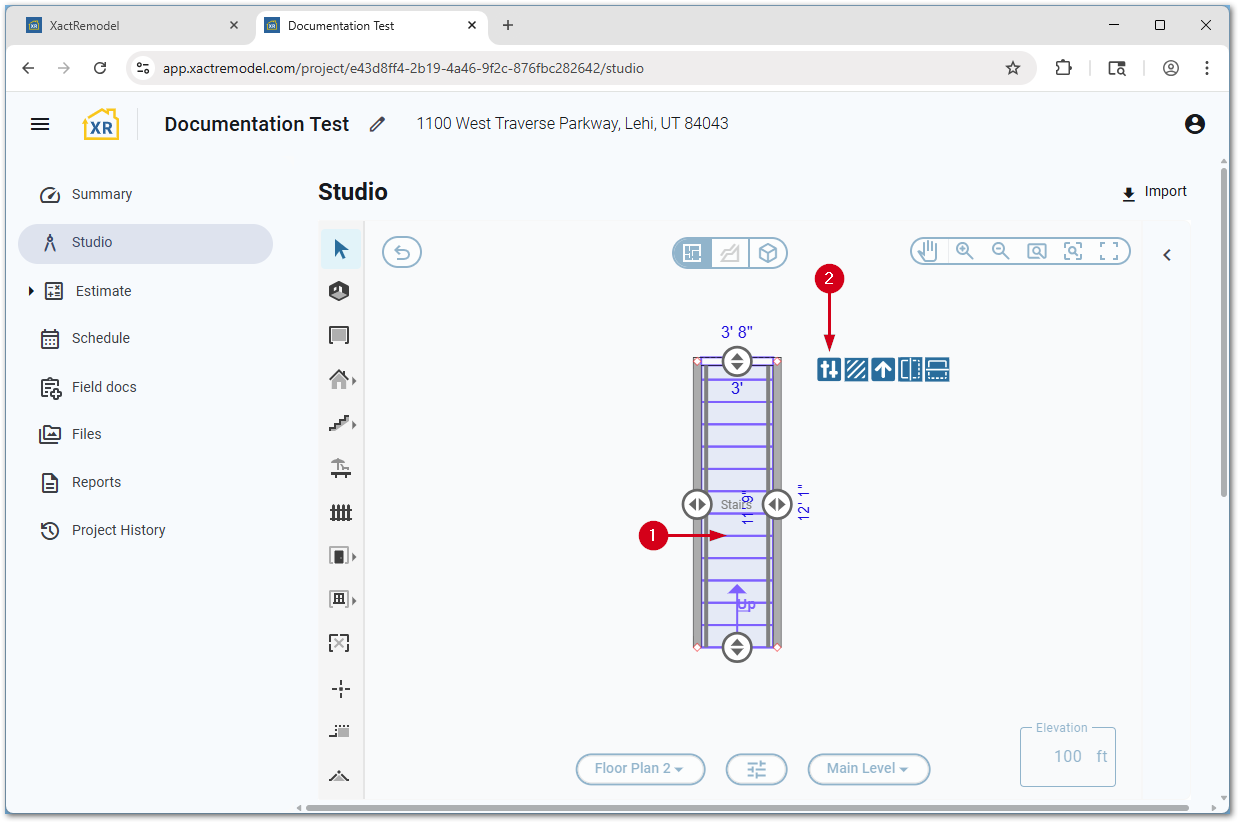
In the Staircase Properties window, the following options appear.
- You can edit the room name, which appears at the top of the window.
- General:
- Group Code: The Studio group the room belongs to. For reference only.
- Subgroup Of: In sketches with more than one room, allows the selected room to be grouped with another one. For more information, see our Subgroups document.
- Show Label: Controls whether or not to show the room label on the canvas.
- Dimensions:
- Floor Height: Sets the height of the floor.
- Relation to Level: Sets if the stairs are above or below the floor of the selected room.
- Wall Thickness: Sets the thickness for the staircase walls. Individual walls can be set in the wall properties.
- Ceiling:
- Ceiling Type: Sets the type of ceiling in the room. See our Ceilings in XactRemodel and XactRestore Studio document for details.
- Ceiling Height: Sets the height of the ceiling.
- Staircase: Includes information about risers and treads.
- Construction: Includes options to frame staircase floors, walls, footings, and staircase framing.
Note: If you select an option in the Construction section, additional sections appear.
- Variables: Lists the calculated values for the staircase attributes. You can find additional variables by selecting the Click for all variables button.
Staircase wall properties
When selecting a staircase wall, the properties window offers several options.
- Select the desired staircase wall.
- Select the Properties… icon.
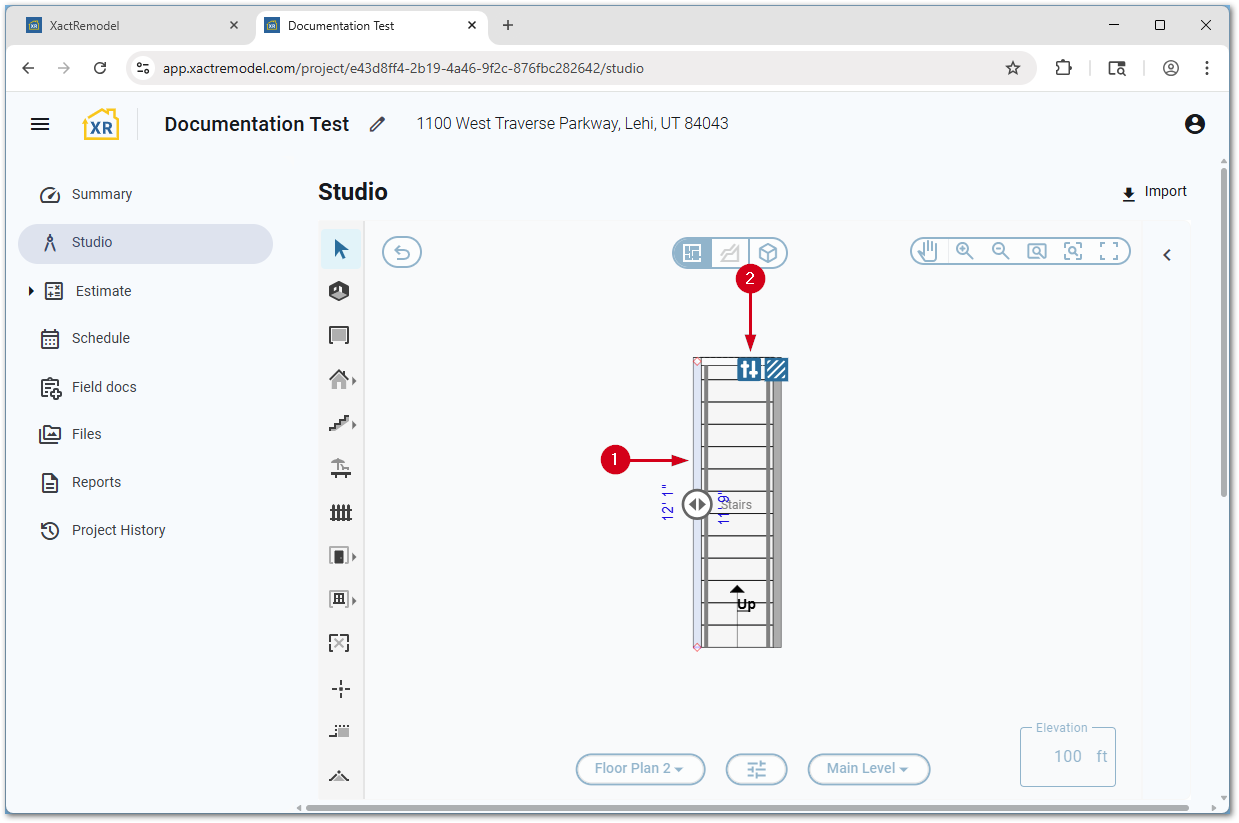
In the Staircase Properties window, the following options appear.
- General:
- Group Code: The Studio group the room belongs to. For reference only.
- Dimensions:
- Thickness: Sets the thickness of the wall.
- Extend Exterior Surfaces Down: When paired with the below option, extends the exterior surface below the level.
- Extend Surfaces Extension Length: When paired with the option above, sets the length of the extension.
- Wall Type: Sets the type of wall.
- Construction: Includes options to frame the walls, footing, or railing.
Note: If you select an option in the Construction section, additional sections appear.
- Variables: Lists the calculated values for the wall attributes. You can find additional variables by selecting the Click for all variables button.
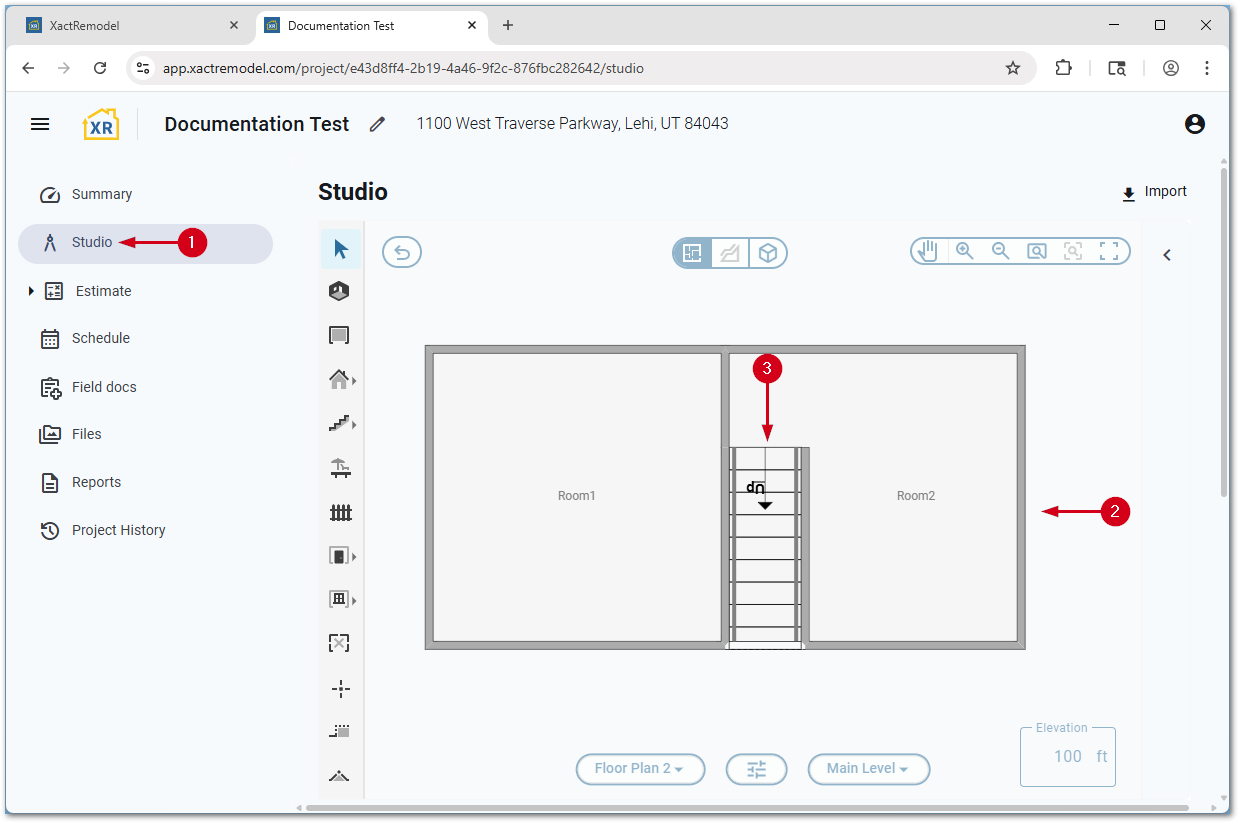
Create staircases in the middle of a room
Normally stairs must be sketched outside of a room or attached to a room wall. Follow the steps below to create stairs in the middle of a room by creating two rooms and grouping them together.
Note: For more information on subgroups, see our Subgroups document.
- Within a project, select Studio.
- Create a sketch with two rooms and a wall between then where the staircase should be located.
Note: For assistance see our Room basics document.
- Place the staircase as outlined in the Add custom staircases section above.
- Delete the walls that are not part of the staircase.
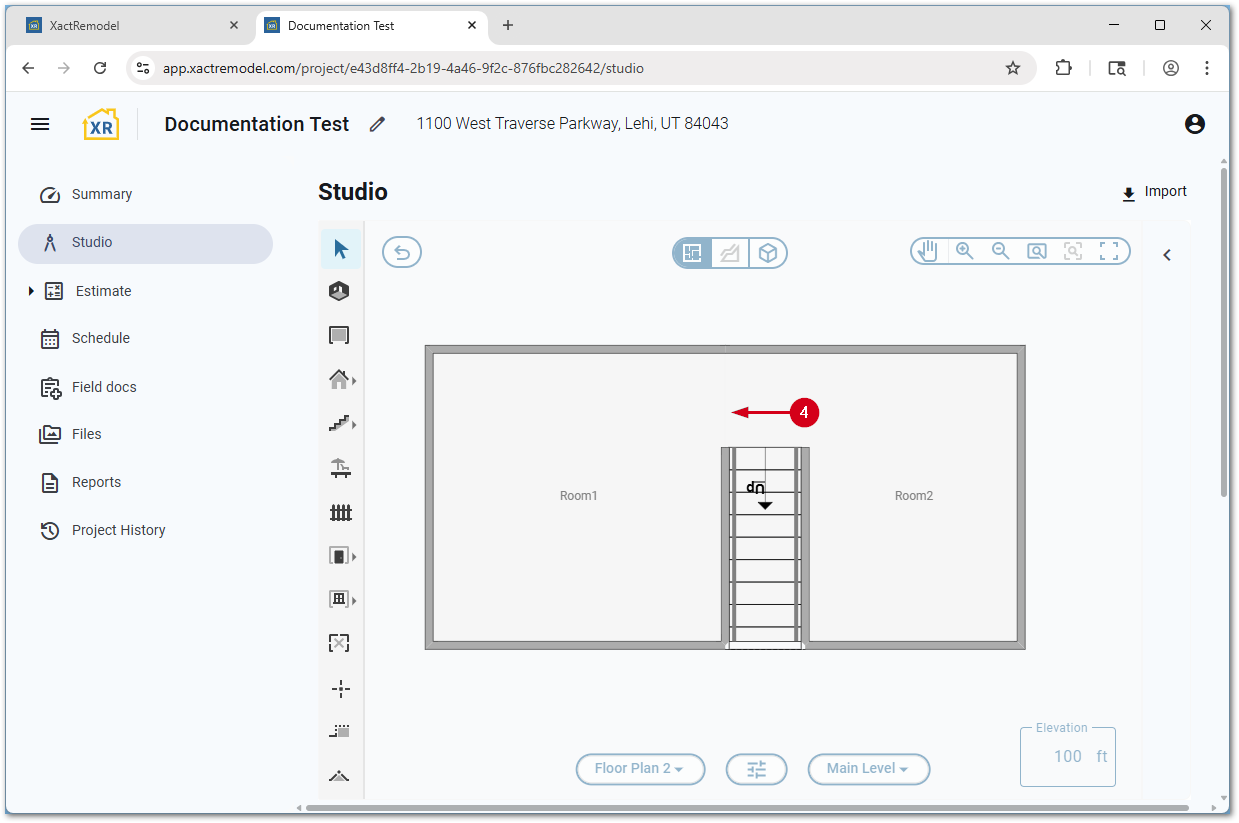
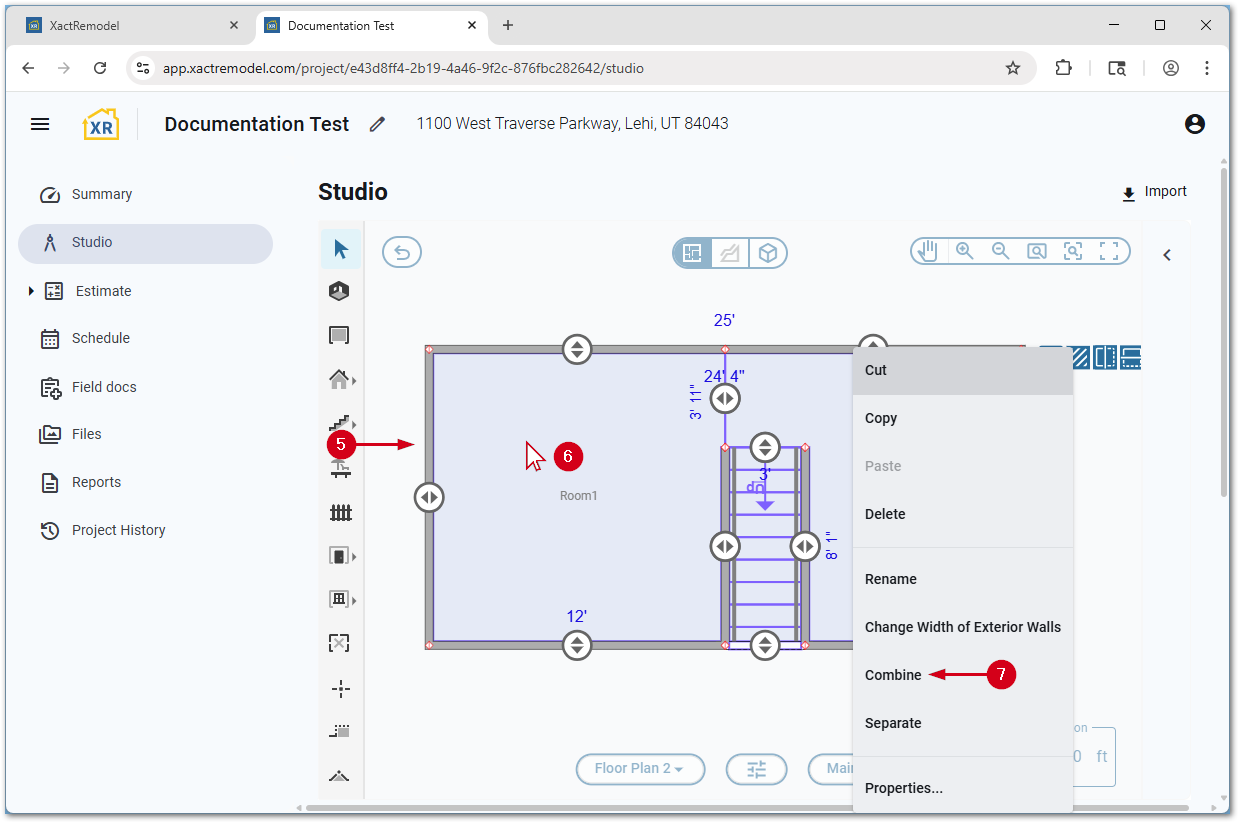
- Select both rooms.
Note: To select multiple rooms, select the first one and press and hold the Ctrl key and select the second room.
- Right-click in the whitespace in one of the rooms.
- Select Combine.
If desired, hide the label from one of the rooms or resize the rooms. For assistance with this, see our Room properties document.
Create angled treads
You can create angled treads using the steps below.
Note: You can also use these steps to add angled steps to a landing, for example in a corner staircase. In addition to the below steps, enter the number of risers in the landing and a total rise.
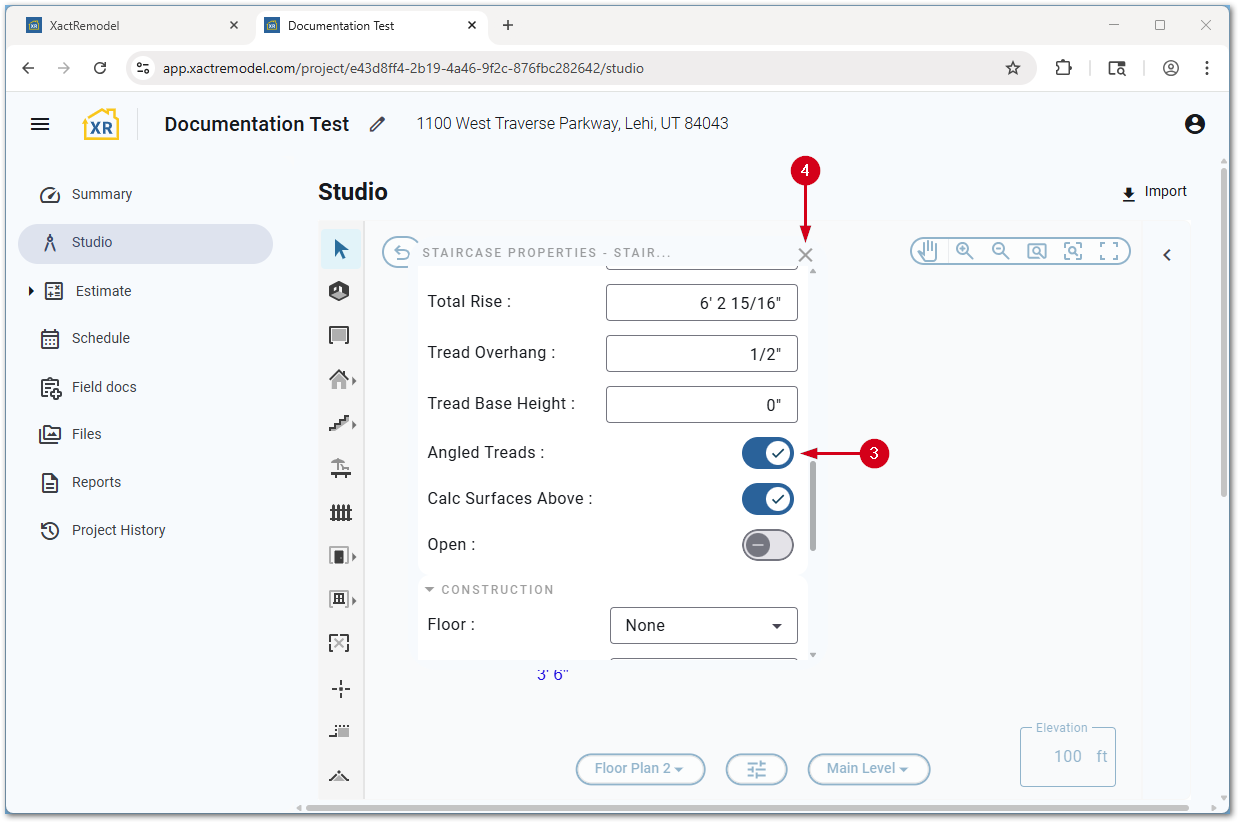
- Select the staircase for which you want to add angled treads.
- Select the Properties… icon.

- Switch on Angled Treads.
- Select the X to save.
- Select and drag the anchor to change the angle of the treads.