Field docs initial job setup

This document goes over the initial settings within a job that a user in the field will go through to setup Field Docs.
![]() Field ocs is part of the XactRestore Pro subscription tier. To upgrade, please speak with our Sales Department by calling 833-352-9228.
Field ocs is part of the XactRestore Pro subscription tier. To upgrade, please speak with our Sales Department by calling 833-352-9228.
When a job is first created, it's recommended to fill out the standard Summary tab with the client’s information. This data is shown in reporting. For assistance with this, see our Project Summary document.
Once basic information is entered, an admin can navigate freely through the Field docs section while non-admins are required to enter information in a preset order.
Note: For this and related documents, screenshots for administrators will be taken from a web browser, but screenshots for non-administrators will be taken from XR mobile on an Android mobile device. iOS and iPadOS are similar, and employees can use a web browser as well, but the intended use case for non-administrators is to use a mobile device in the field.
Add images
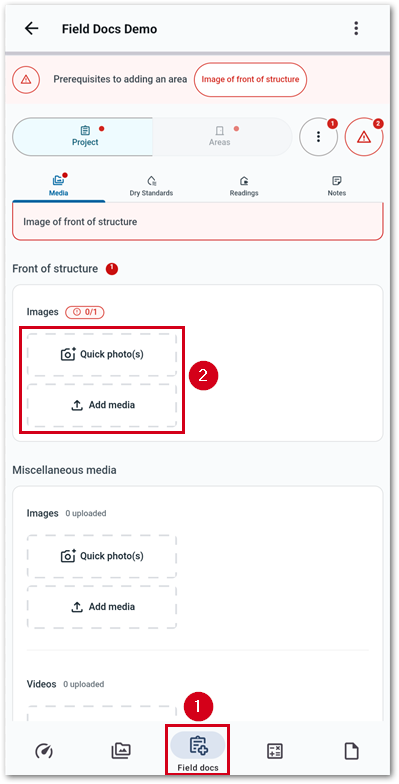
Depending on what options have been set by an administrator before a user in the field using XR Mobile, there will be one or more prerequisites to complete before areas, equipment, and readings can be added.
In the example below, an image of the property is set as required.
- From within a job in XR Mobile, select Field docs.
- Select either Quick photo(s) or Add media.
Note: Quick photo(s) opens the camera app to allow you to take an image live. Add media lets you select an existing photo on the device. In the example below, the quick photo option is used.
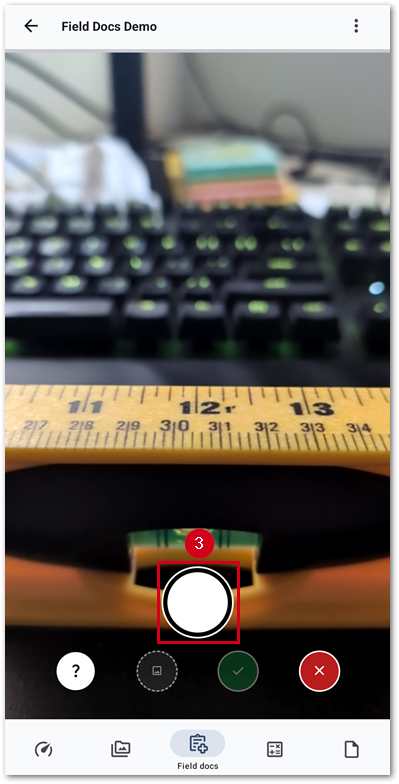
- Select the shutter icon to take an image.
Note: A red bubble appears to indicate the number of images taken.
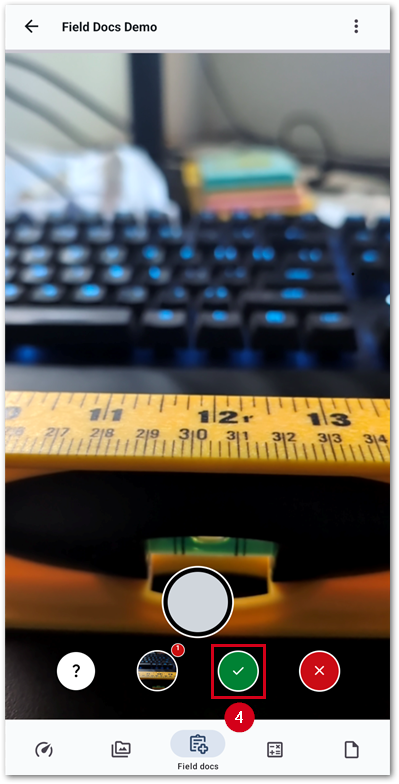
- Select the green checkmark icon to save and exit the camera once all images have been taken.
Note: Images added in Field docs are not saved in the normal attachments section of XactRestore, but are exclusive to the Field Docs section.
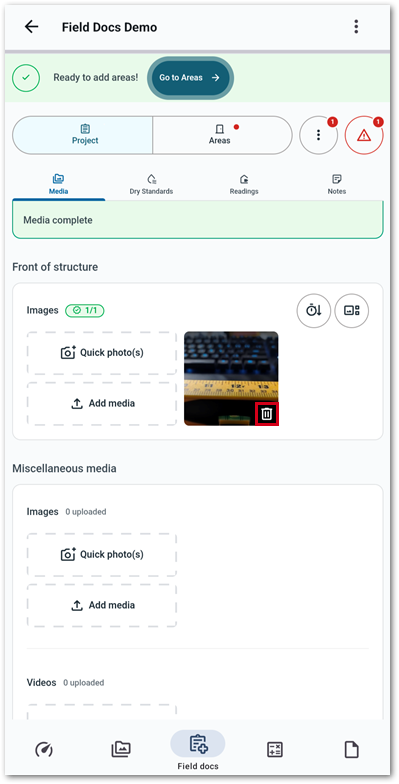
Once images have been added, they will display next to the options to add images. The trashcan icon can be used to delete images.
Set dates
A user in the field, or an administrator, will also need to set the starting date of the job within Field Docs.
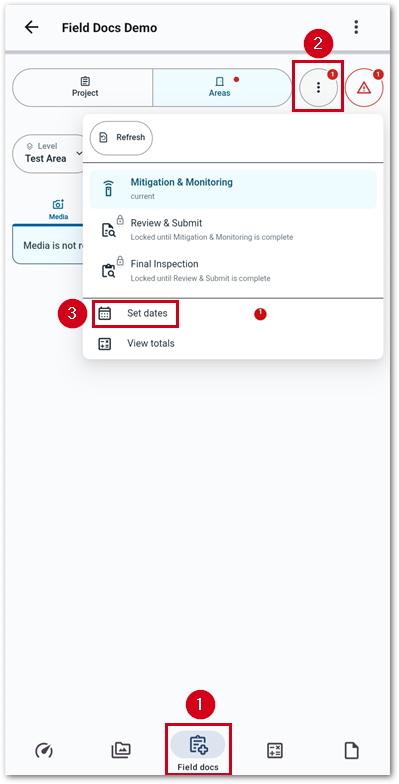
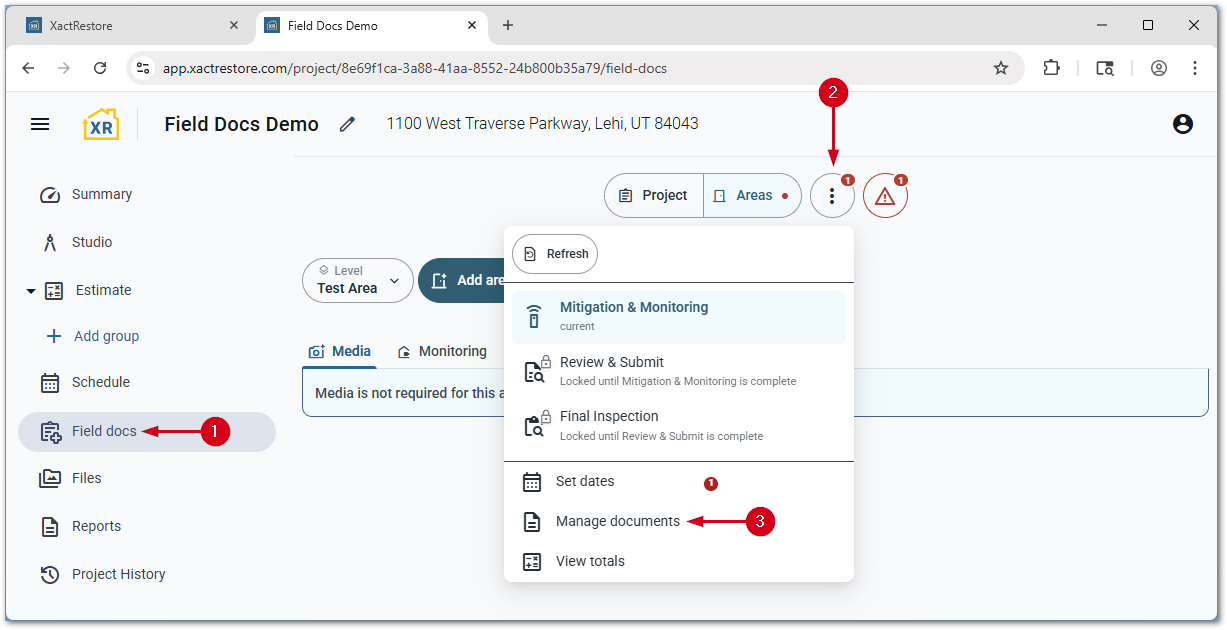
- From within a project, select Field docs.
- Select the three-dot menu icon.
- Select Set dates.
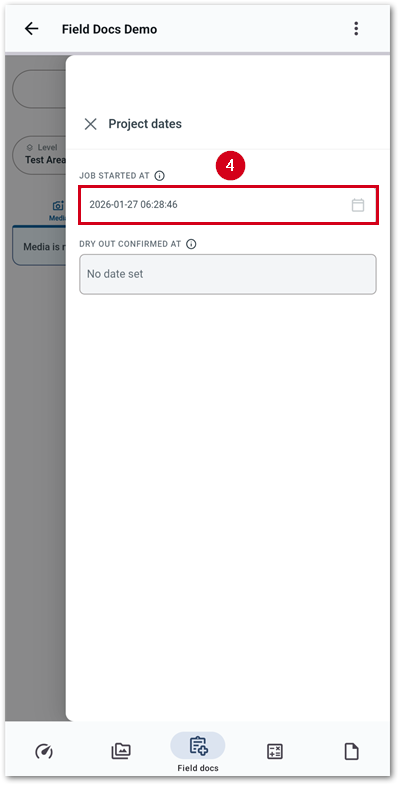
- Select the JOB STARTED AT field.
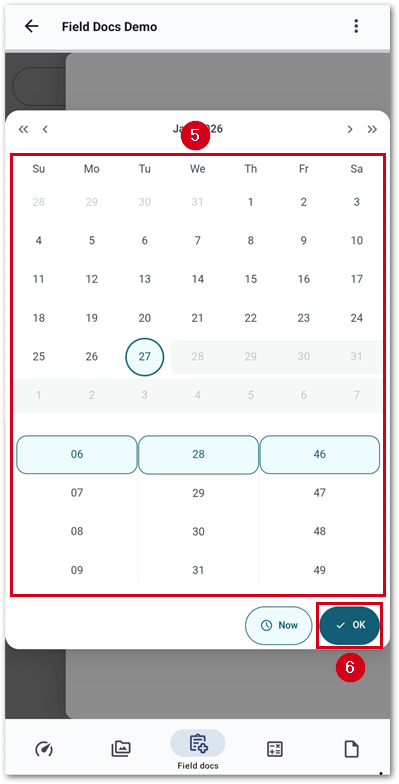
- Enter the correct date and time.
Note: Alternatively, select Now to set the current date and time.
- Select OK.
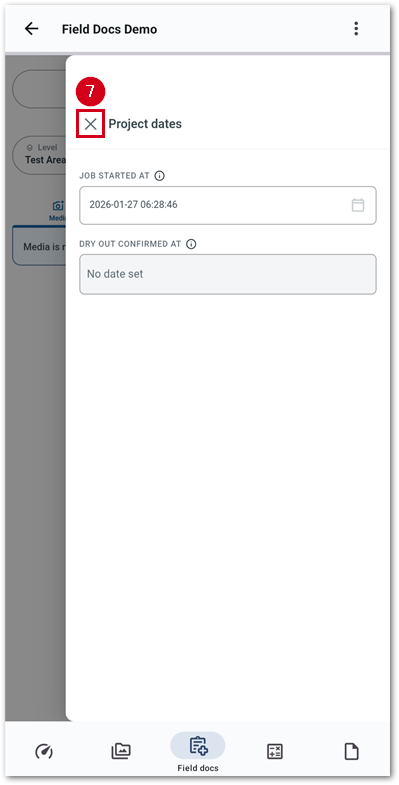
- Select the X next to project dates to return to the main Field docs section.
Sign documents
Administrator setup
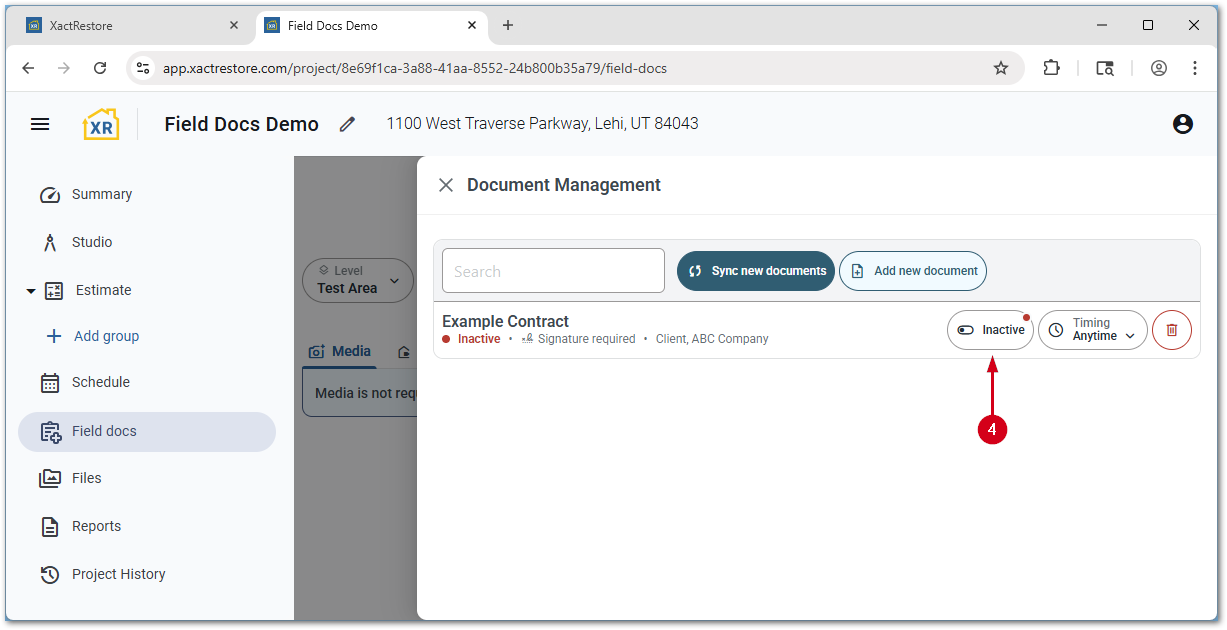
If a document is not marked active, but an administrator wants to make it available on a job, follow the steps below.
- From within a project while logged in as an administrator, select Field docs.
- Select the three-dot menu icon.
Note: If an administrator is performing these steps from XR Mobile, select the three-dot menu icon. Depending on screen size or resolution, the word menu may show next to the three-dot icon.
- Select Manage documents.
- Switch the Inactive toggle to Active. The toggle will show Active once complete.
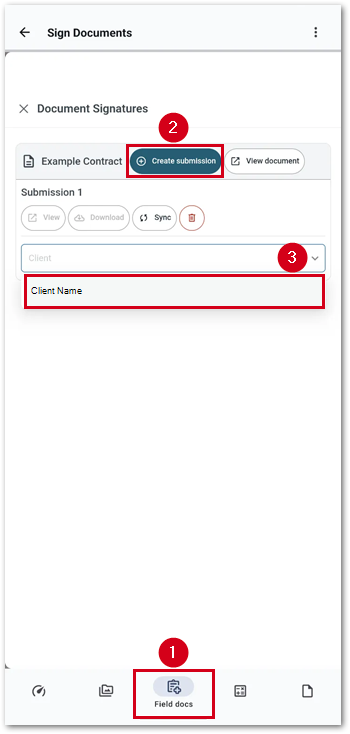
Sign in the field
If an administrator has setup documents, these documents are available within XR Mobile. If a signature is required at the start of a job, a field tech may be presented with it upon selecting the Field Docs section, otherwise follow the steps below to access it.
- From within XR Mobile, select Field docs.
Note: Depending on when in the job a document is required to be signed, it may automatically populate the document signatures screen when you select Field docs. You can close this screen or come back to it at any time by selecting the menu, then select Sign documents.
- Select Create submission
- Select the appropriate signing parties for the submission.
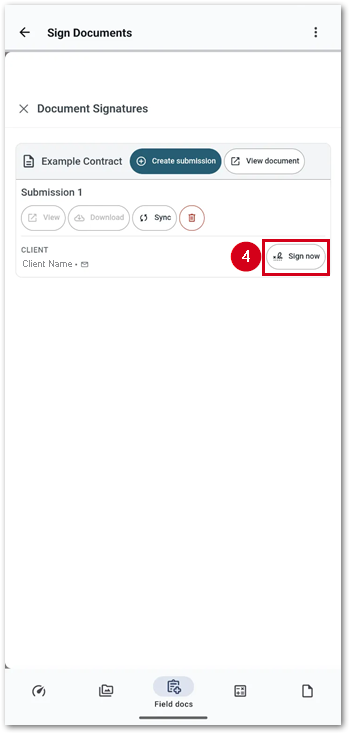
- Select Sign now. The document will guide you through completing the required fields.
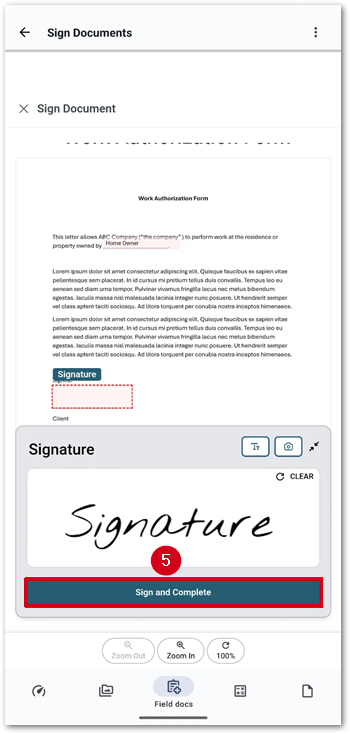
- Select Sign and Complete... to submit the document.