Framing in Studio
Updated
by Rose Gulley
The document below covers how to use the framing option in XactRemodel and XactRestore Studio.
![]() Please note that any framing items for items are added at the floor plan group, not within a specific item’s group. For example, framed walls for a room called Room 1 on the Main Level will have the framing items added to the Main Level group. The exception is for decks, which are added to the specific deck’s group.
Please note that any framing items for items are added at the floor plan group, not within a specific item’s group. For example, framed walls for a room called Room 1 on the Main Level will have the framing items added to the Main Level group. The exception is for decks, which are added to the specific deck’s group.
Show Framing
To view framing items in Studio follow the steps below.
- From within Studio, click the level properties button.
- Open the View menu.
- Select Framing.
Note: Alternatively press the Control, Shift and F key at the same time. To show deck framing click show deck framing.
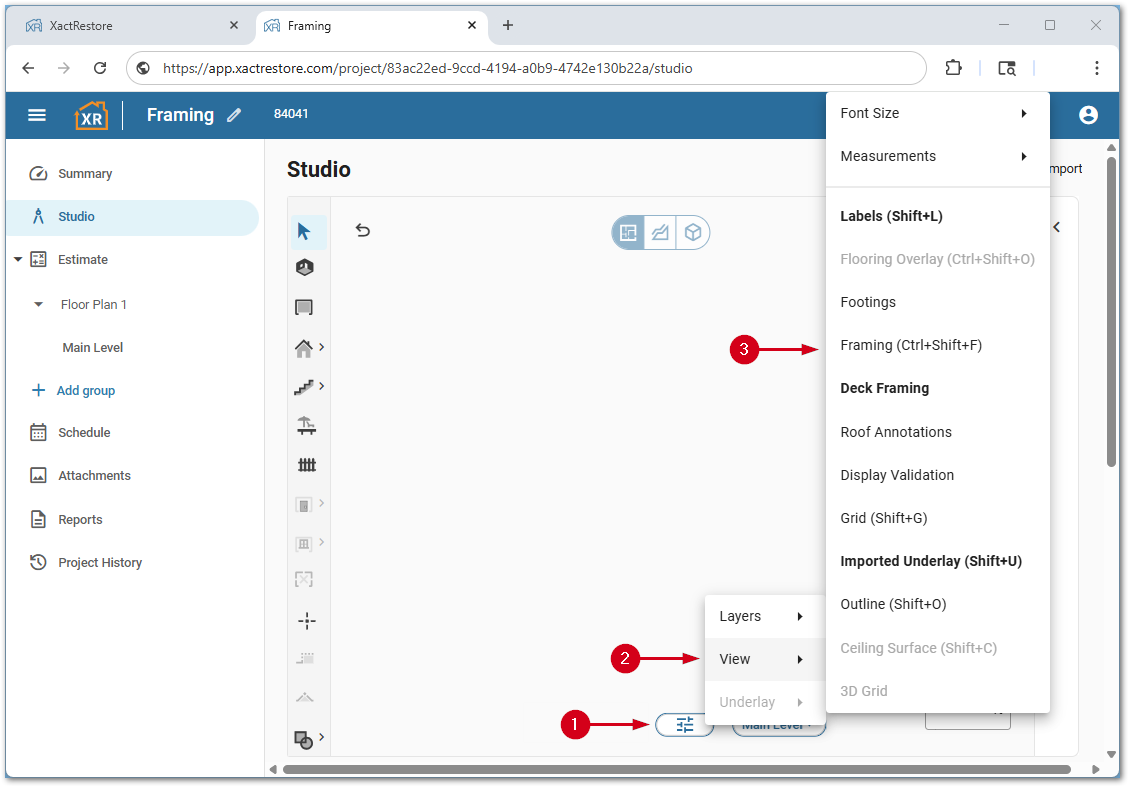
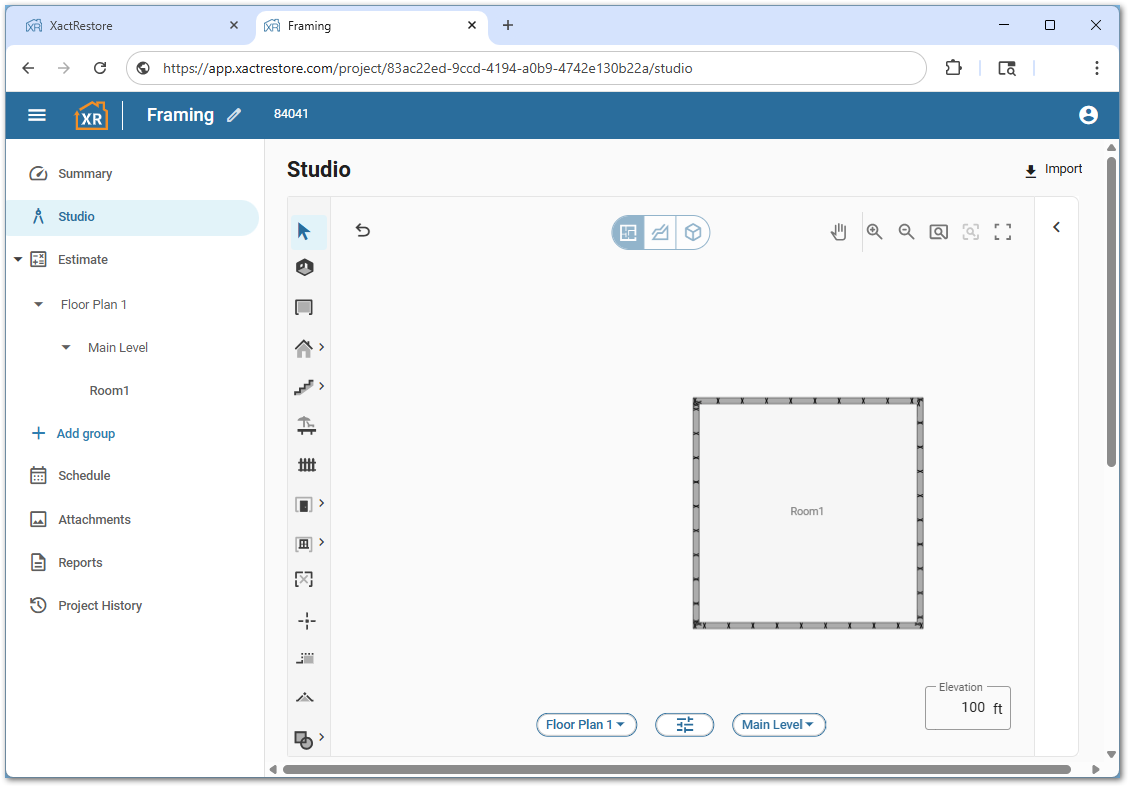
Framing items will now be shown.
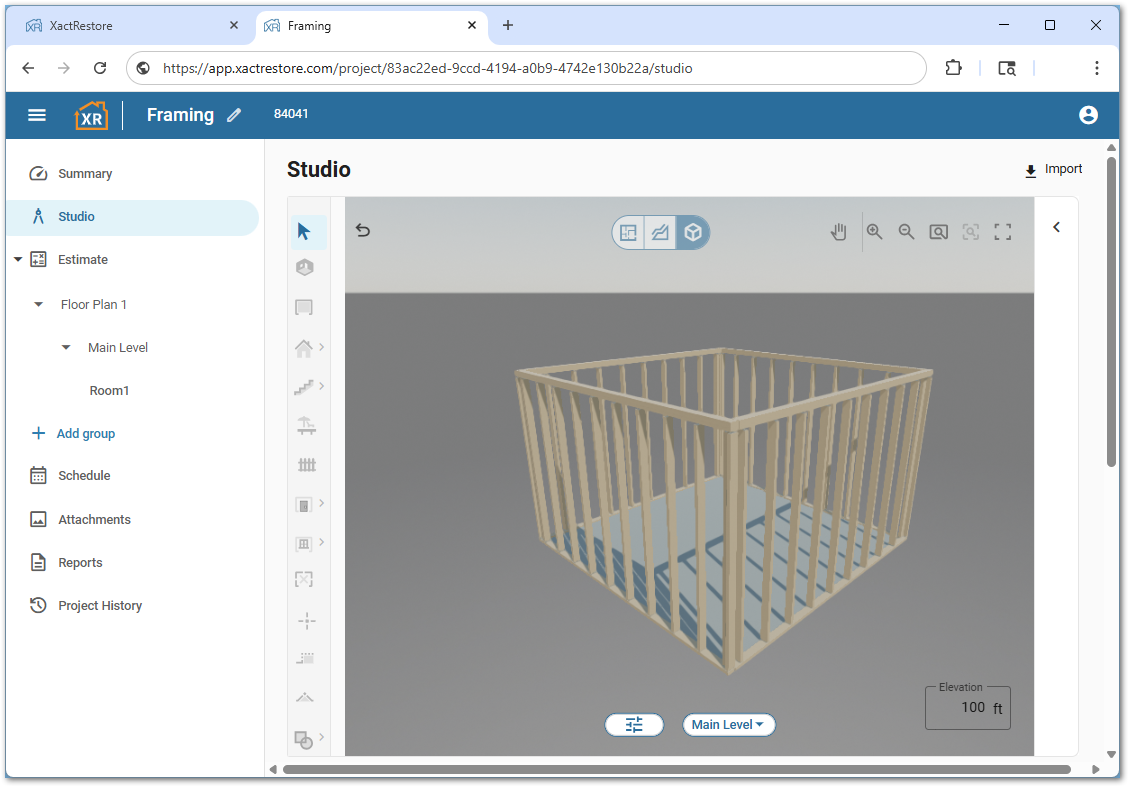
And are visible in 3D view.
Rooms
Follow the steps below to add framing to rooms.
- From within Studio, select the room(s) to frame.
- Click the properties icon.
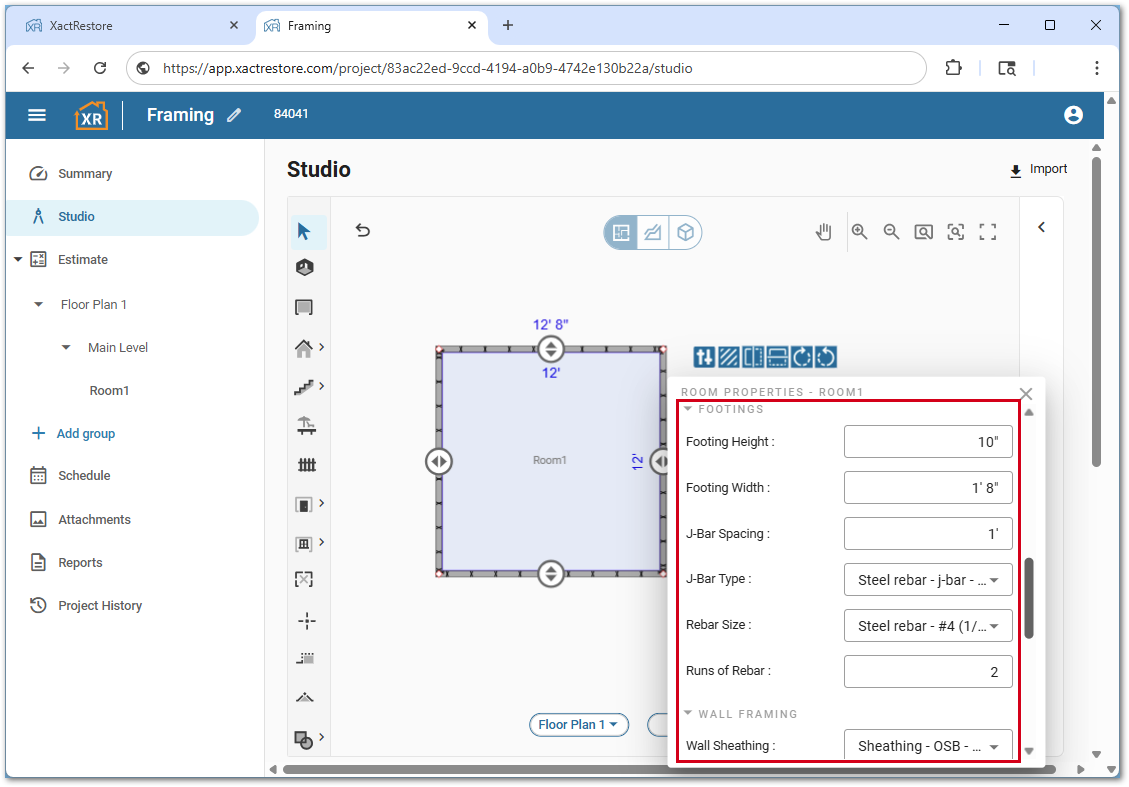
- Select the desired Floor, Wall, or Footing framing option from the menu.
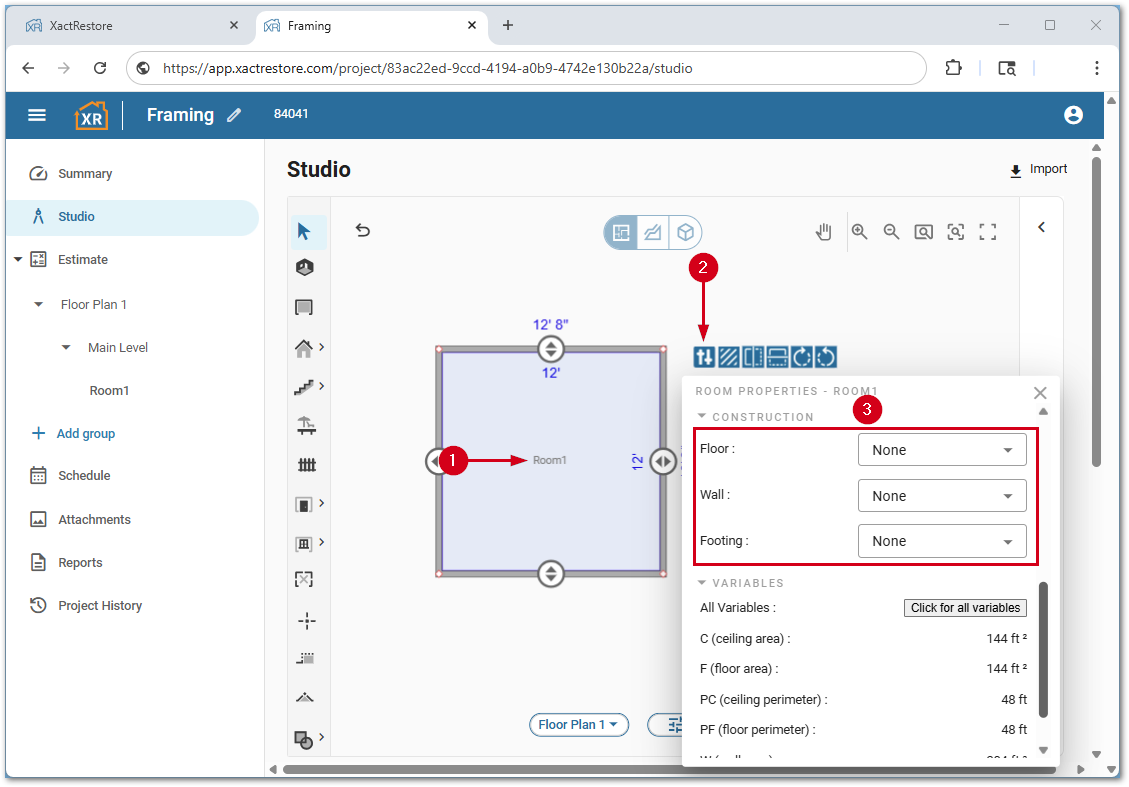
A new framing section will be added based on the option selected in step 3 where additional details can be selected.
Stairs
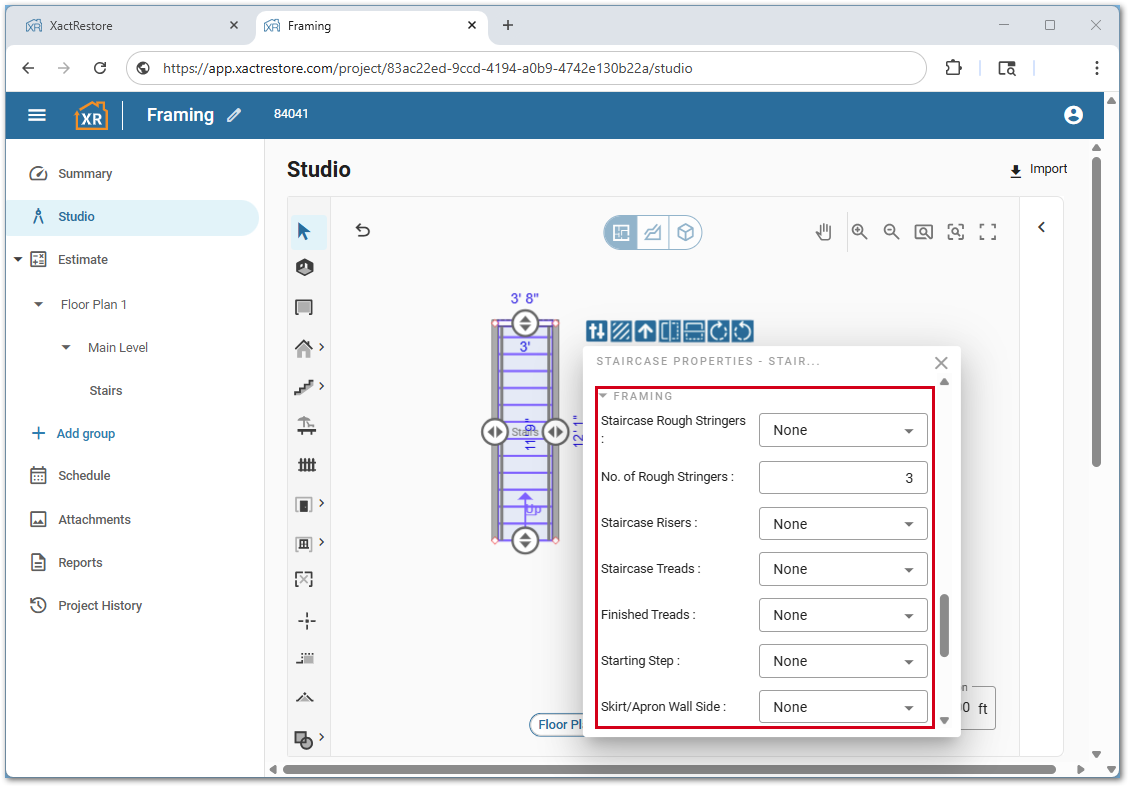
Follow the steps below to add framing to staircases.
- From within Studio, select the staircase(s) to frame.
- Click the properties icon.
- Select the desired Staircase Framing option from the menu.
Note: Additionally, similarly to rooms above, floor, wall, and footing items can be added to staircases as well.
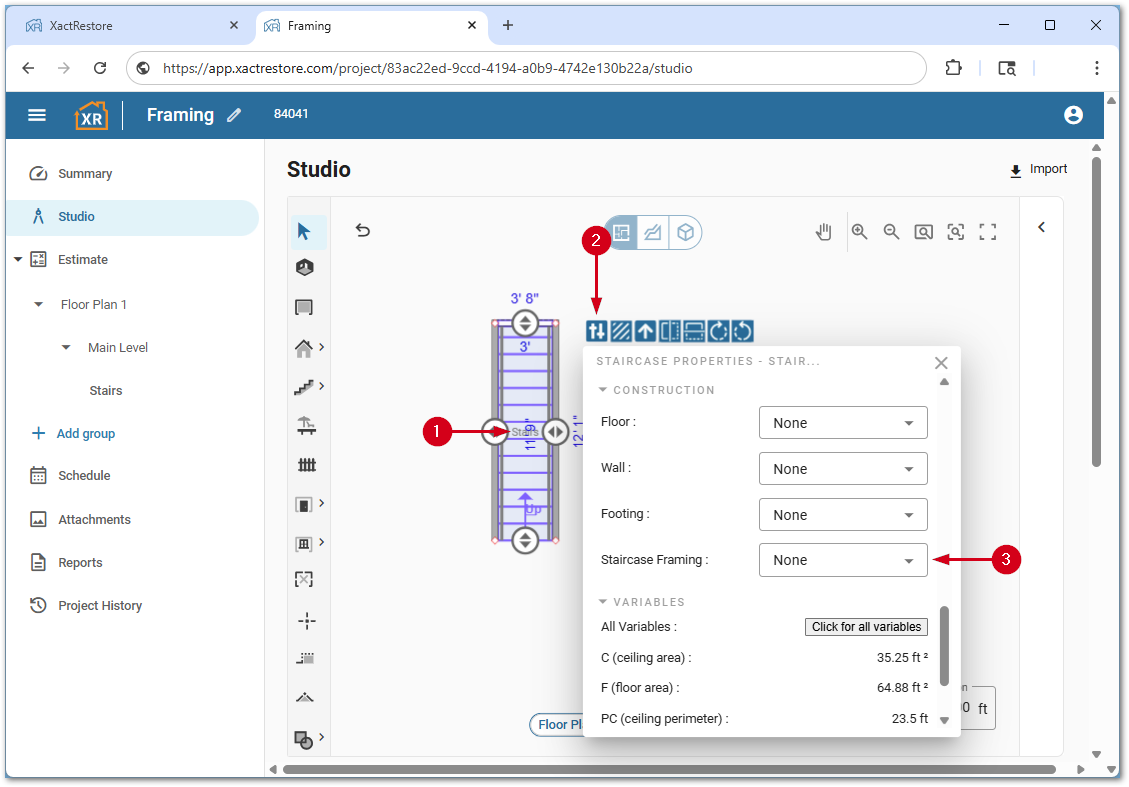
A new framing section will be added based on the option selected in step 3 where additional details can be selected.
Decks
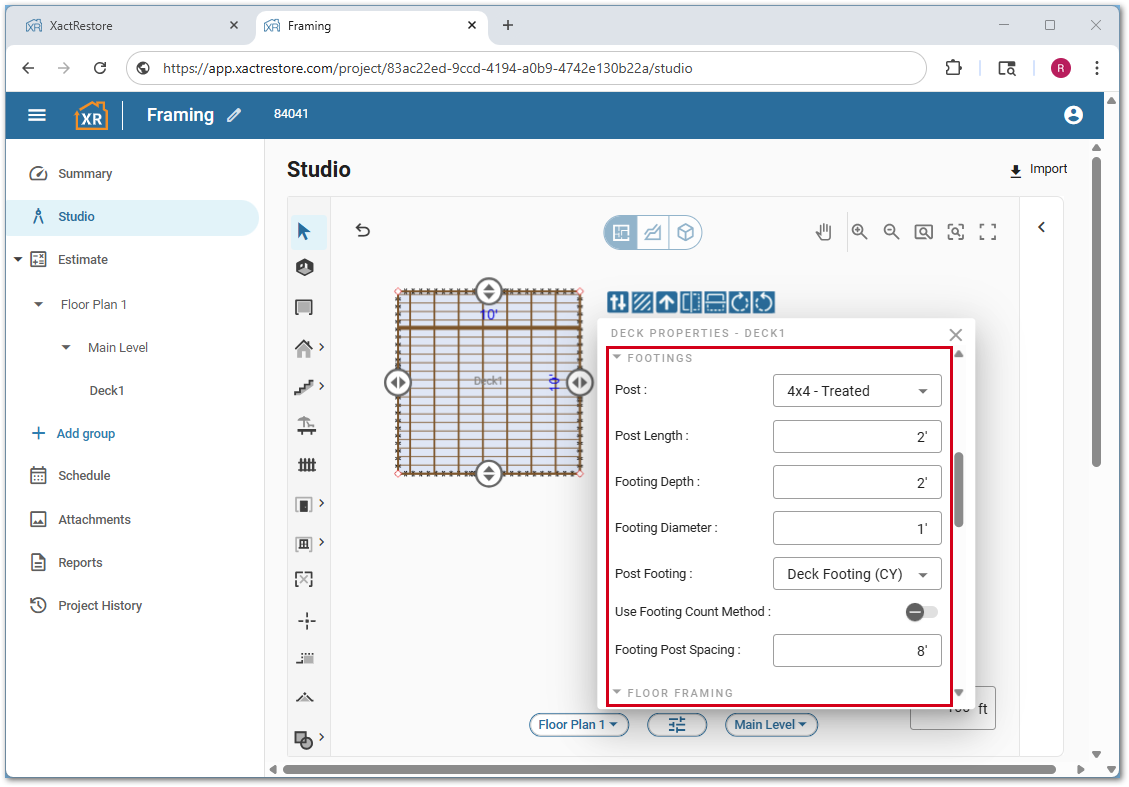
Follow the steps below to add framing to decks.
- From within Studio, select the deck(s) to frame.
- Click the properties icon.
- Select Framed in either the Deck or Railing (or both) menus.
Note: Selecting deck framing will then also offer the option to add deck footings.
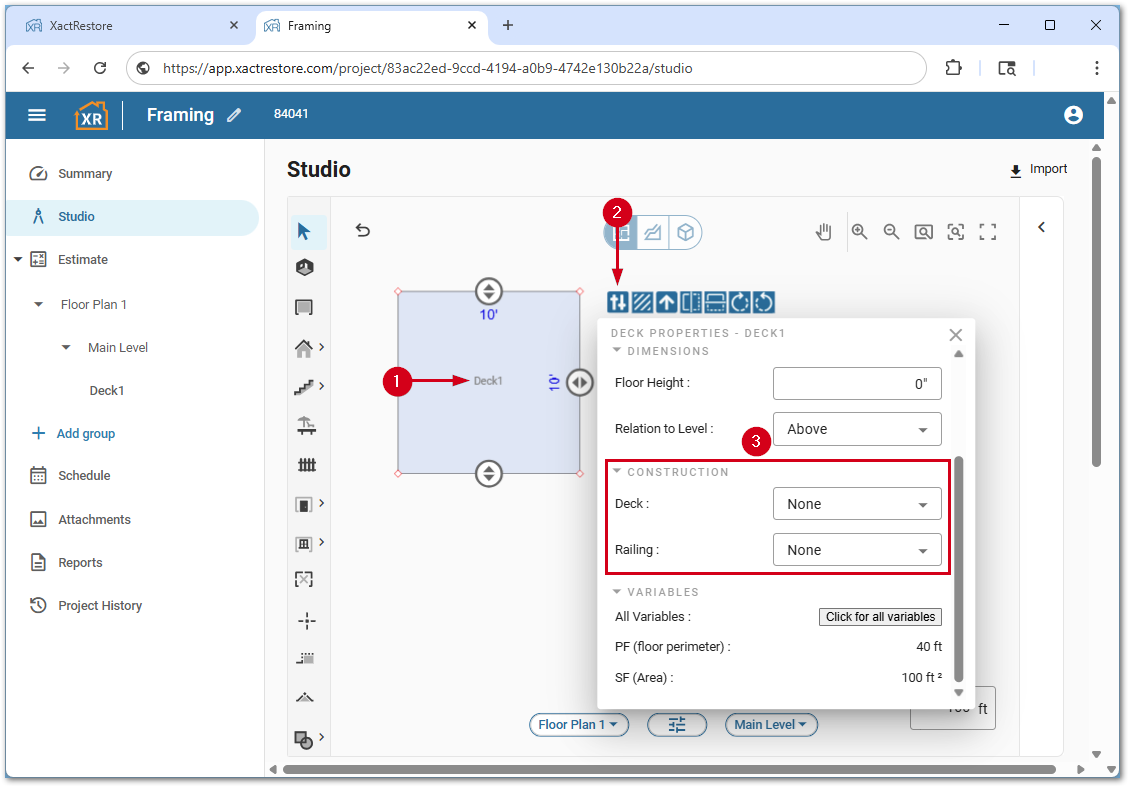
A new framing section will be added based on the option selected in step 3 where additional details can be selected.
Roofs
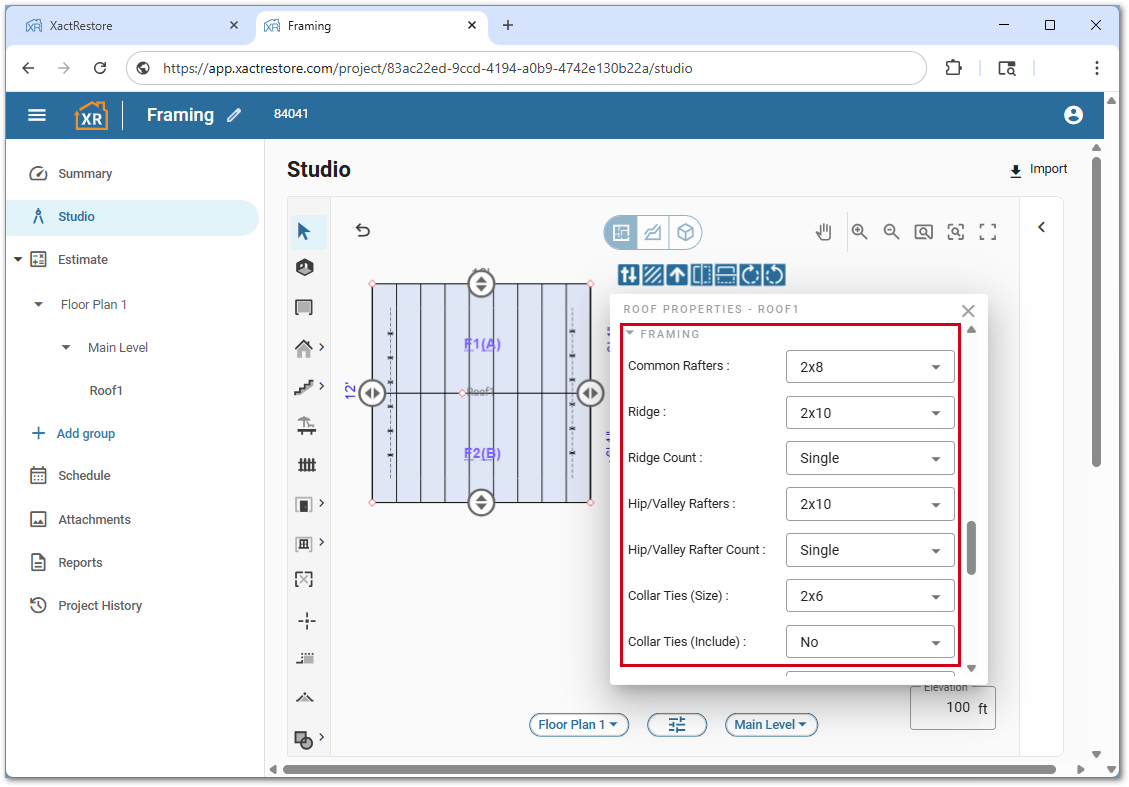
Follow the steps below to add framing to roofs.
- From within Studio, select the roof(s) to frame.
- Click the properties icon.
- Select the desired Roof Framing or Roof Wall framing option from the menu.
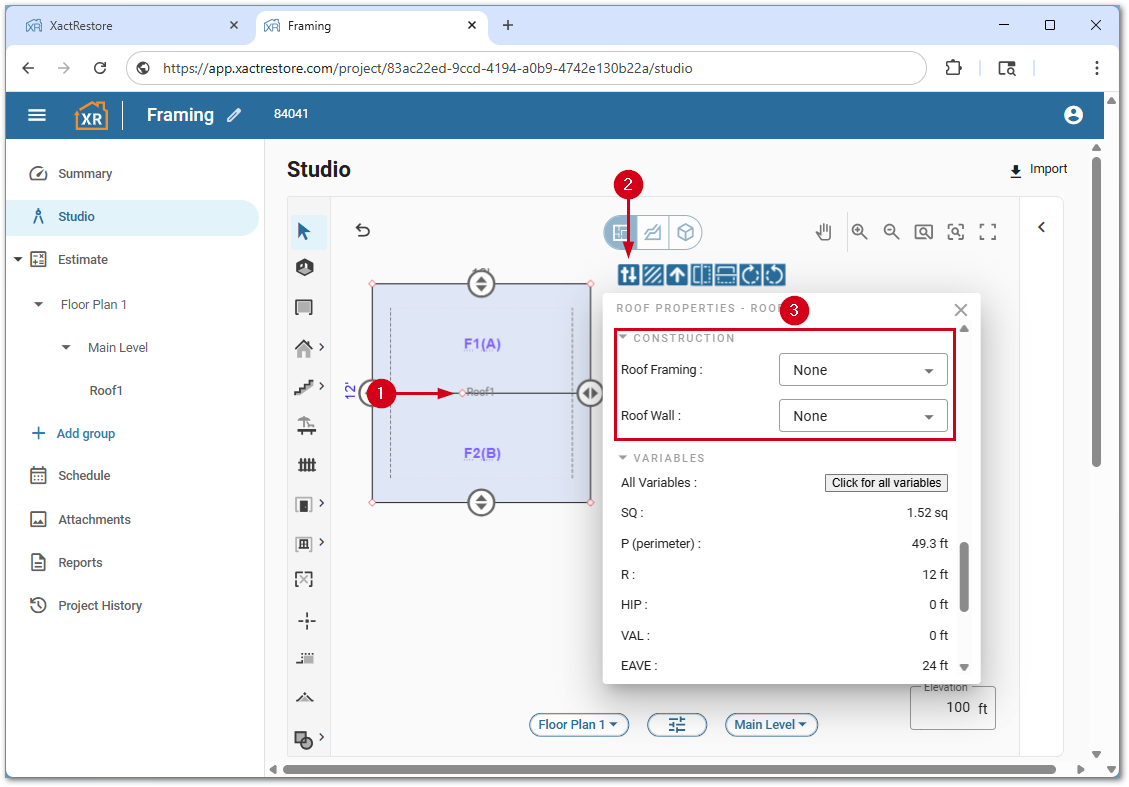
A new framing section will be added based on the option selected in step 3 where additional details can be selected.
Fences
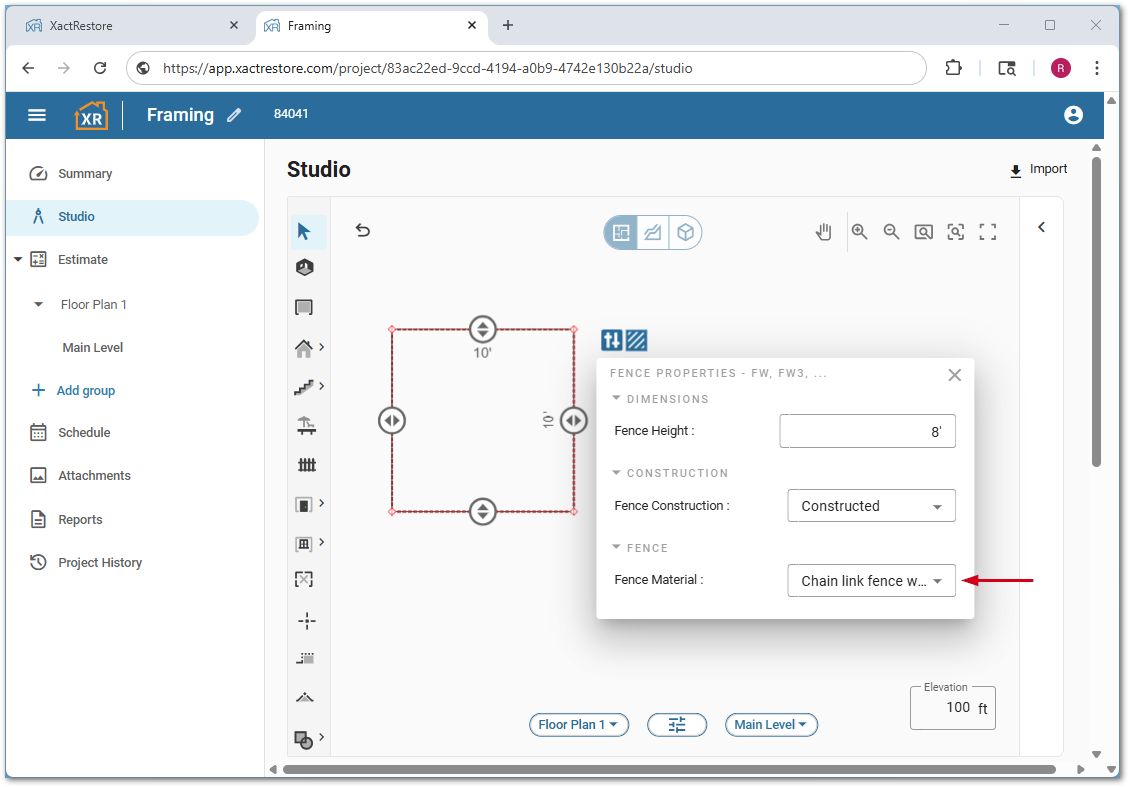
Follow the steps below to add framing to fences.
- From within Studio, select desired fence segment(s) to frame.
- Click the properties icon.
- Select Constructed in the Fence Construction menus.
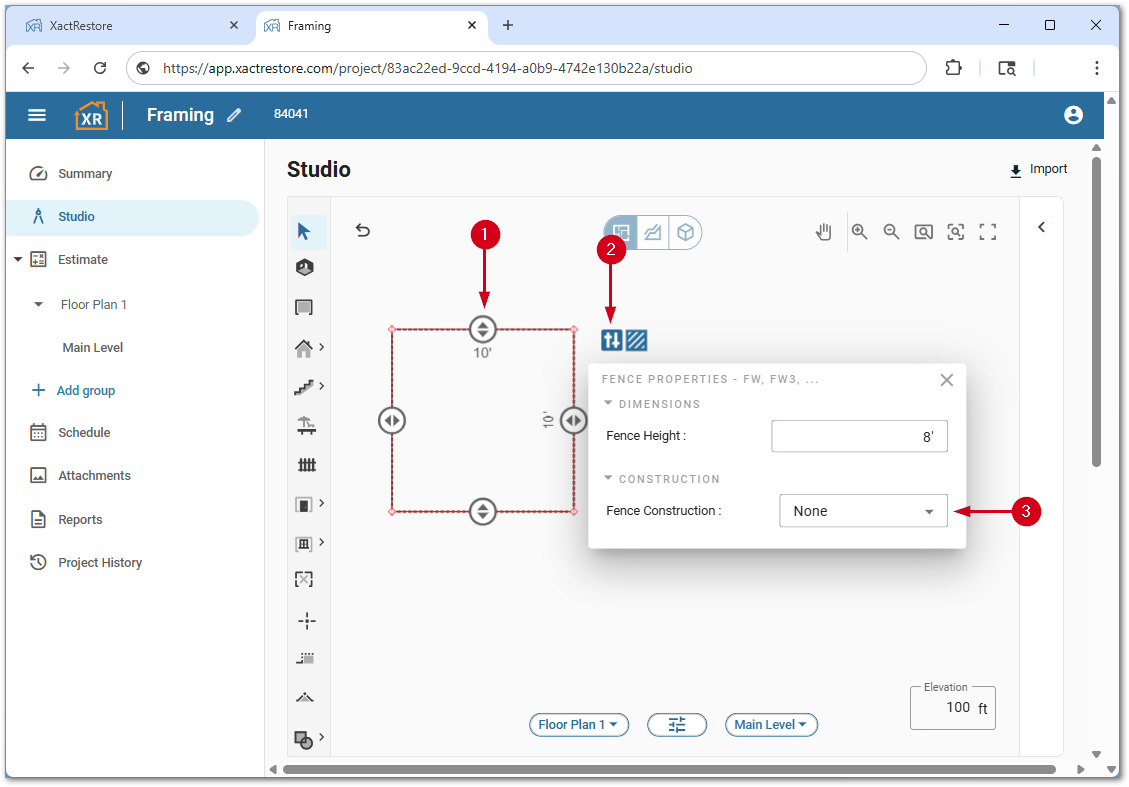
A new fence material will be added based on the option selected in step 3 where additional details can be selected.
Exterior walls
Exterior walls will first be framed using room framing. In larger sketches, where multiple framed rooms create an exterior wall, the sheathing property will not be able to be edited from the main properties menu. To edit sheathing, the exterior walls will need to be selected and edited separately from the rest of the room properties.
- From within Studio, select the exterior wall(s) to frame.
- Click the properties icon.
- Select the desired Wall or Footing framing option from the menu.
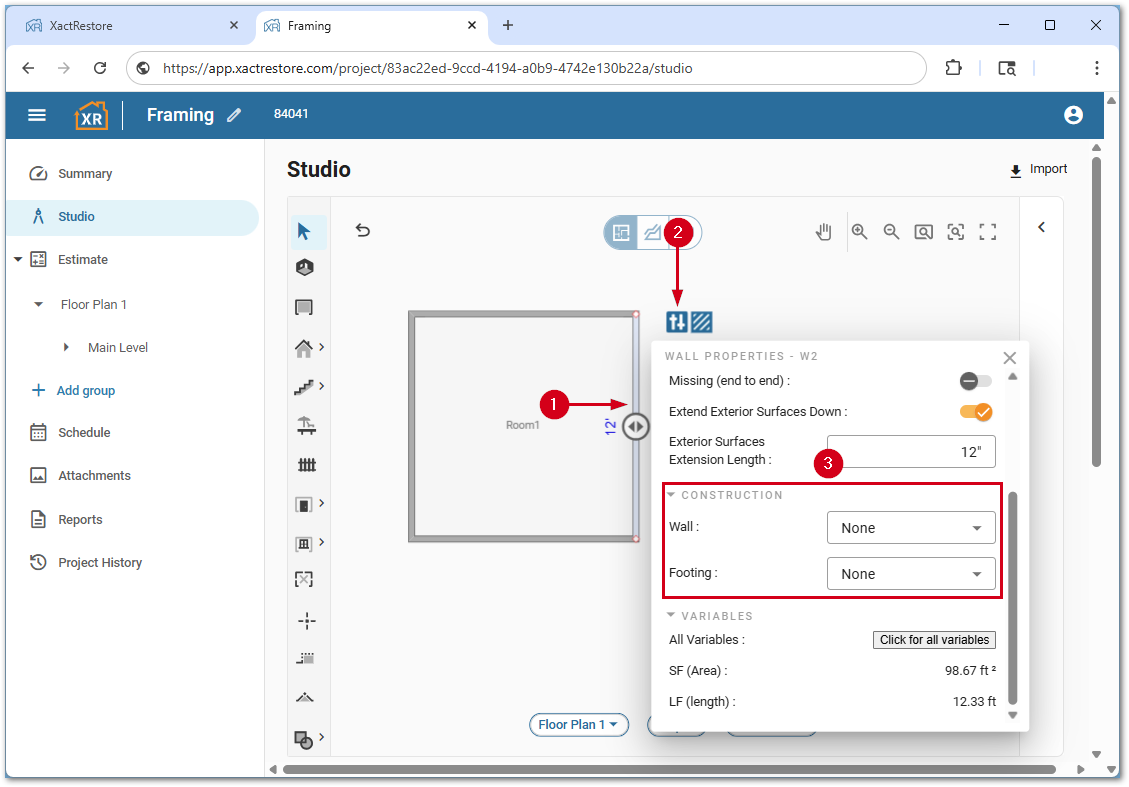
A new framing section will be added based on the option selected in step 3 where additional details can be selected.
Orientation tool for framing
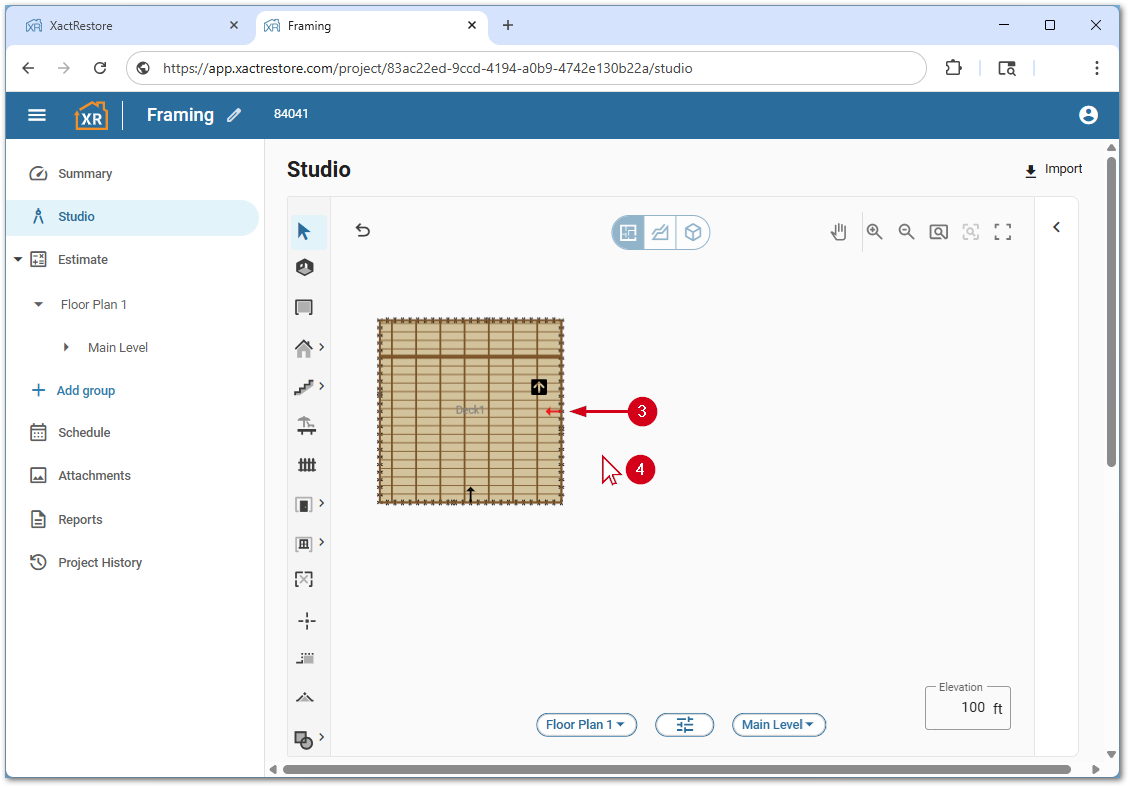
The orientation tool allows the flooring, deck, or roofing framing to be oriented in a different direction if needed.
- Select the desired framed item.
- Click the orientation tool.
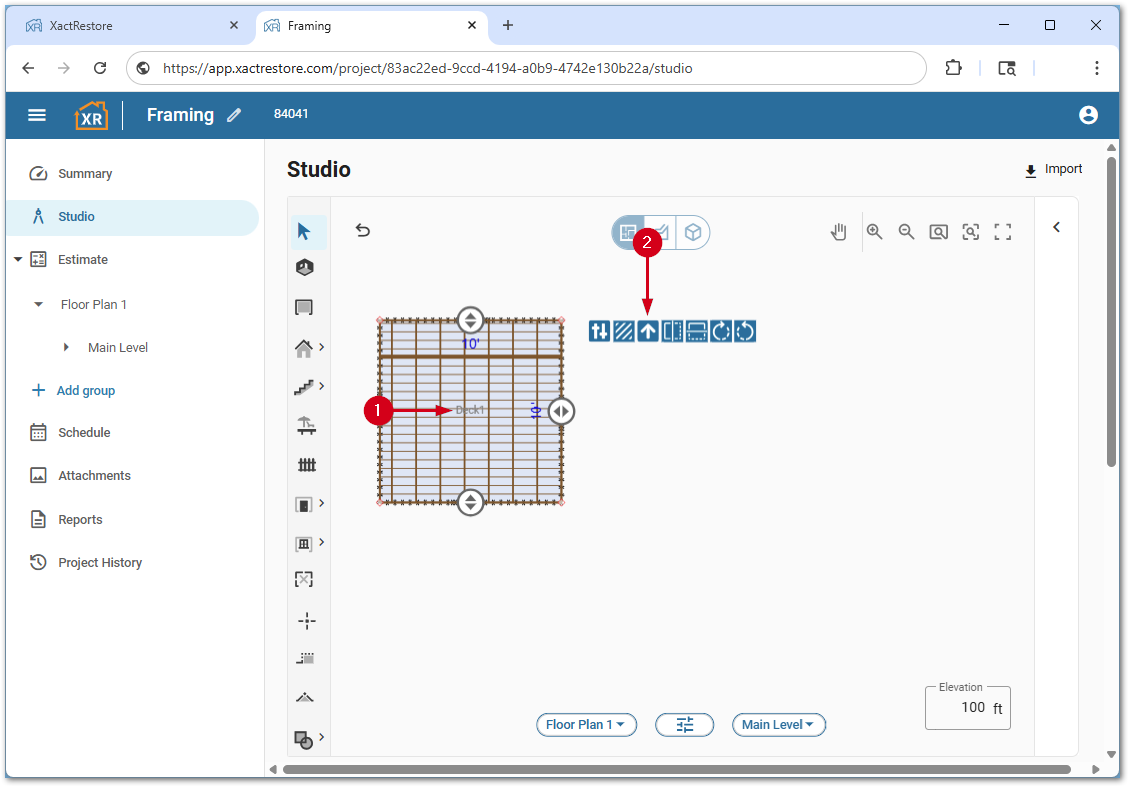
- Hover the cursor over the wall perpendicular to the direction the framing should run.
Note: As the cursor hovers, red arrows will appear to indicate the direction.
- Click the cursor. This will change the orientation of the framing.
