Manage photos in Proposal reports
Photo attachments, as well as Studio sketches, are shown in the Proposal report by default. Options are available to hide certain photos or hide all photos and Studio sketches.
XactRemodel and XactRestore online
Show or hide specific photos
Follow the steps below to show or hide specific photos in the Proposal report in XactRemodel and XactRestore online.
Note: By default, photos are set as visible when first uploaded. The steps below show how to hide them. The process is similar to making a hidden photo visible again.
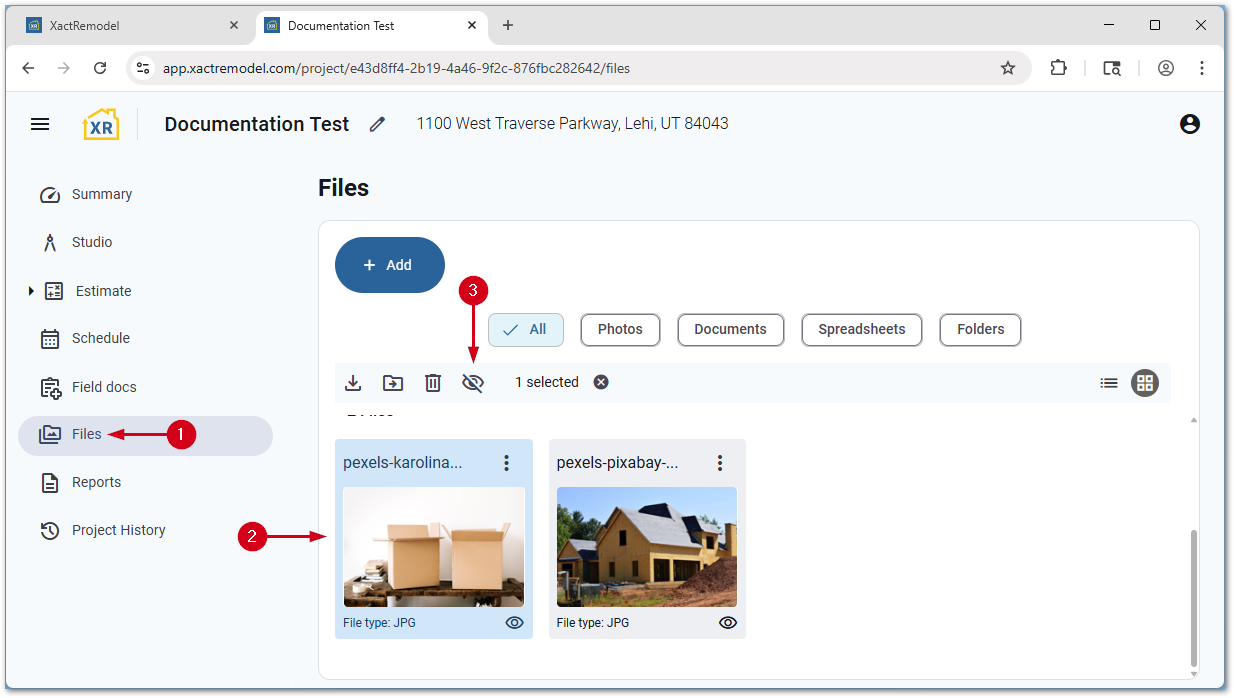
- Within a project, select Files.
- Select the photo(s) to hide from the Proposal report.
Note: Visible photos show an eye icon next to the file type, while hidden images show an eye icon with a line through it.
- Select the Exclude images from reports icon.
Show or hide all photos
You can use a setting in the proposal report to show or hide photos in XactRemodel and XactRestore online.
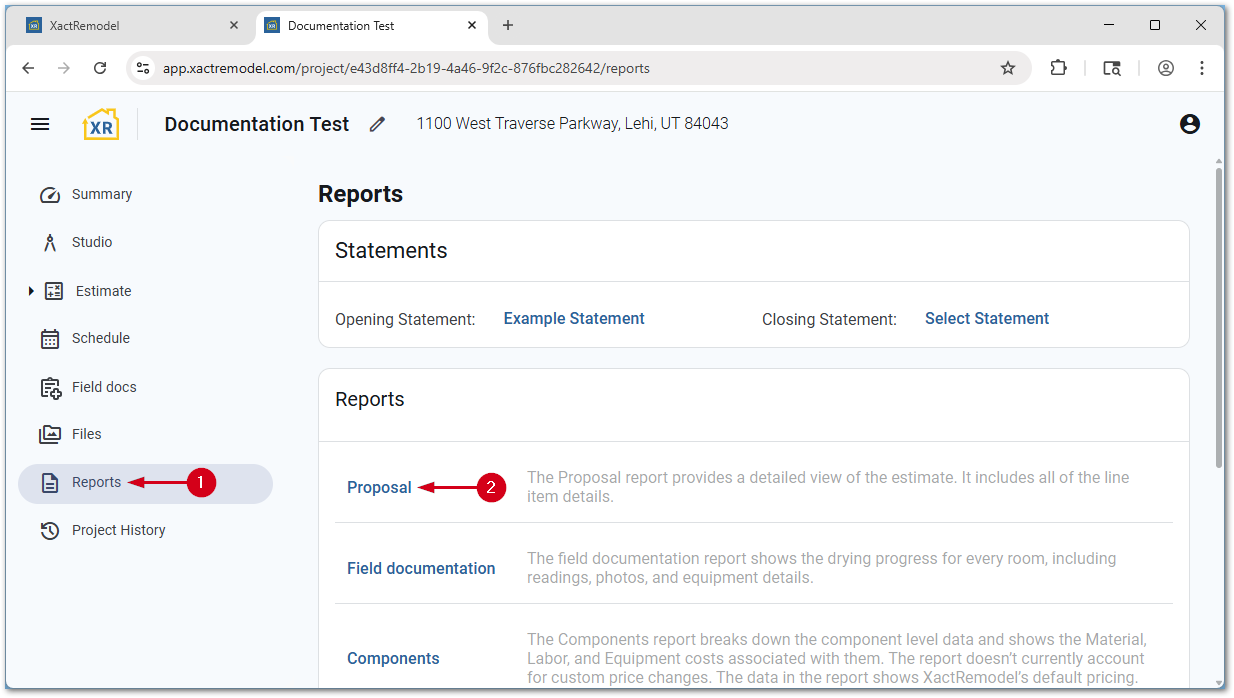
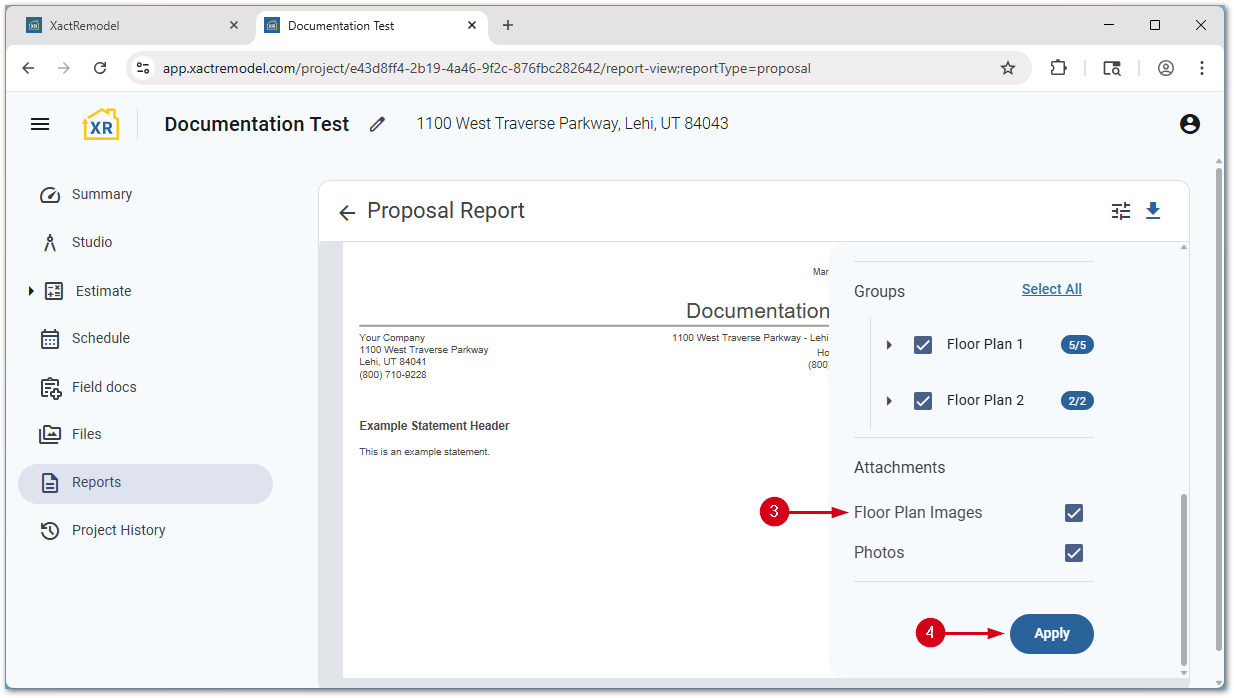
- Within a project, select Reports.
- Select Proposal.
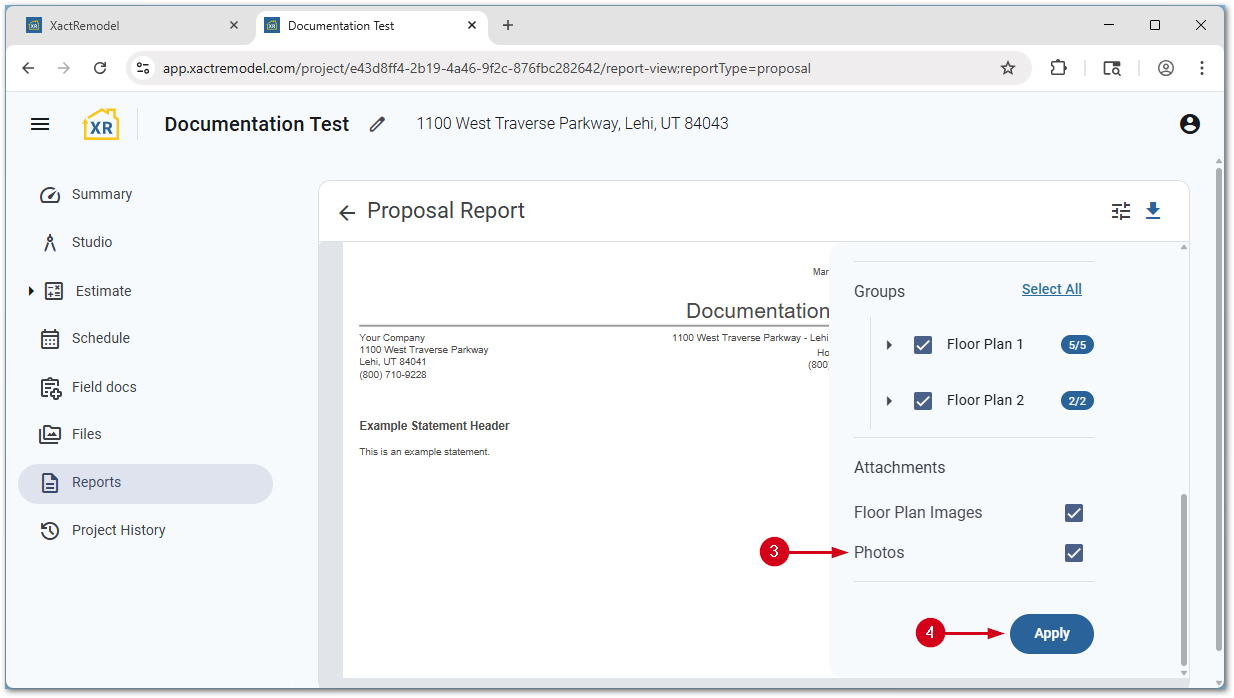
- In the setting slide out, select or unselect Photos.
Note: If the slide out is not visible, select the menu icon in the top right corner.
- Select Apply. The report regenerates showing or hiding the photos.
Show or hide Studio sketches
You can choose to show all floor plan images or hide them all; individual selection isn't available.
- Within a project, select Reports.
- Select Proposal.
- In the setting slide out, select or unselect Floor Plan Images.
Note: If the slide out is not visible, select the menu icon in the top right corner.
- Select Apply. The report regenerates showing or hiding the floor plan images.
XR Mobile
Show or hide specific photos
Follow the steps below to show or hide specific photos in the Proposal report in XR Mobile.
Note: By default, photos are set as visible when first uploaded. The steps below show how to hide them. The process is similar to mark a hidden photo as visible again.
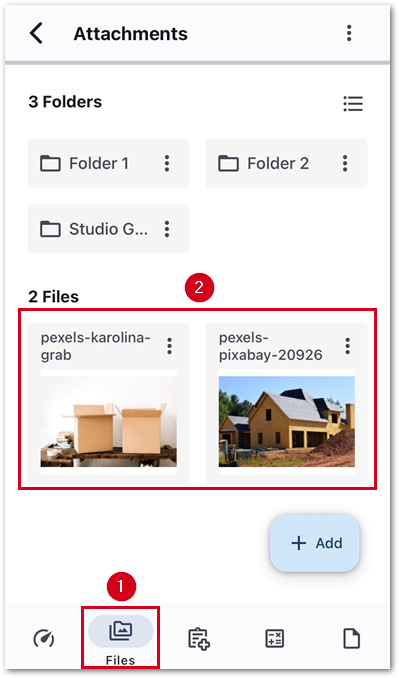
- Within a project, select Files.
- Select a photo to show or hide on reports.
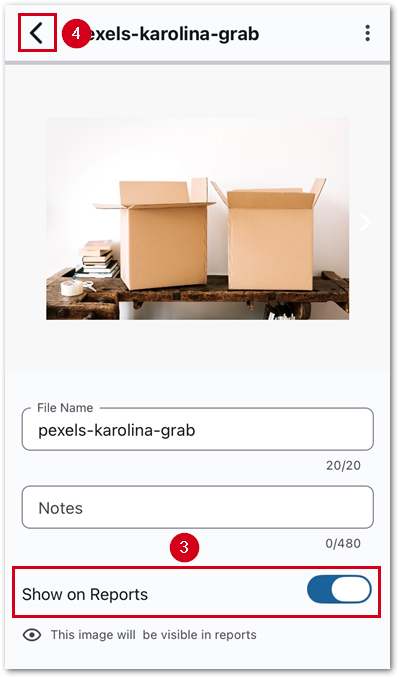
- Switch on or switch off Show on Reports.
- Select the back arrow to save and return to the files section.
Note: To quickly navigate to another photo, swipe left or right to be taken to the next photo instead of selecting the back icon.
Show or hide all photos
A setting within the Proposal report can quickly show all photos set to show on reports or hide all photos in XR Mobile.
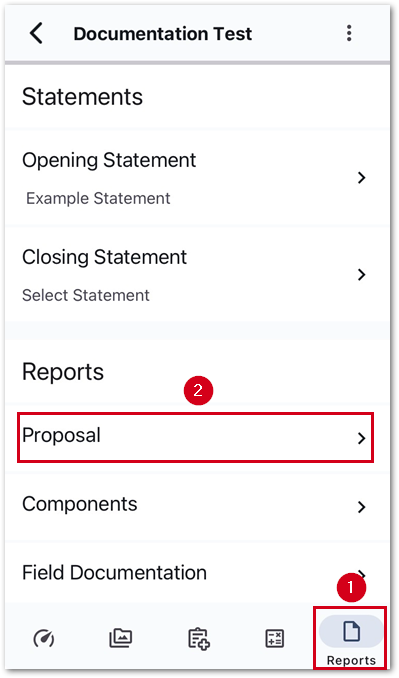
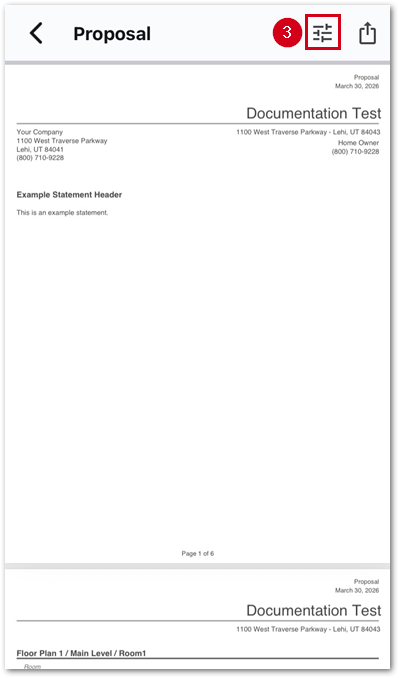
- Within a project, select Reports.
- Select Proposal.
- Select the menu icon.
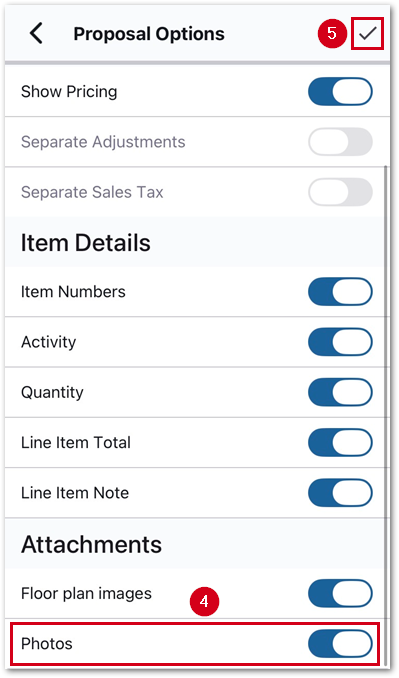
- Switch on or switch off Photos.
- Select the checkmark icon to save. The report regenerates after the menu closes.
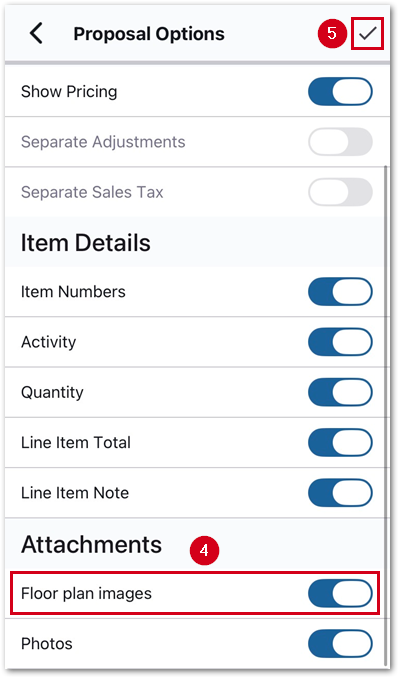
Show or hide Studio sketches
Floor plan images are only able to be set to show all or none of them in XR Mobile.
- Within a project, select Reports.
- Select Proposal.
- Select the menu icon.
- Switch on or switch off Floor plan images.
- Select the checkmark icon to save. The report regenerates after the menu closes.