Getting Started
Frequently Asked Questions (FAQ)
System Requirements
Company Info
Add Company Markup
My Pricing
Line Item and Pricing Data
Create Report Statements
Create a Project
Contact Support
XactRemodel subscription levels
XactRemodel Mobile App
Unable to view Quick Estimates
Admin Users Control
Accounts and Contacts
Manage client and vendor Accounts in XactRemodel
Manage Contacts in XactRemodel
Associate projects with Accounts in XactRemodel
Projects
Project Overview
Project Summary
Duplicate a Project
Reprice an Estimate
Sending Projects to Direct Supplier
XactRemodel Mobile: Import Contacts
Project History
Restoring Deleted Projects
Groups
Line Items
Studio
Getting Started
About Studio
Share floor plan in XactRemodel
Building an Estimate
Import image as underlay
Level Properties
Multiple Floor Plans in Studio
Reference Objects
Tools
View Levels in 3D
Working with Levels
3D View
Rename a sketch in XactRemodel and XactRestore Studio
Framing in Studio
Rooms
Openings
Roofs
Add line items from within Studio
Scheduling
Schedule Work Week Setup
Adding Tasks to your Project Schedule
Company Schedule
Task Report in Scheduling
Schedule Views
Creating a Project Schedule with Auto-Scheduling
Attachments
Manage attachments in Proposal reports
Manage photos and documents in XactRemodel and XactRestore
Attachments
Reports
Integrations
Release Notes
January 2025 New Features
Upcoming Features
November 2024 New Features
June 2024 New Features
February 2024 New Features
2023 Release Notes
November 2023 New Features
September 2023 New Features
XactRemodel PRO Release
November 2025 New Features
Account management
How do I cancel or change my subscription?
Account Deletion
Subscribe to XactRemodel
Updating Account Info
Transferring from XactRemodel Desktop
Import projects from XactRemodel desktop
Transfer data from XactRemodel Desktop to Xactimate
Back up your data in XactRemodel Desktop
XactRestore
Field docs
Field docs - Admin
Field docs initial job setup
Add levels in Field docs
Add rooms in Field docs
Add equipment in Field docs
Reporting in Field docs
Field Docs completion and final review
Take daily readings in Field docs
Pick up equipment in Field docs
XactRestore now available!
Set project dates
Type of Loss
Import Xactimate estimates (ESX) in to XactRemodel and XactRestore
Manage users and roles in XactRemodel and XactRestore
Lead creation in XactRestore Pro
Adjustments in XactRemodel and XactRestore
- All Categories
- Studio
- Getting Started
- Building an Estimate
Building an Estimate
Updated
by Seth
In addition to creating floor plans, estimates can be created in XactRemodel Studio. The estimate is built by attaching line items to elements in Studio.
Line items
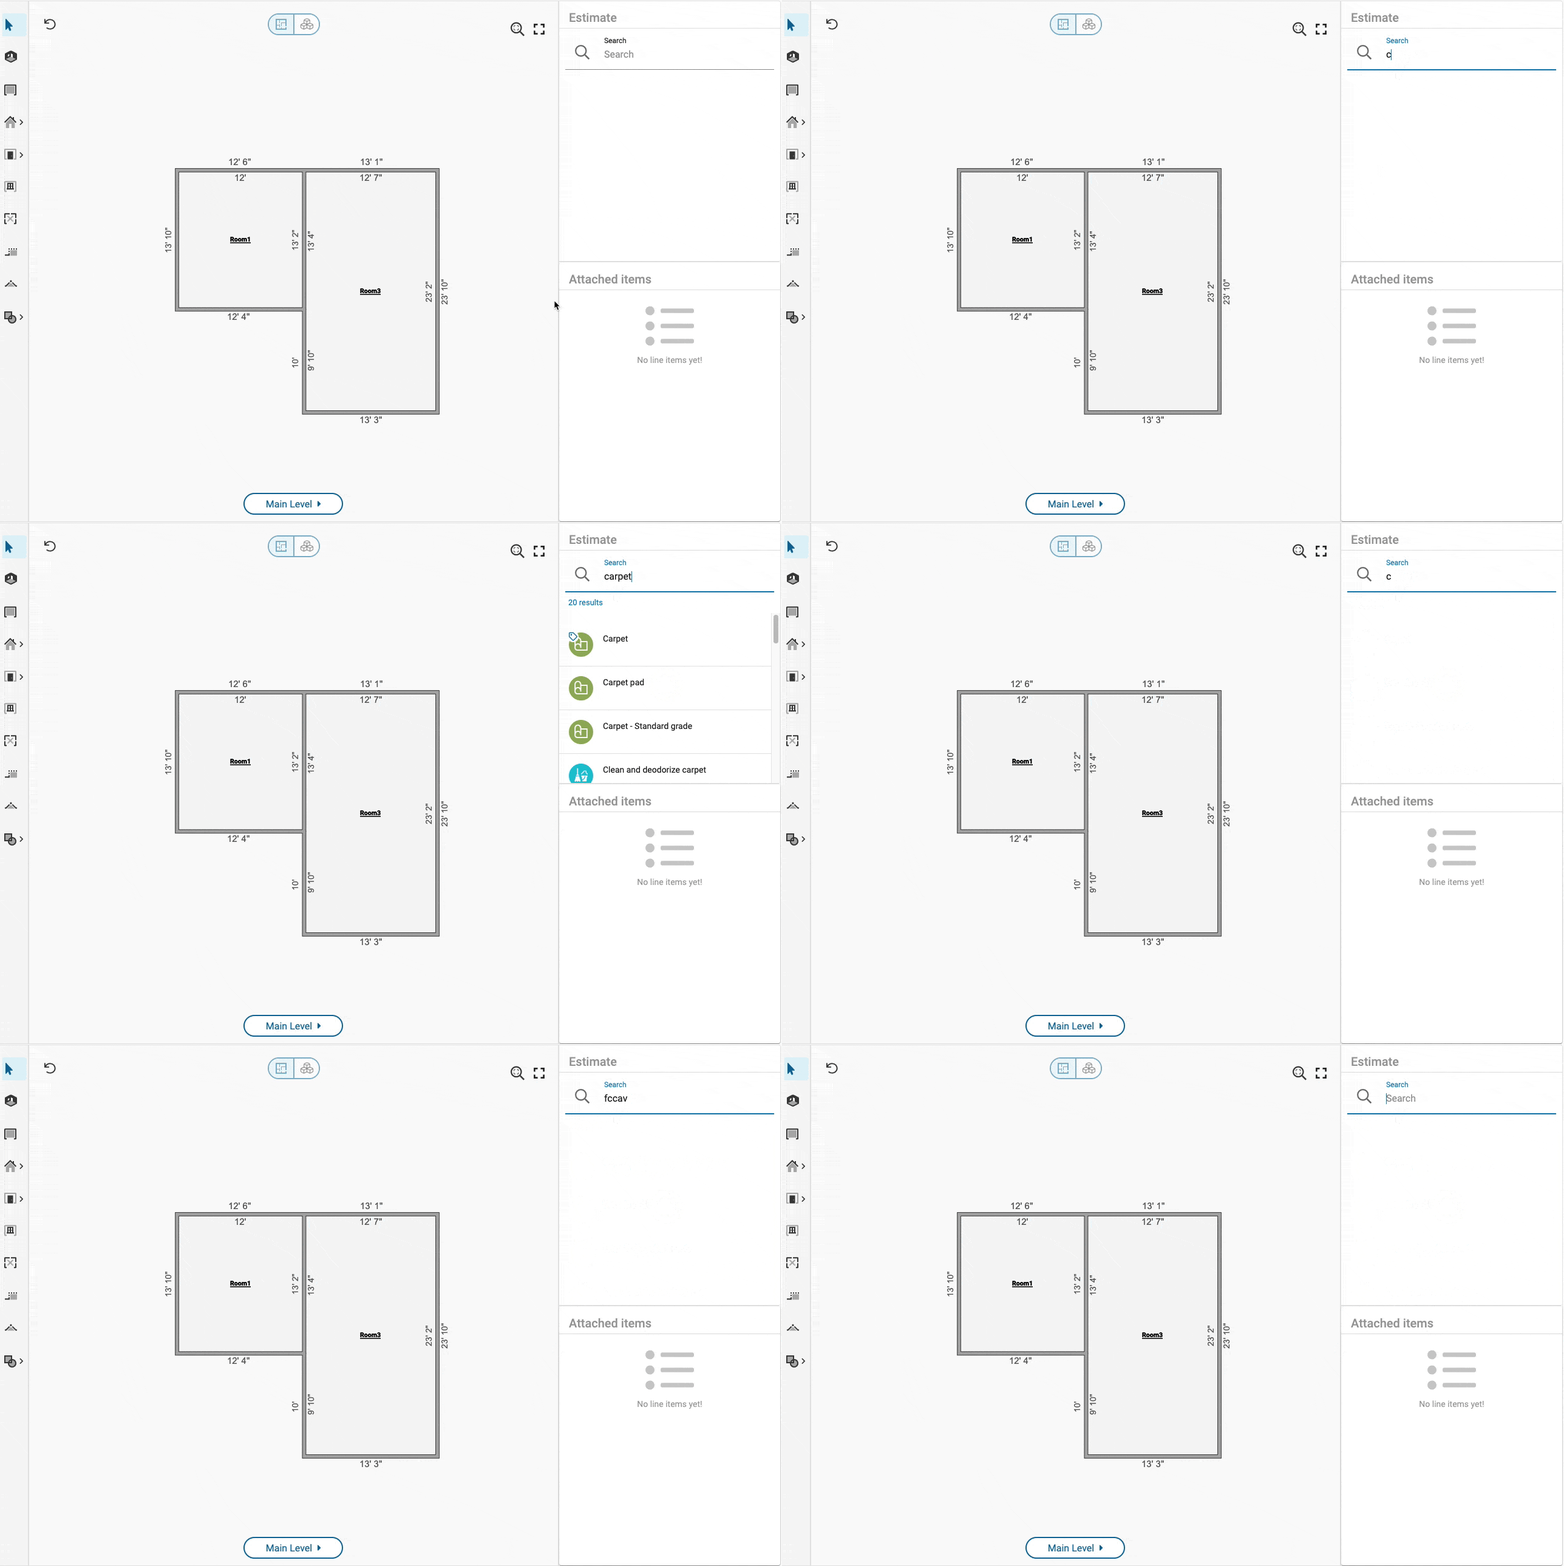
Search
Line item search works by typing keywords or the category and selector codes for items.
Adding items
When line items are added to the floor plan, the line item quantity is based on the dimensions of the floor plan.
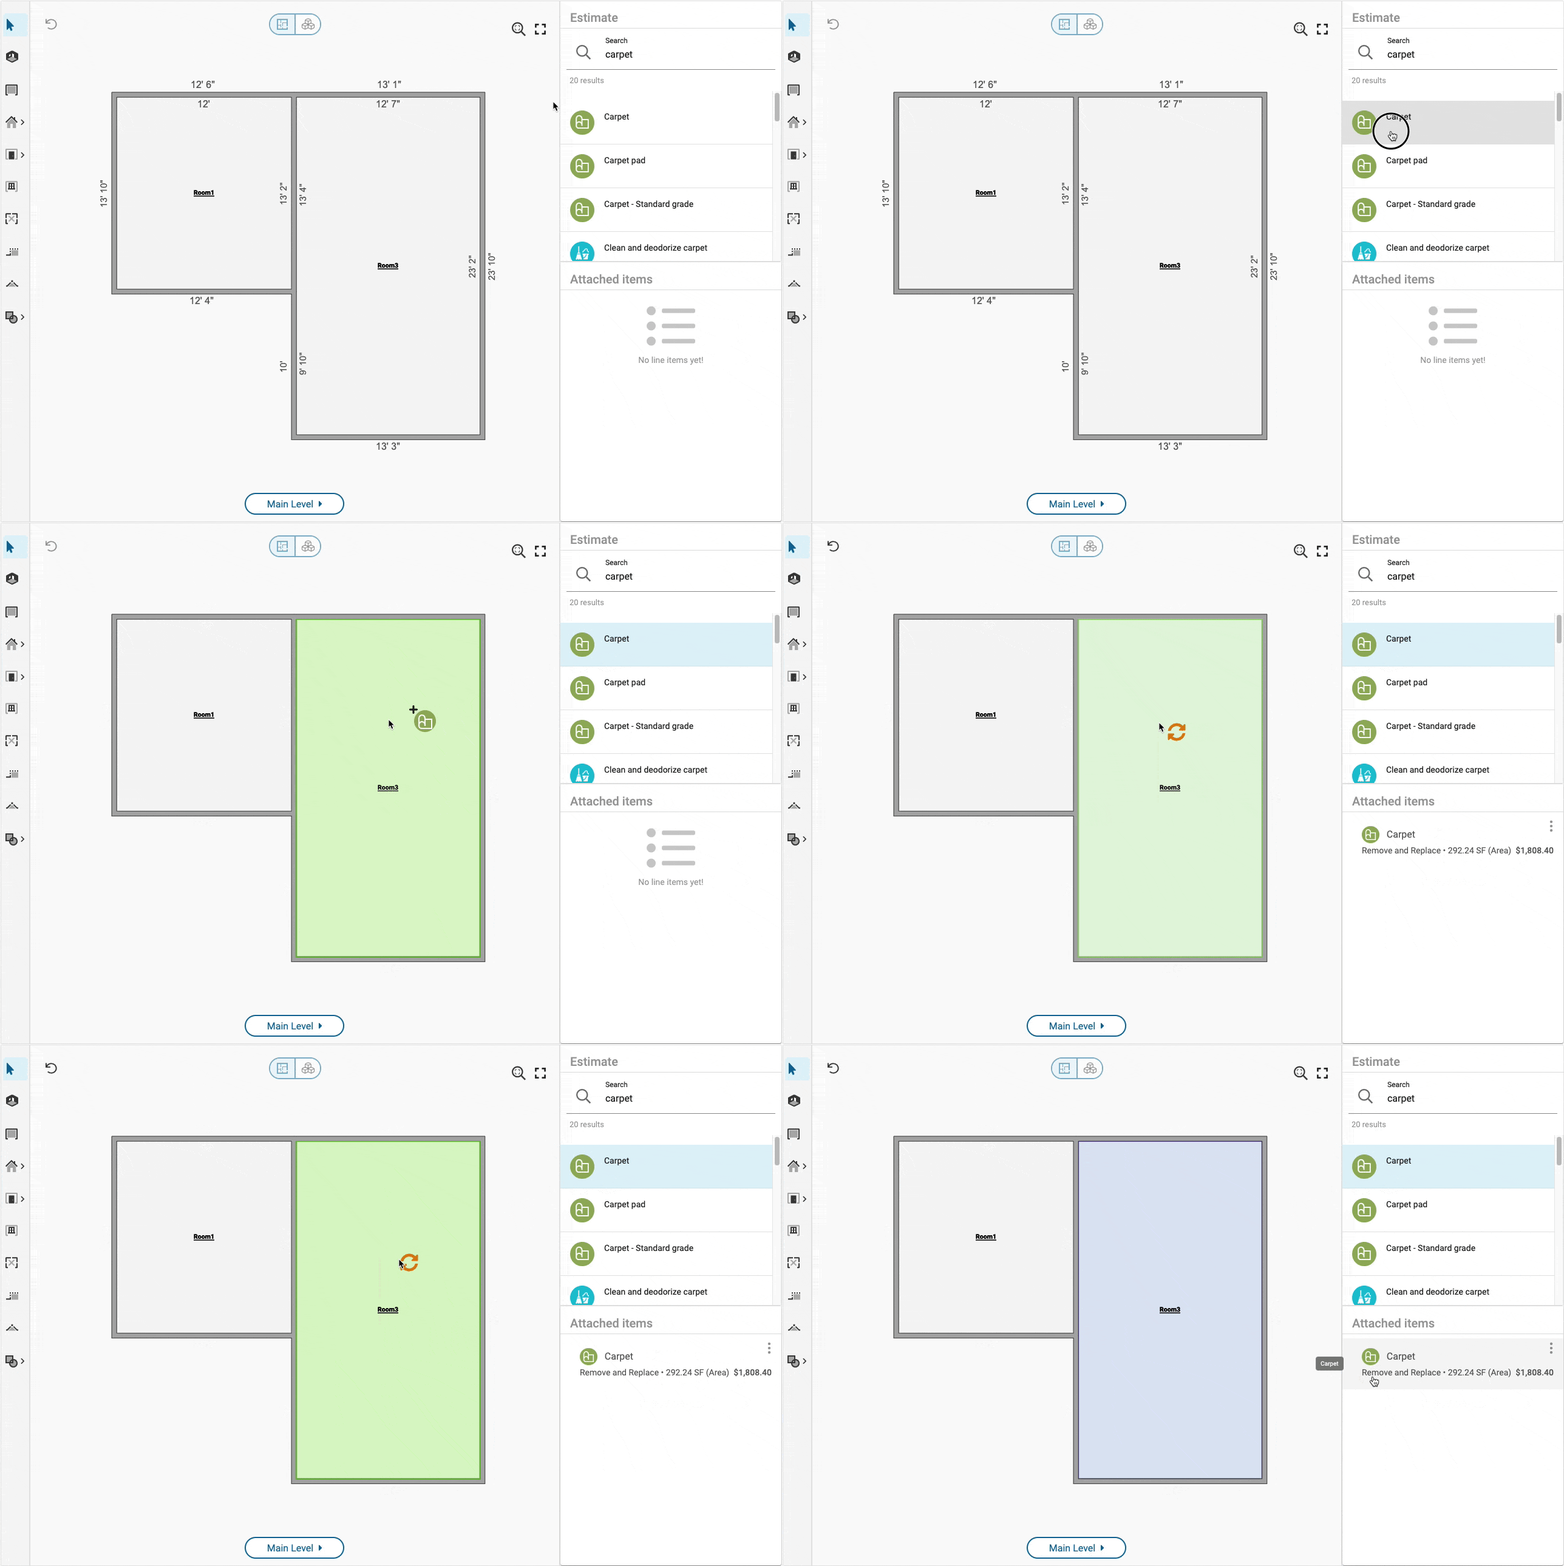
To add line items to a floor plan,
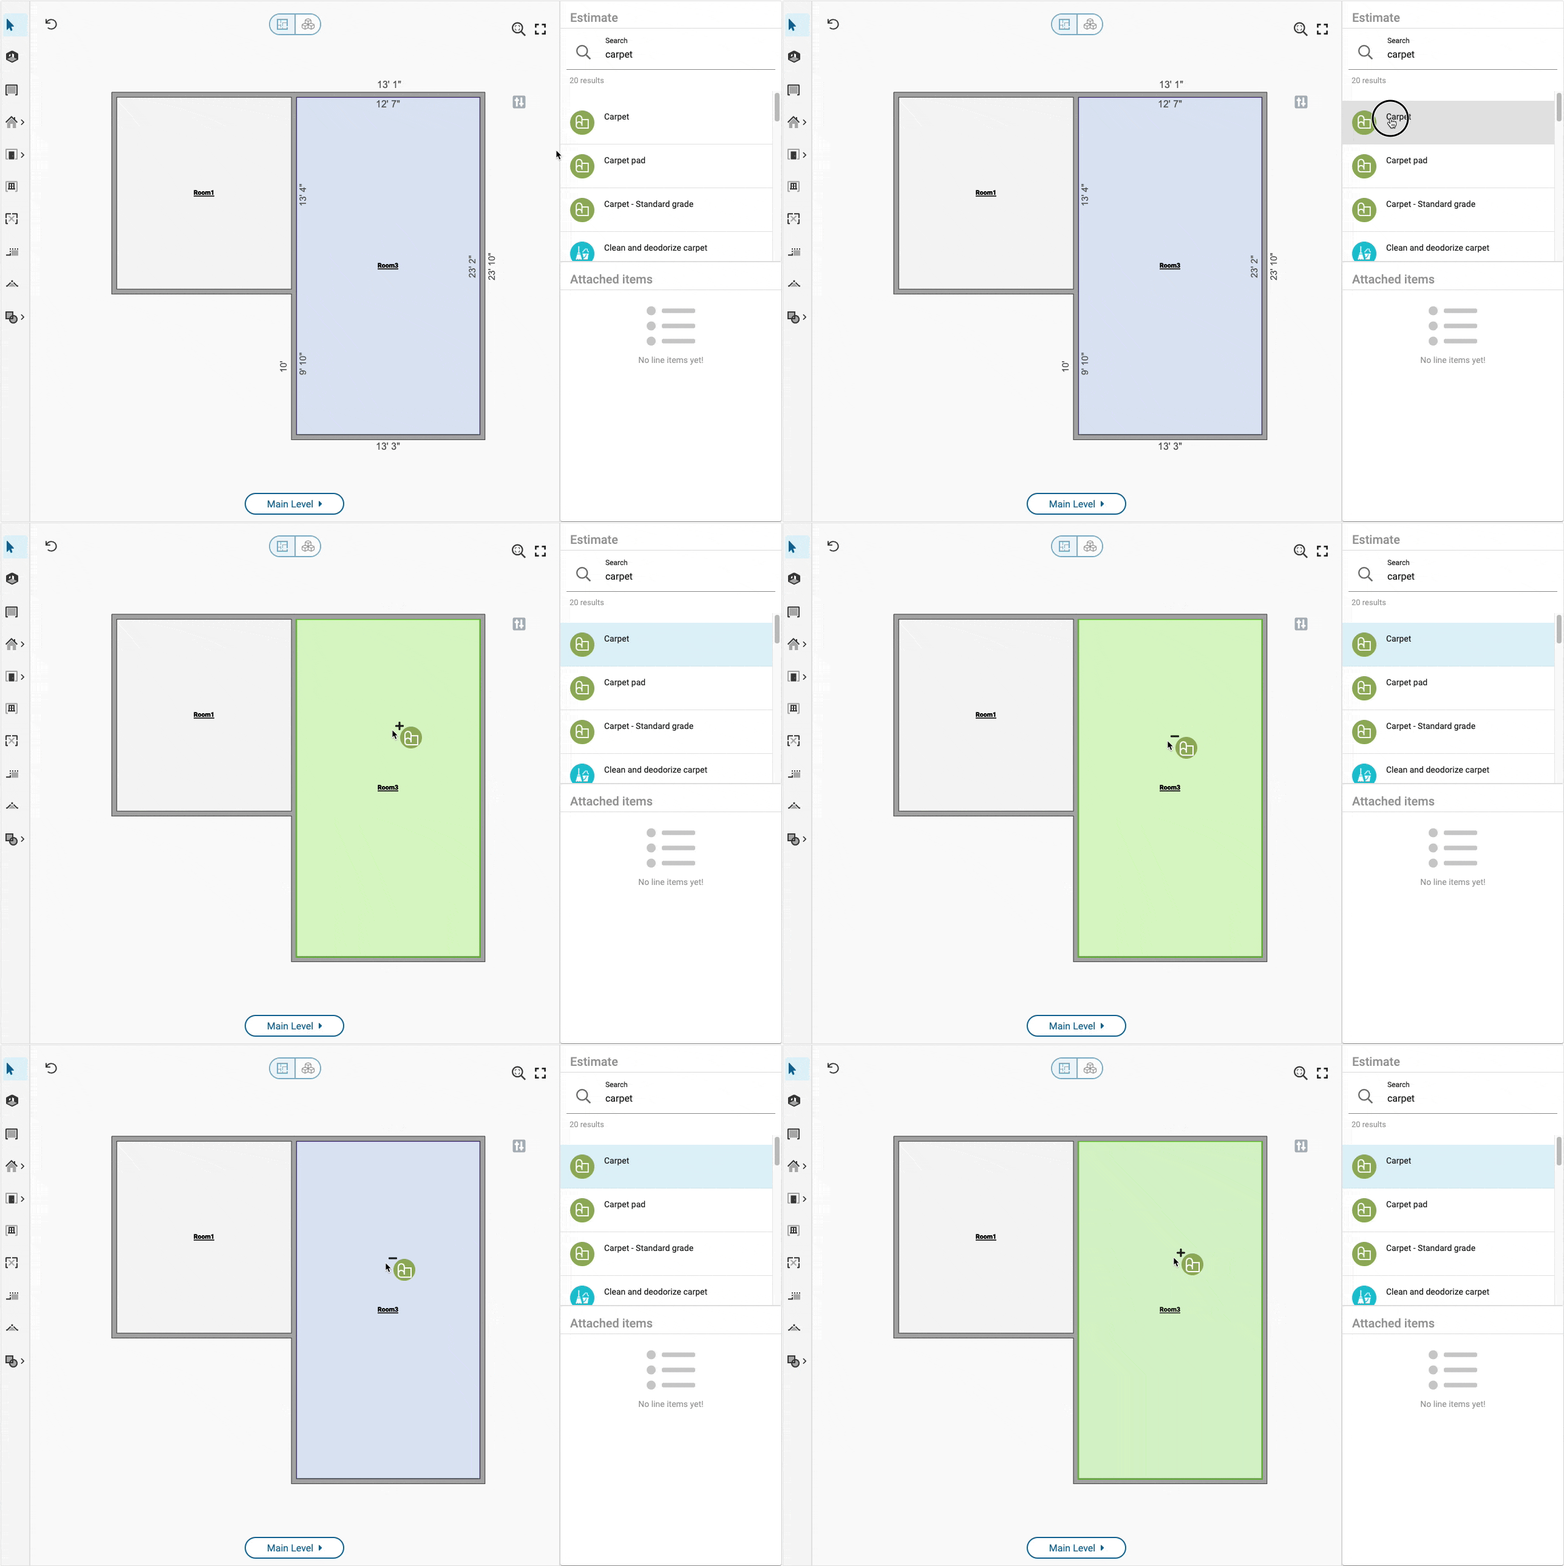
- Select a line item from the search results by clicking on the line item. This will activate the cursor with the selected line item.
- Hover over the target element. Elements that allow for attaching the line item will highlight when the cursor hovers over it.
- Left-click to place the line item on the target element.
- Press ESC or select another tool to confirm and save the changes.
Adding items with symbols
When adding items you will notice that some items, such as a toilet or a fan, are represented in studio with a green outlined image called a symbol. Add these items the same as any other item.
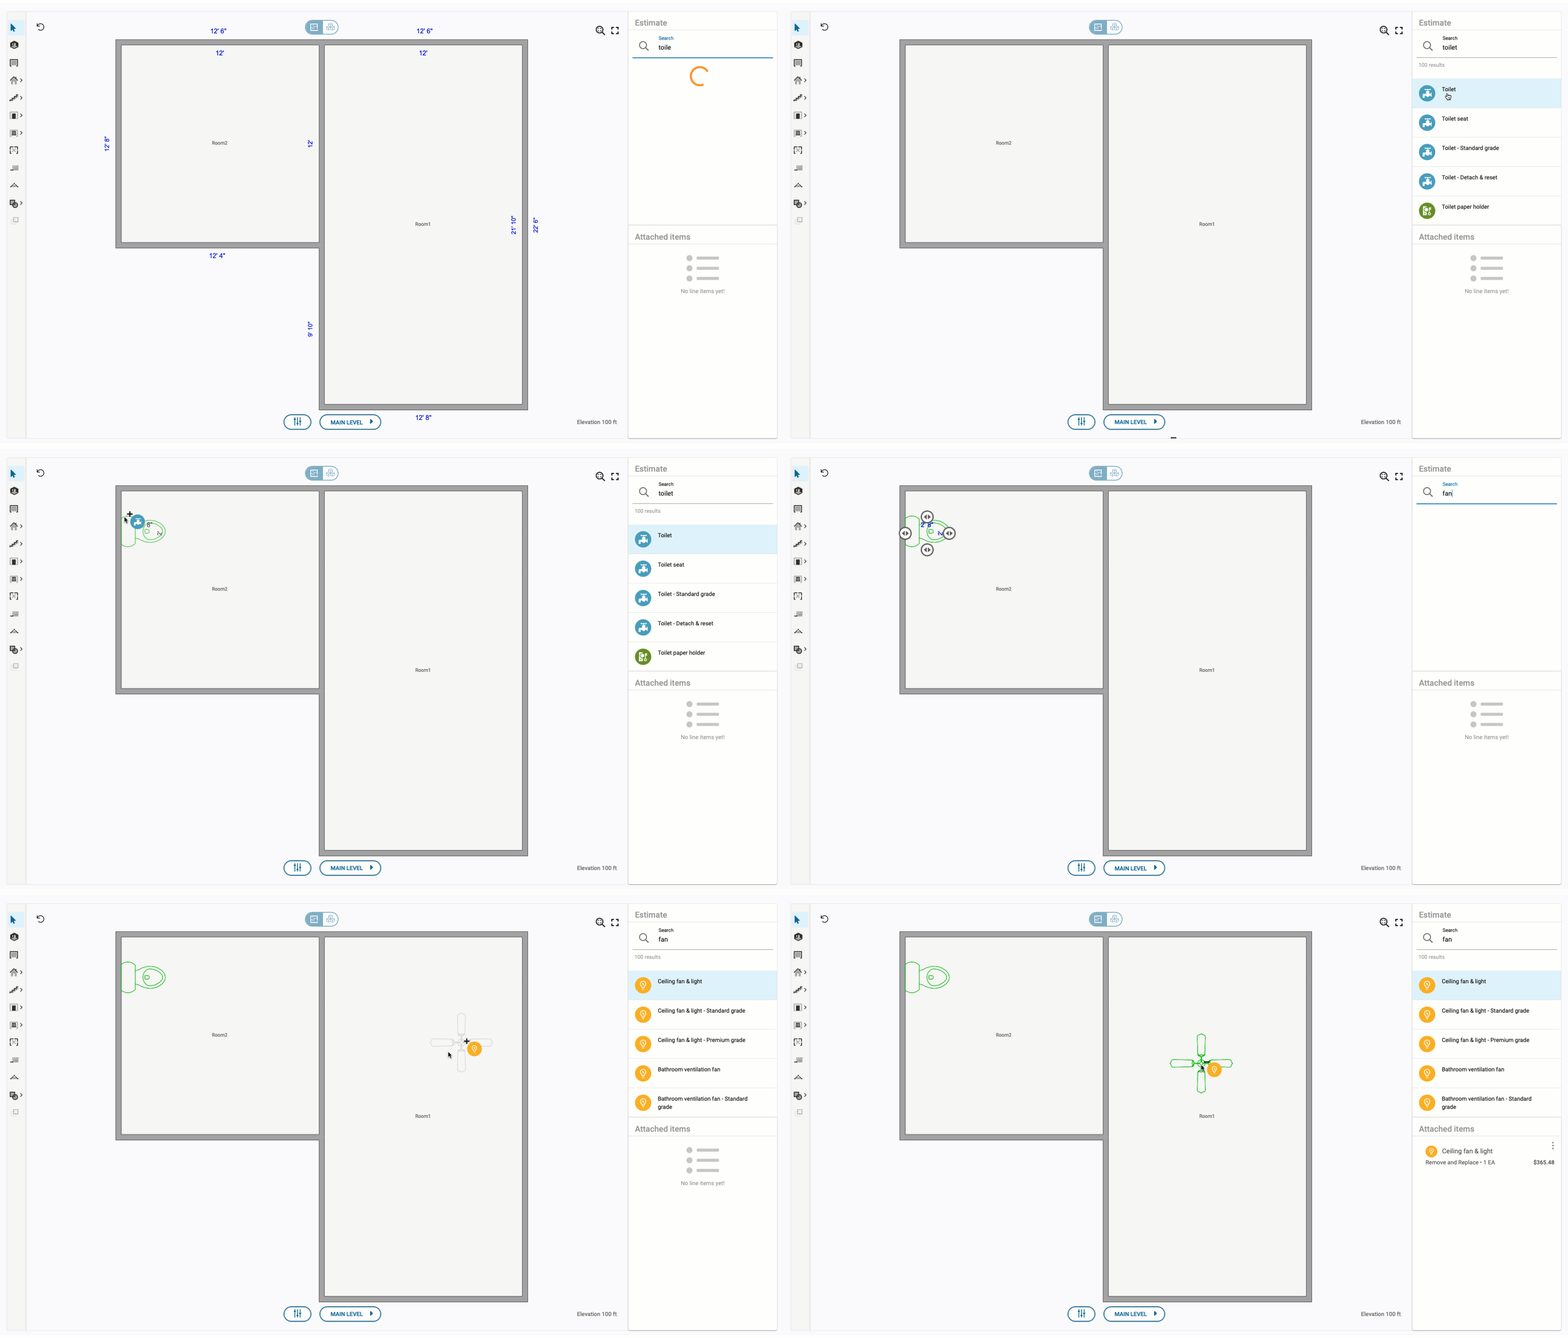
To view the attached items, select a room or other element in Studio. The attached items are displayed in the Attached items list.
Deleting line items
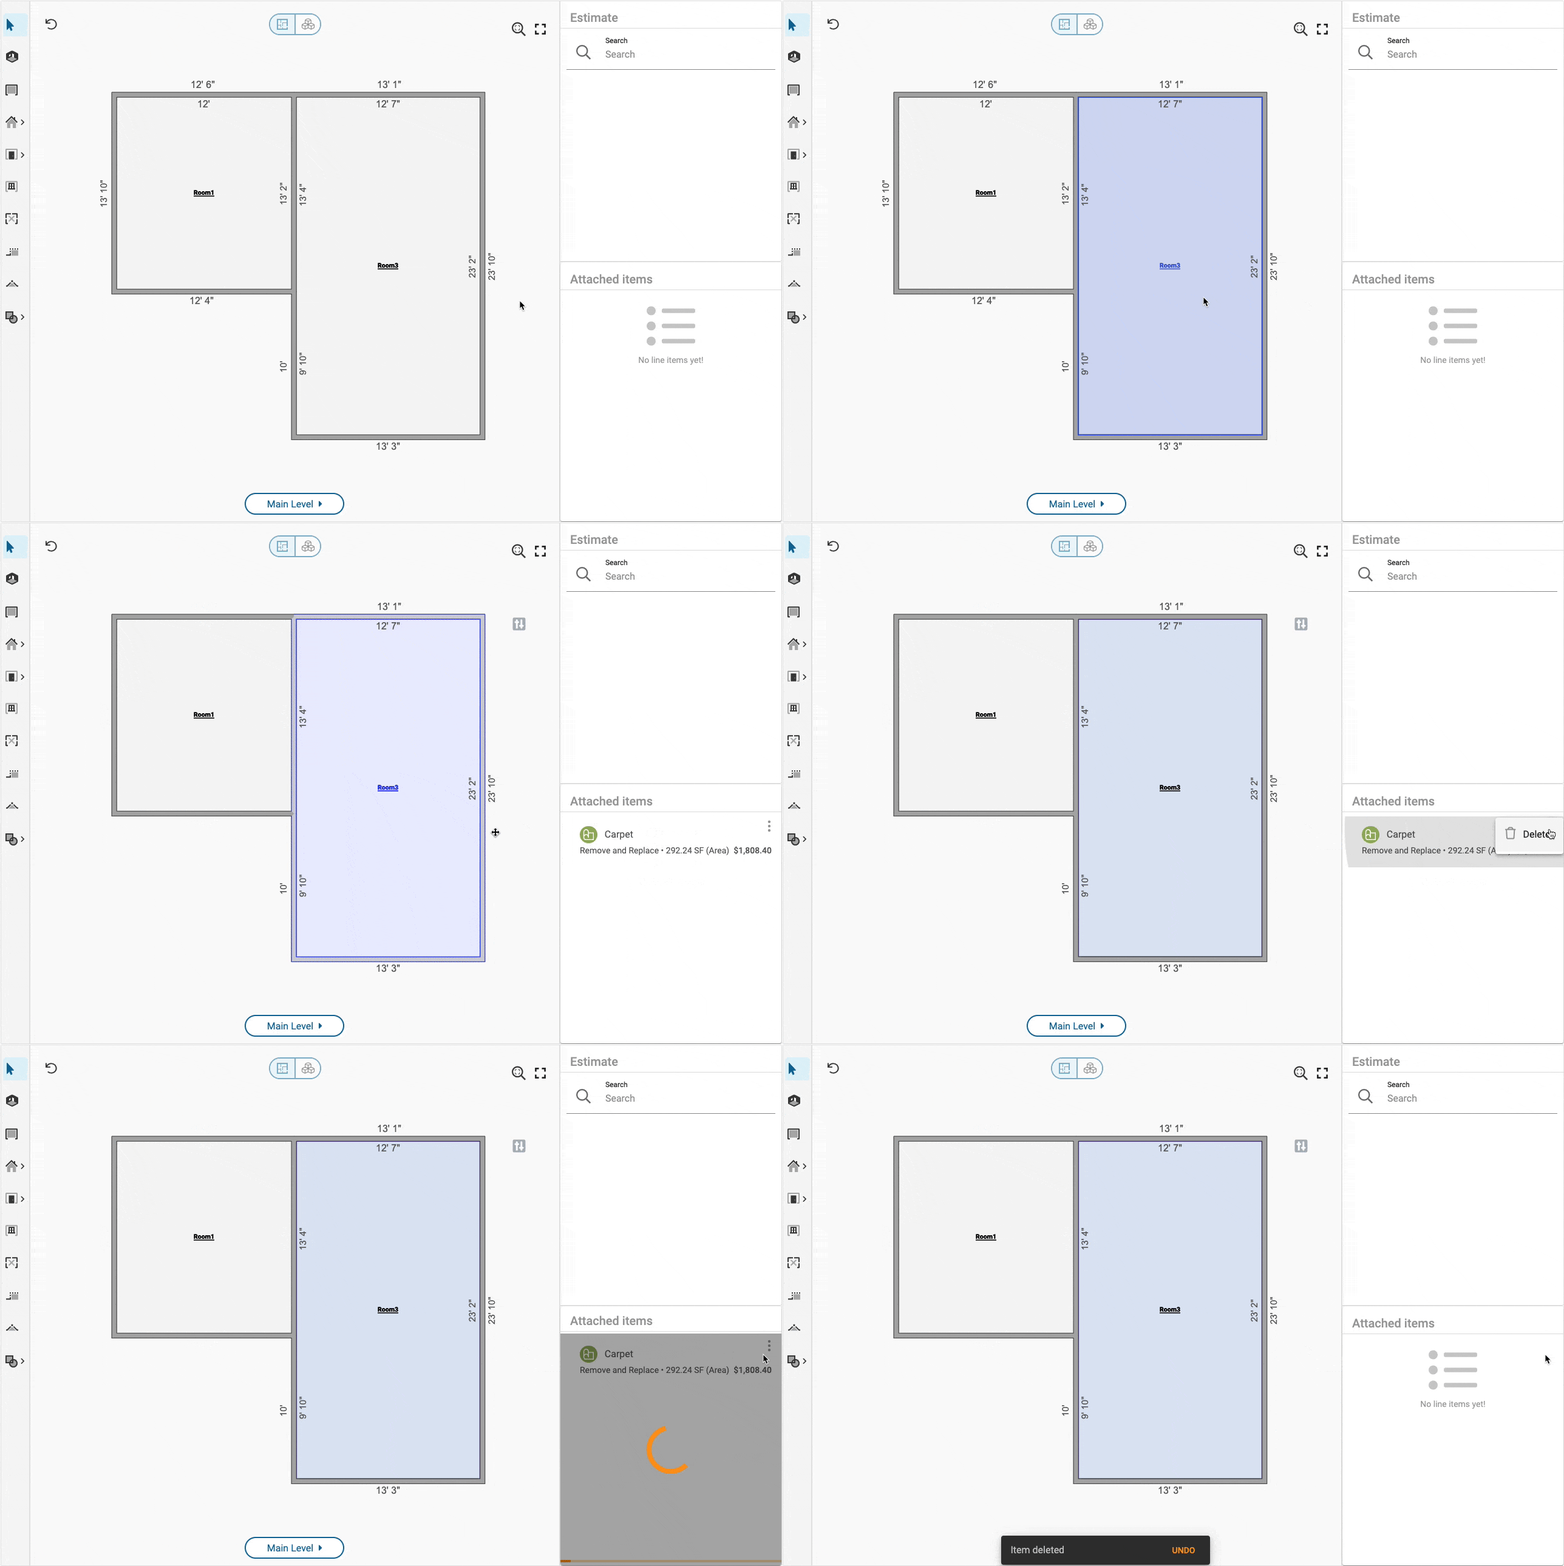
There are multiple ways to delete line items from the estimate.
Delete a line item in the Attached items list.
Delete line items by clicking the target element while the cursor is active with the line item of interest.
Groups
Creating Groups
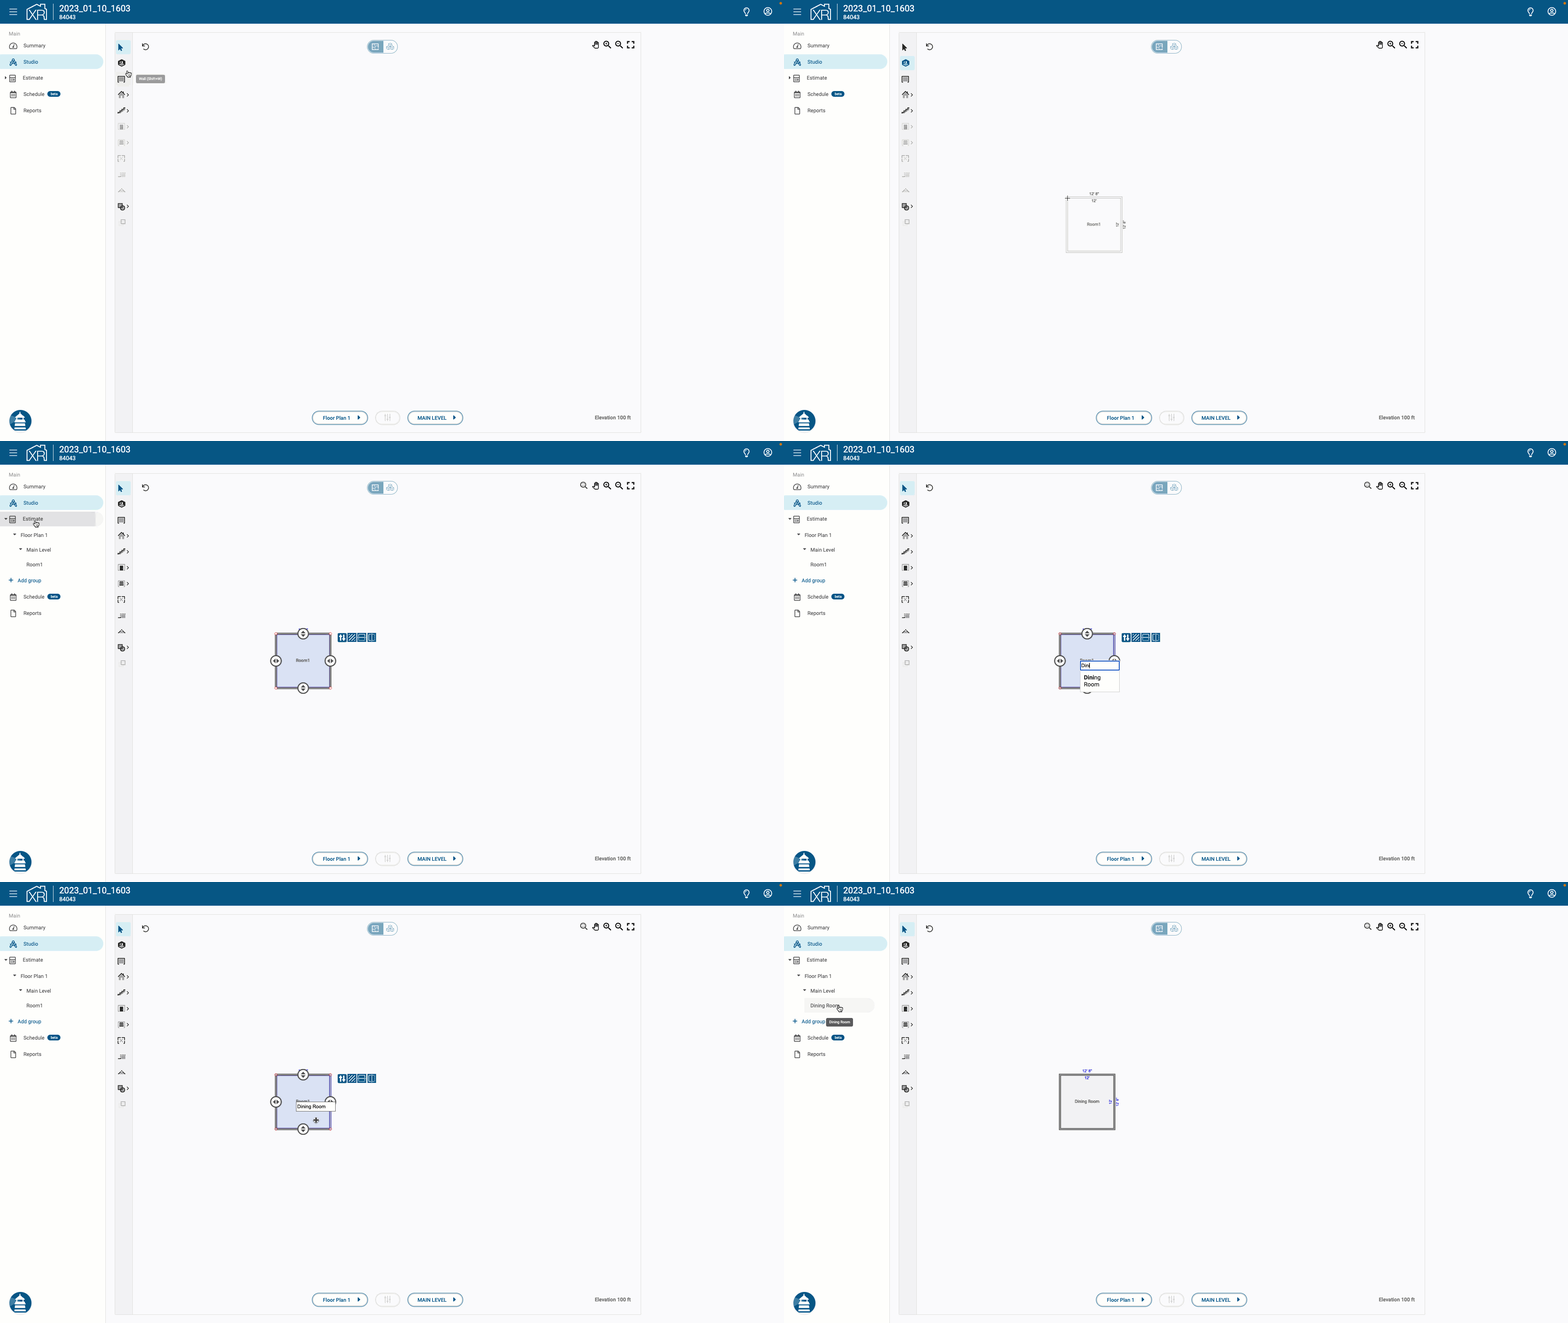
The list of groups is under the Estimate tab of the main menu in the side navigation. When a room is added to Studio, groups are automatically being added as well. The information of the floor plan, level and the room name will all be reflected under the estimate tab in the main menu.
After renaming the created room, the new room name will also be reflected under the estimate tab in the main menu.
Here is an example of adding the Dining Room to Studio and viewing the updated group information.
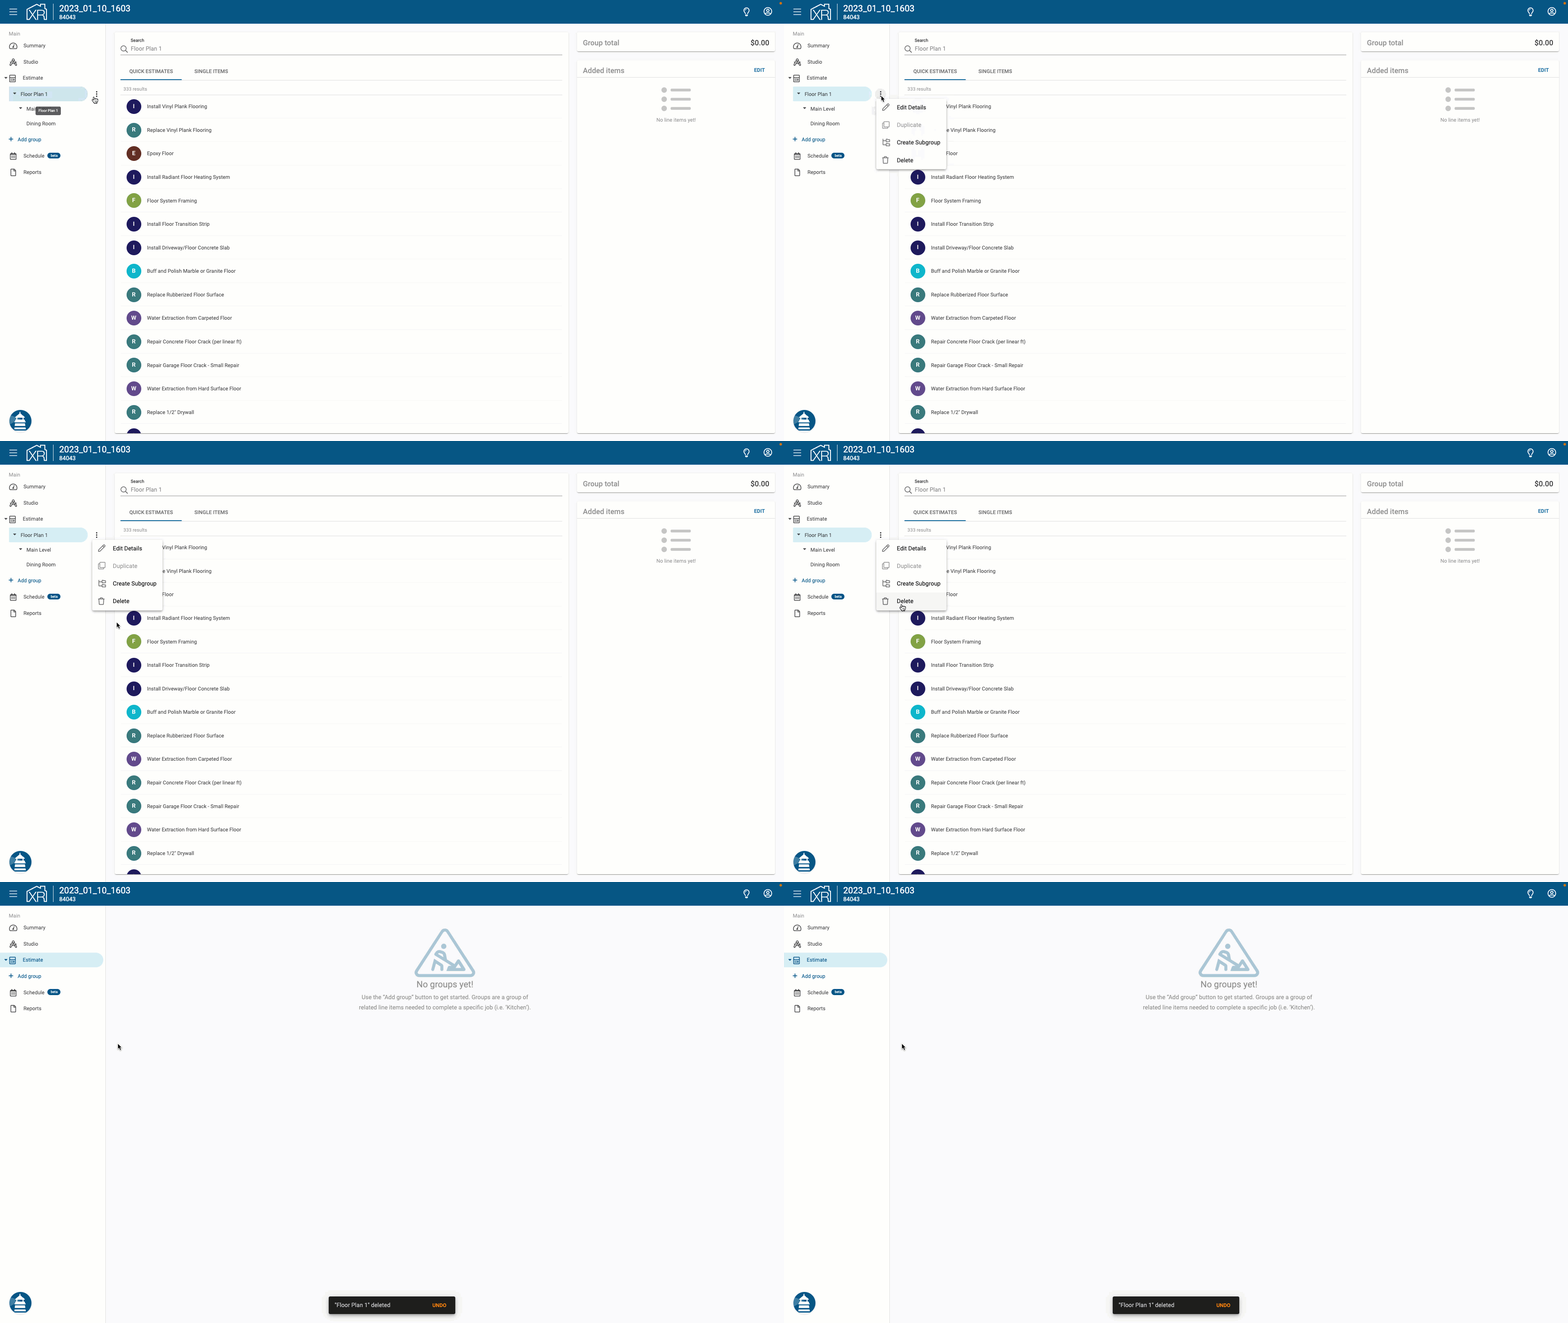
Deleting Groups
Groups are deleted by selecting the menu options next to a group and clicking "Delete". Deleting a group will delete all line items and their association with the rooms in Studio. Deleting the groups from the Estimate menu will delete the group from the tree, but it won't remove the room from the floor plan in Studio.
