Getting Started
Frequently Asked Questions (FAQ)
System Requirements
Company Info
Add Company Markup
My Pricing
Line Item and Pricing Data
Create Report Statements
Create a Project
Contact Support
XactRemodel subscription levels
XactRemodel Mobile App
Unable to view Quick Estimates
Admin Users Control
Accounts and Contacts
Manage client and vendor Accounts in XactRemodel
Manage Contacts in XactRemodel
Associate projects with Accounts in XactRemodel
Projects
Project Overview
Project Summary
Duplicate a Project
Reprice an Estimate
Sending Projects to Direct Supplier
XactRemodel Mobile: Import Contacts
Project History
Restoring Deleted Projects
Groups
Line Items
Studio
Getting Started
About Studio
Share floor plan in XactRemodel
Building an Estimate
Import image as underlay
Level Properties
Multiple Floor Plans in Studio
Reference Objects
Tools
View Levels in 3D
Working with Levels
3D View
Rename a sketch in XactRemodel and XactRestore Studio
Framing in Studio
Rooms
Openings
Roofs
Add line items from within Studio
Scheduling
Schedule Work Week Setup
Adding Tasks to your Project Schedule
Company Schedule
Task Report in Scheduling
Schedule Views
Creating a Project Schedule with Auto-Scheduling
Attachments
Manage attachments in Proposal reports
Manage photos and documents in XactRemodel and XactRestore
Attachments
Reports
Integrations
Release Notes
January 2025 New Features
Upcoming Features
November 2024 New Features
June 2024 New Features
February 2024 New Features
2023 Release Notes
November 2023 New Features
September 2023 New Features
XactRemodel PRO Release
November 2025 New Features
Account management
How do I cancel or change my subscription?
Account Deletion
Subscribe to XactRemodel
Updating Account Info
Transferring from XactRemodel Desktop
Import projects from XactRemodel desktop
Transfer data from XactRemodel Desktop to Xactimate
Back up your data in XactRemodel Desktop
XactRestore
Field docs
Field docs - Admin
Field docs initial job setup
Add levels in Field docs
Add rooms in Field docs
Add equipment in Field docs
Reporting in Field docs
Field Docs completion and final review
Take daily readings in Field docs
Pick up equipment in Field docs
XactRestore now available!
Set project dates
Type of Loss
Import Xactimate estimates (ESX) in to XactRemodel and XactRestore
Manage users and roles in XactRemodel and XactRestore
Lead creation in XactRestore Pro
Adjustments in XactRemodel and XactRestore
- All Categories
- Scheduling
- Adding Tasks to your Project Schedule
Adding Tasks to your Project Schedule
Updated
by Torrey Rawlings
Efficiently manage your time with our scheduling feature. Not only can tasks be auto-generated, but you can also input your own tasks and appointments. This allows you to see everything you need planned for your project in one place.
Tasks
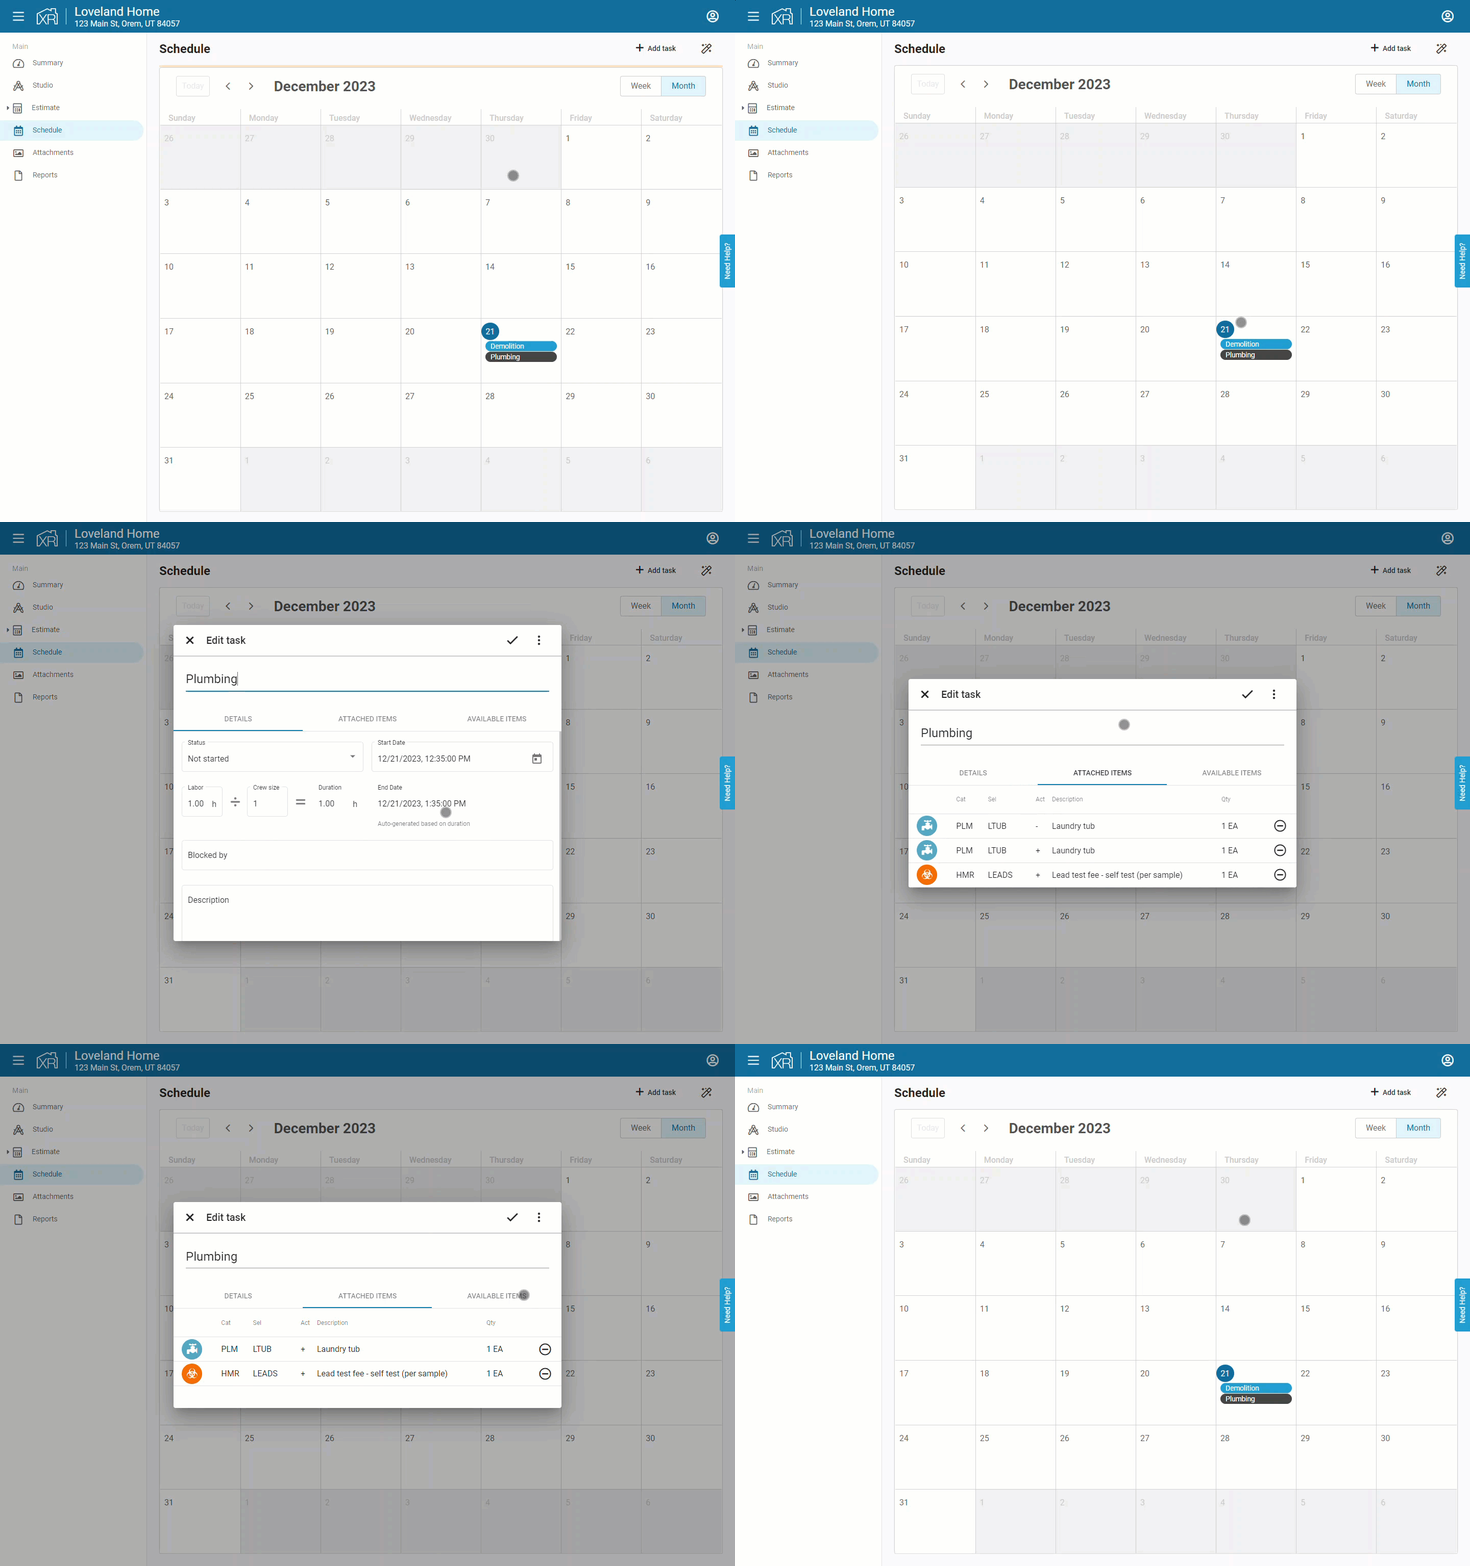
Tasks are work to be completed and are created by clicking the "Add task" button in the upper left of the calendar.
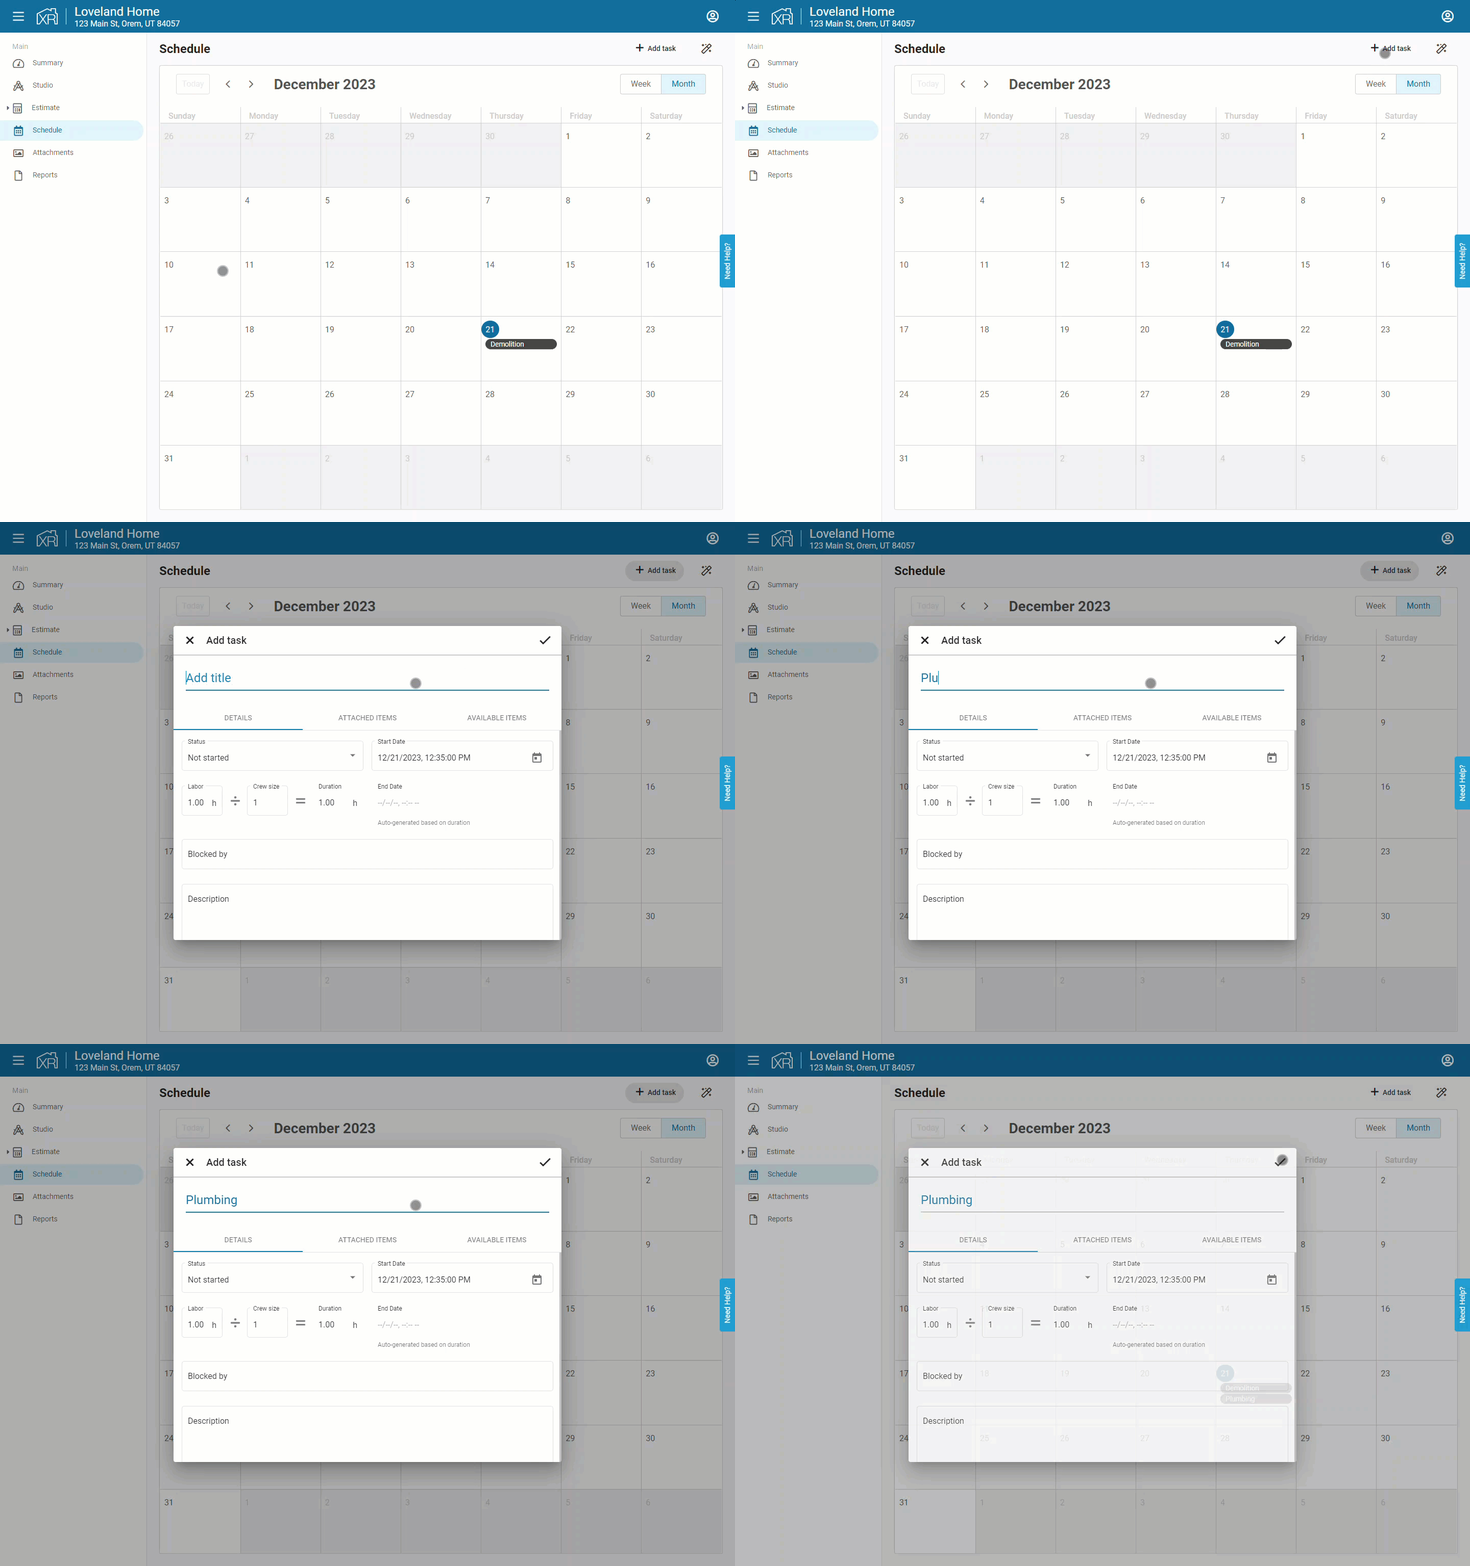
Tasks encompass the following components:
- Status: Update the task status to "Not started," "In progress," or "Complete" to track progress effectively.
- Labor, Crew Size, and Duration: Input labor hours and crew size; the system calculates the task duration based on this information.
- Start and End Date: Choose a start date manually, and the end date is automatically calculated based on the specified duration.
- Blocked By: Identify tasks that must be finished before commencing work on the current task.
- Description: Provide essential details for the task.
- Attached Items: These are the items already linked to your task, integral to the work to be performed.
- Available Items: Items not yet associated with a task; they remain accessible for addition to any task.
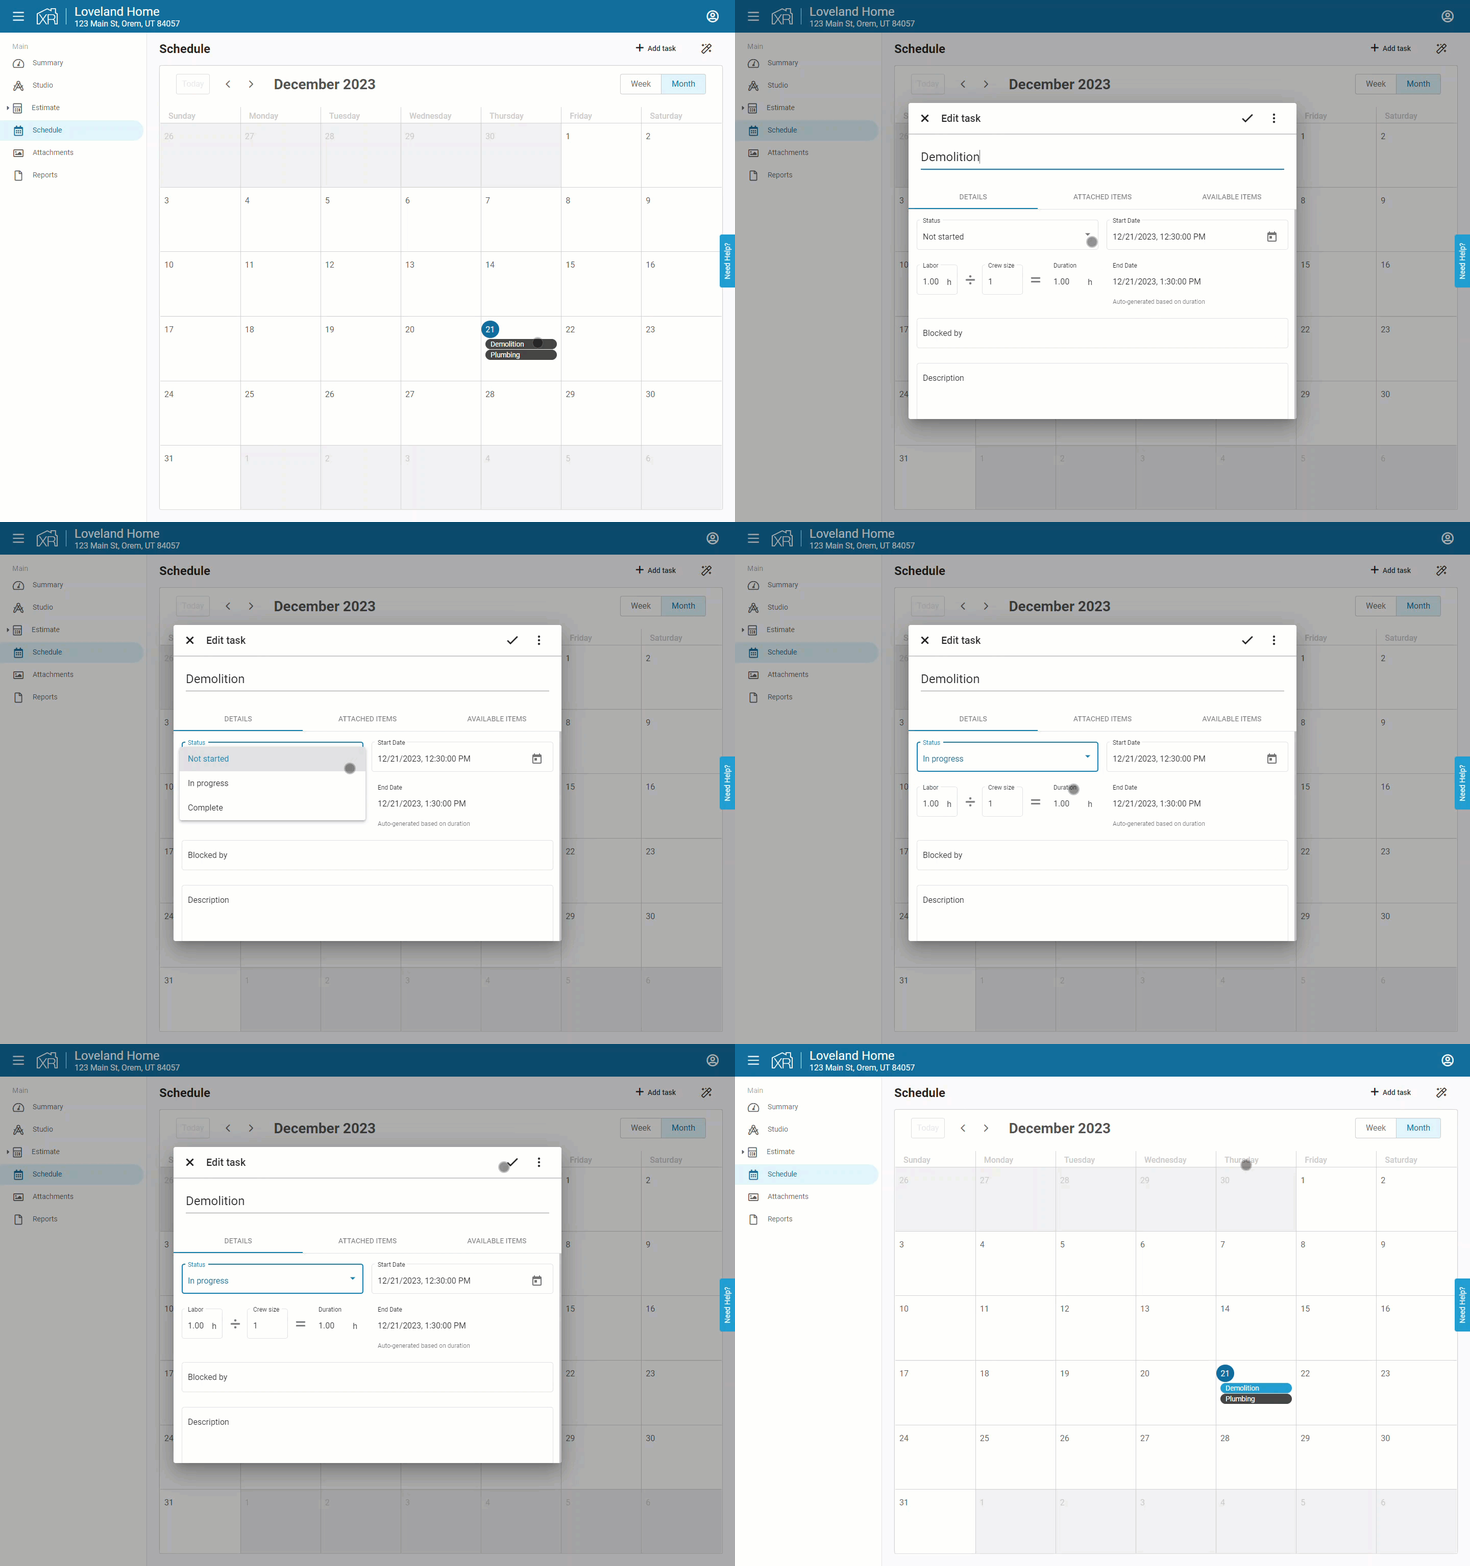
Editing a Task:
- Click into a task from your schedule.
- Make any adjustments as necessary in the "DETAILS" tab.
- Click on the check mark to save.
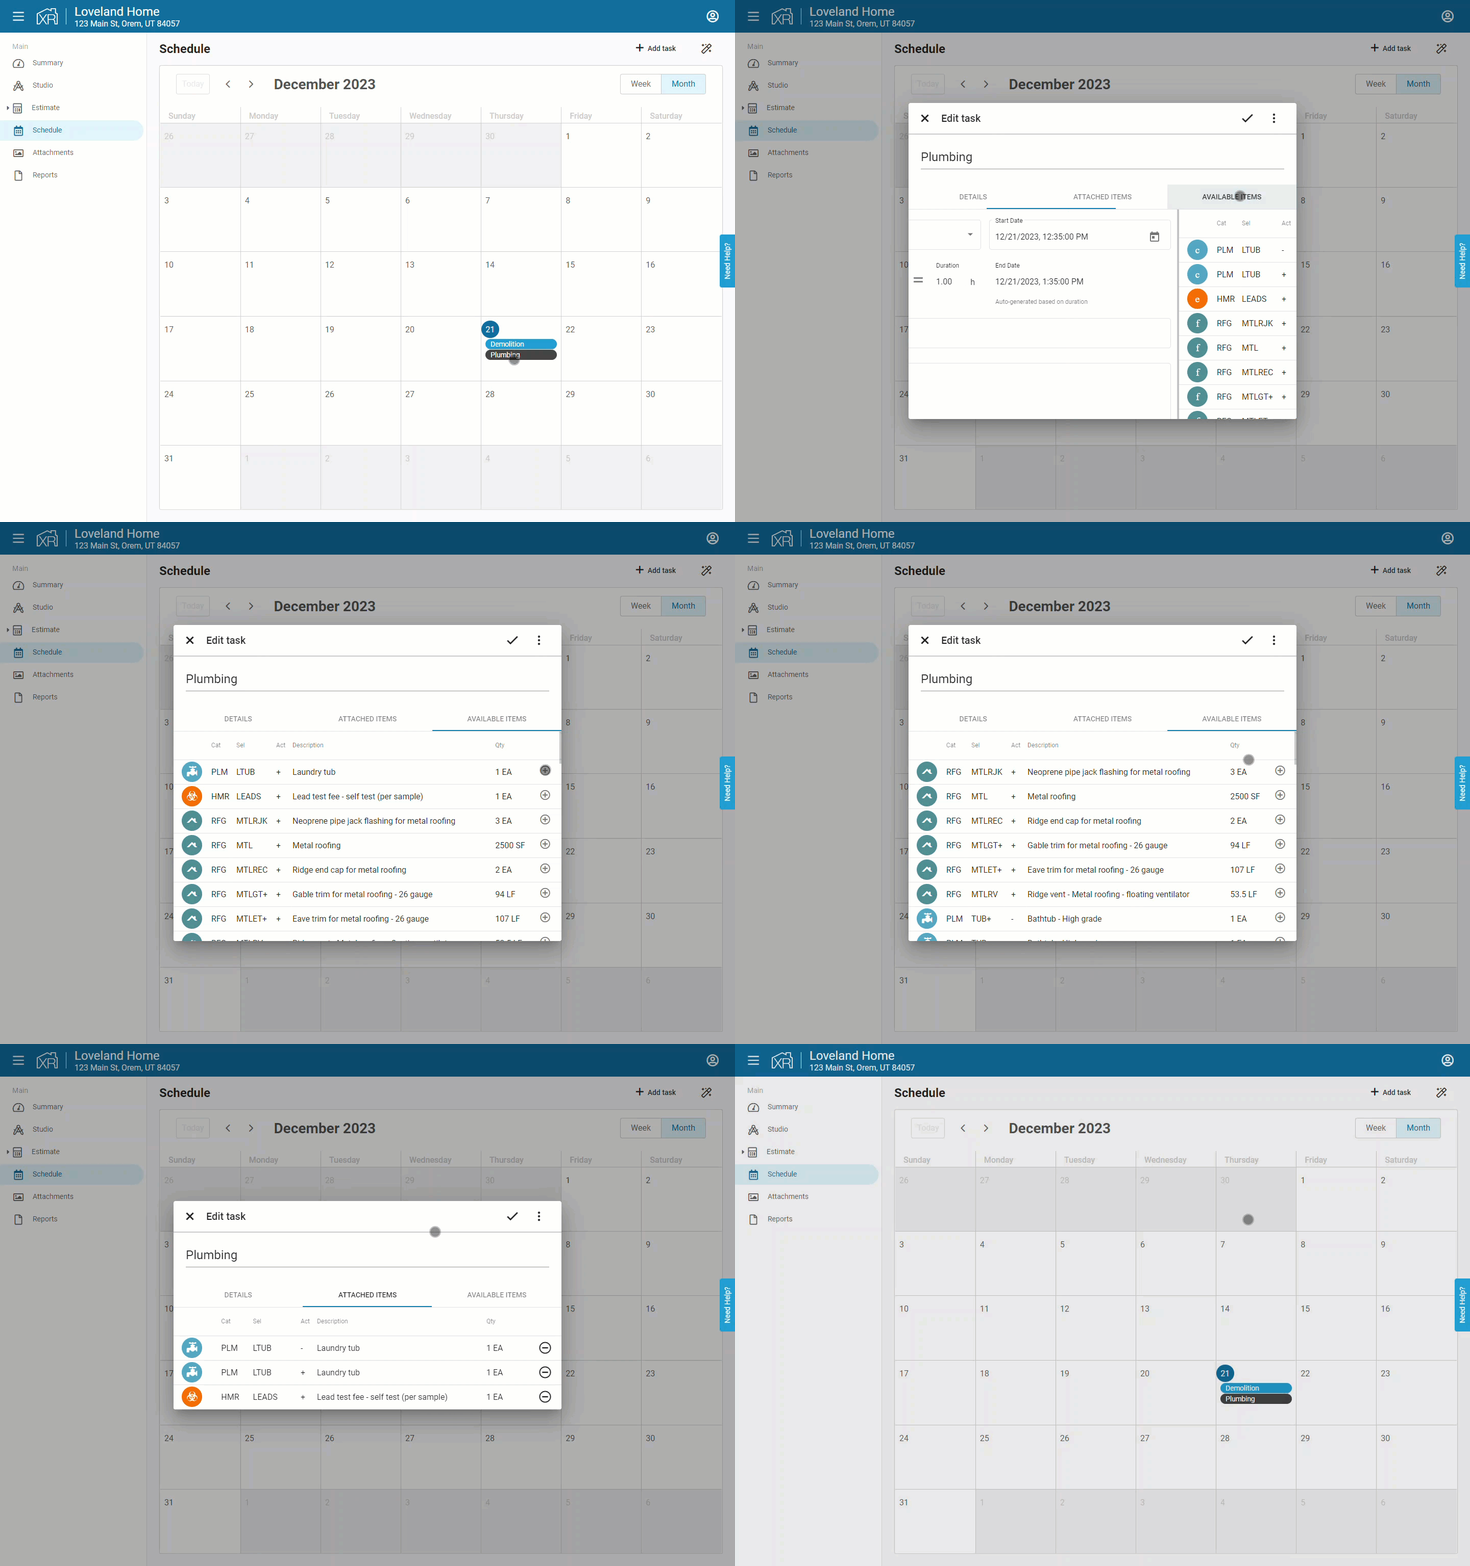
Attaching a Line Item to a Task:
- Create a new task by using the "Add task" button or open an existing task.
- Navigate to the "AVAILABLE ITEMS" tab.
- Click on the plus marks next to the items you wish to add. The added items will be transferred to the "ATTACHED ITEMS" section.
- Click on the check mark to save.
Viewing/Removing Attached Line Items in a Task:
- Click into a task from your schedule.
- Navigate to the "ATTACHED ITEMS" tab.
- This section will showcase all items linked to the task. To remove any items, click on the minus button next to each item.
- Click on the check mark to save.
Deleting a Task:
- Open the task from your schedule.
- Click on the three dots located in the top right corner of your task.
- Choose the "Delete" button.
