Creating a Project Schedule with Auto-Scheduling
Updated
by Torrey Rawlings
XactRemodel line items come with a lot more data than pricing. Line items also contain data for the time it takes to do the work. This data can be used for building a schedule based on your project estimate.
Auto-Scheduling
Auto-scheduling in XactRemodel streamlines project management by automatically generating a project schedule once an estimate is created within a project. This feature utilizes expected labor durations derived from the estimate's line items, creating organized project tasks named after common construction phases. These tasks are further sequenced based on dependencies, ensuring a coherent and efficient project timeline.
What does auto-scheduling do?
Auto-scheduling takes the line items you have already included in your estimate and creates a project schedule for you. Here's how it works:
- Line Item Association: Auto-scheduling takes the line items included in your estimate and transforms them into project tasks. These tasks are grouped by common construction phases. These line items can be viewed in the Assigned Items section of a task.
- Start Dates and Blocked By: You can input the project start date to indicate the first day of work on the project. This feature seamlessly integrates with the schedule, as the initial task start date is automatically generated based on the project start date inputted. Subsequent start dates align with the completion of preceding tasks. Each task includes a "Blocked By" section, indicating tasks that must be completed before it can begin. "Blocked By" and the task start date can be viewed in the Details section of a task.
- Labor Hours and End Dates: Each task calculates labor hours associated with the line items within the task group. The tool then auto-generates the end date based on these labor hours, providing an accurate projection for project completion. Labor hours and the end date can be viewed in the Details section of a task.
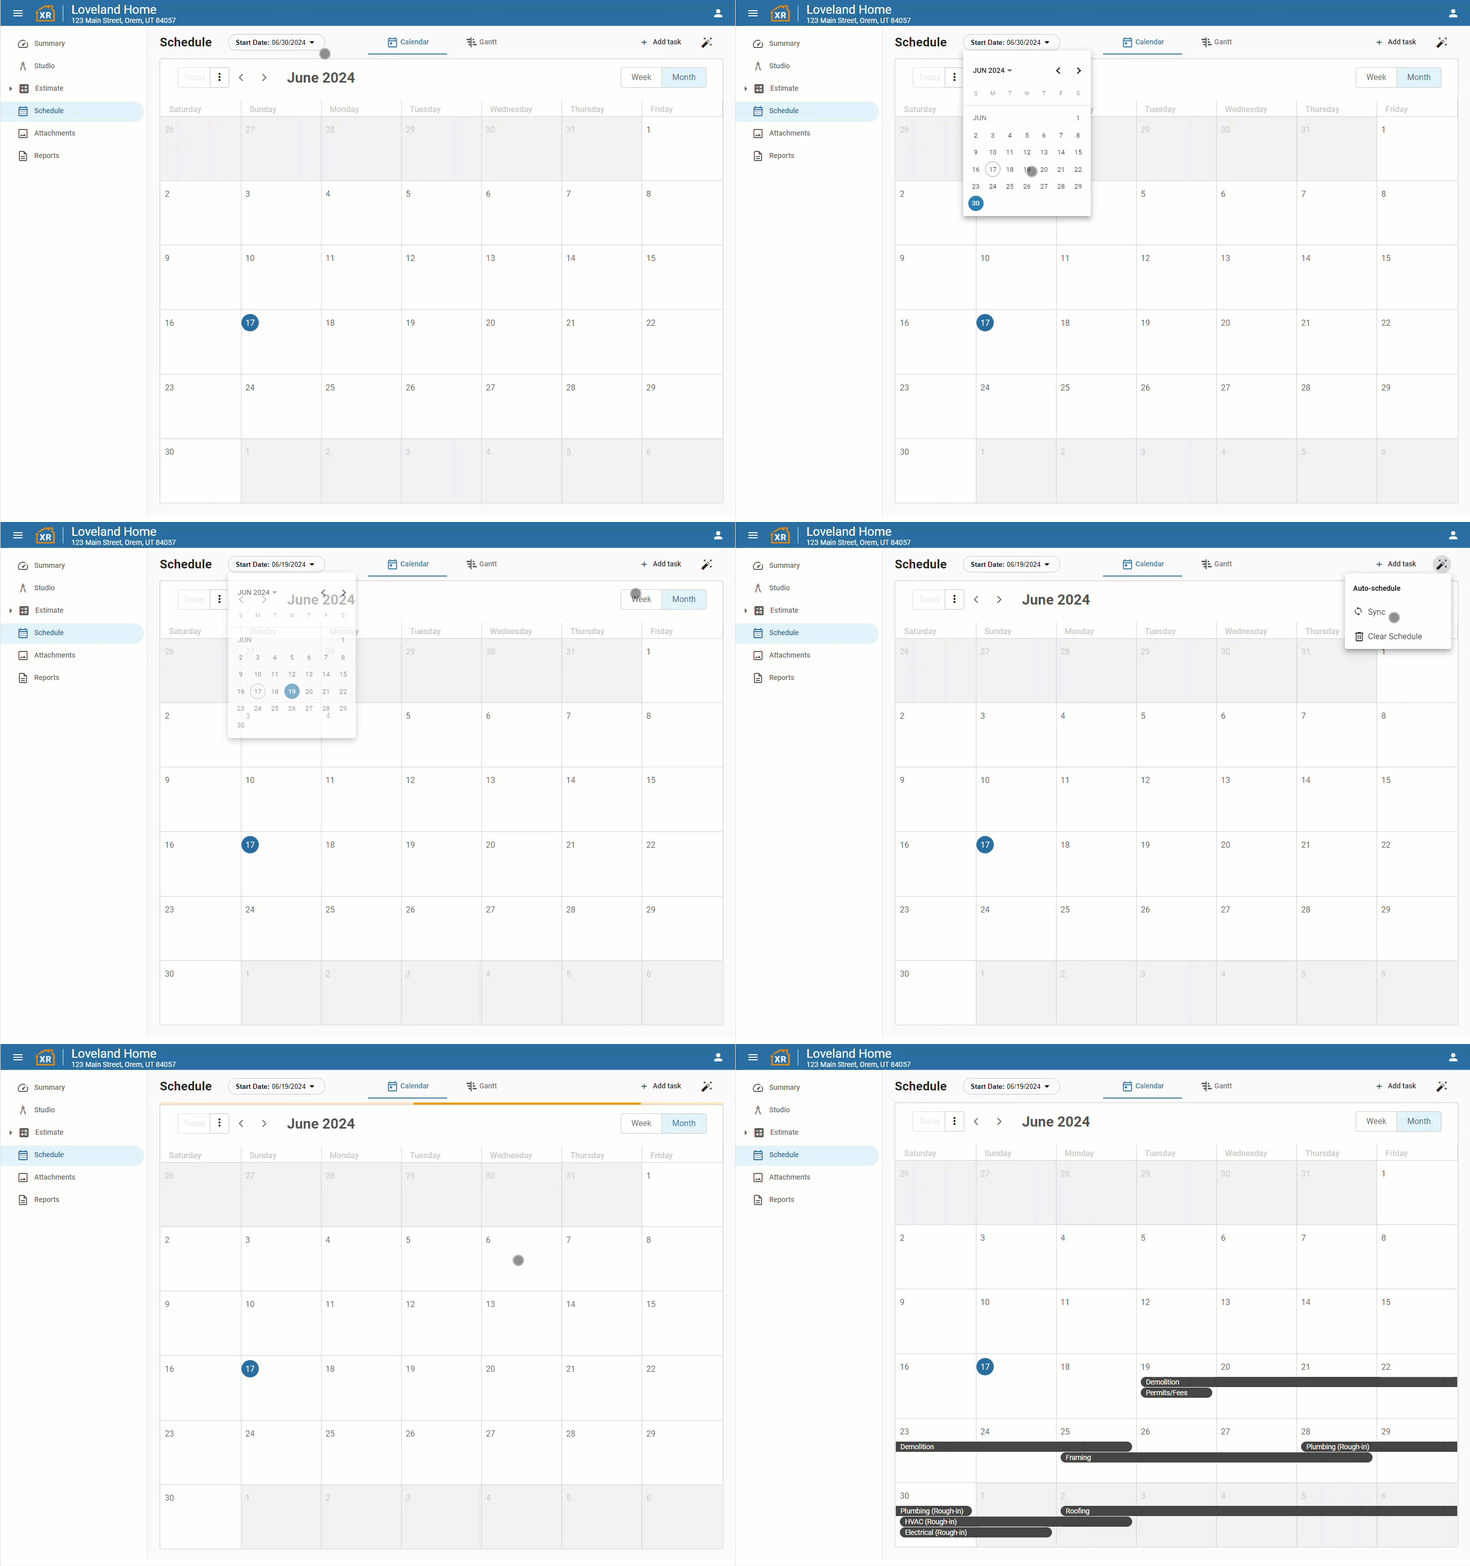
Auto-Scheduling your Project:
- Create an estimate within a project by adding line items.
- Navigate to the Schedule page within the project.
- Input the start date for the project.
- Select the magic wand icon and click "Sync".

Converting an Auto-Scheduled Task to Manual:
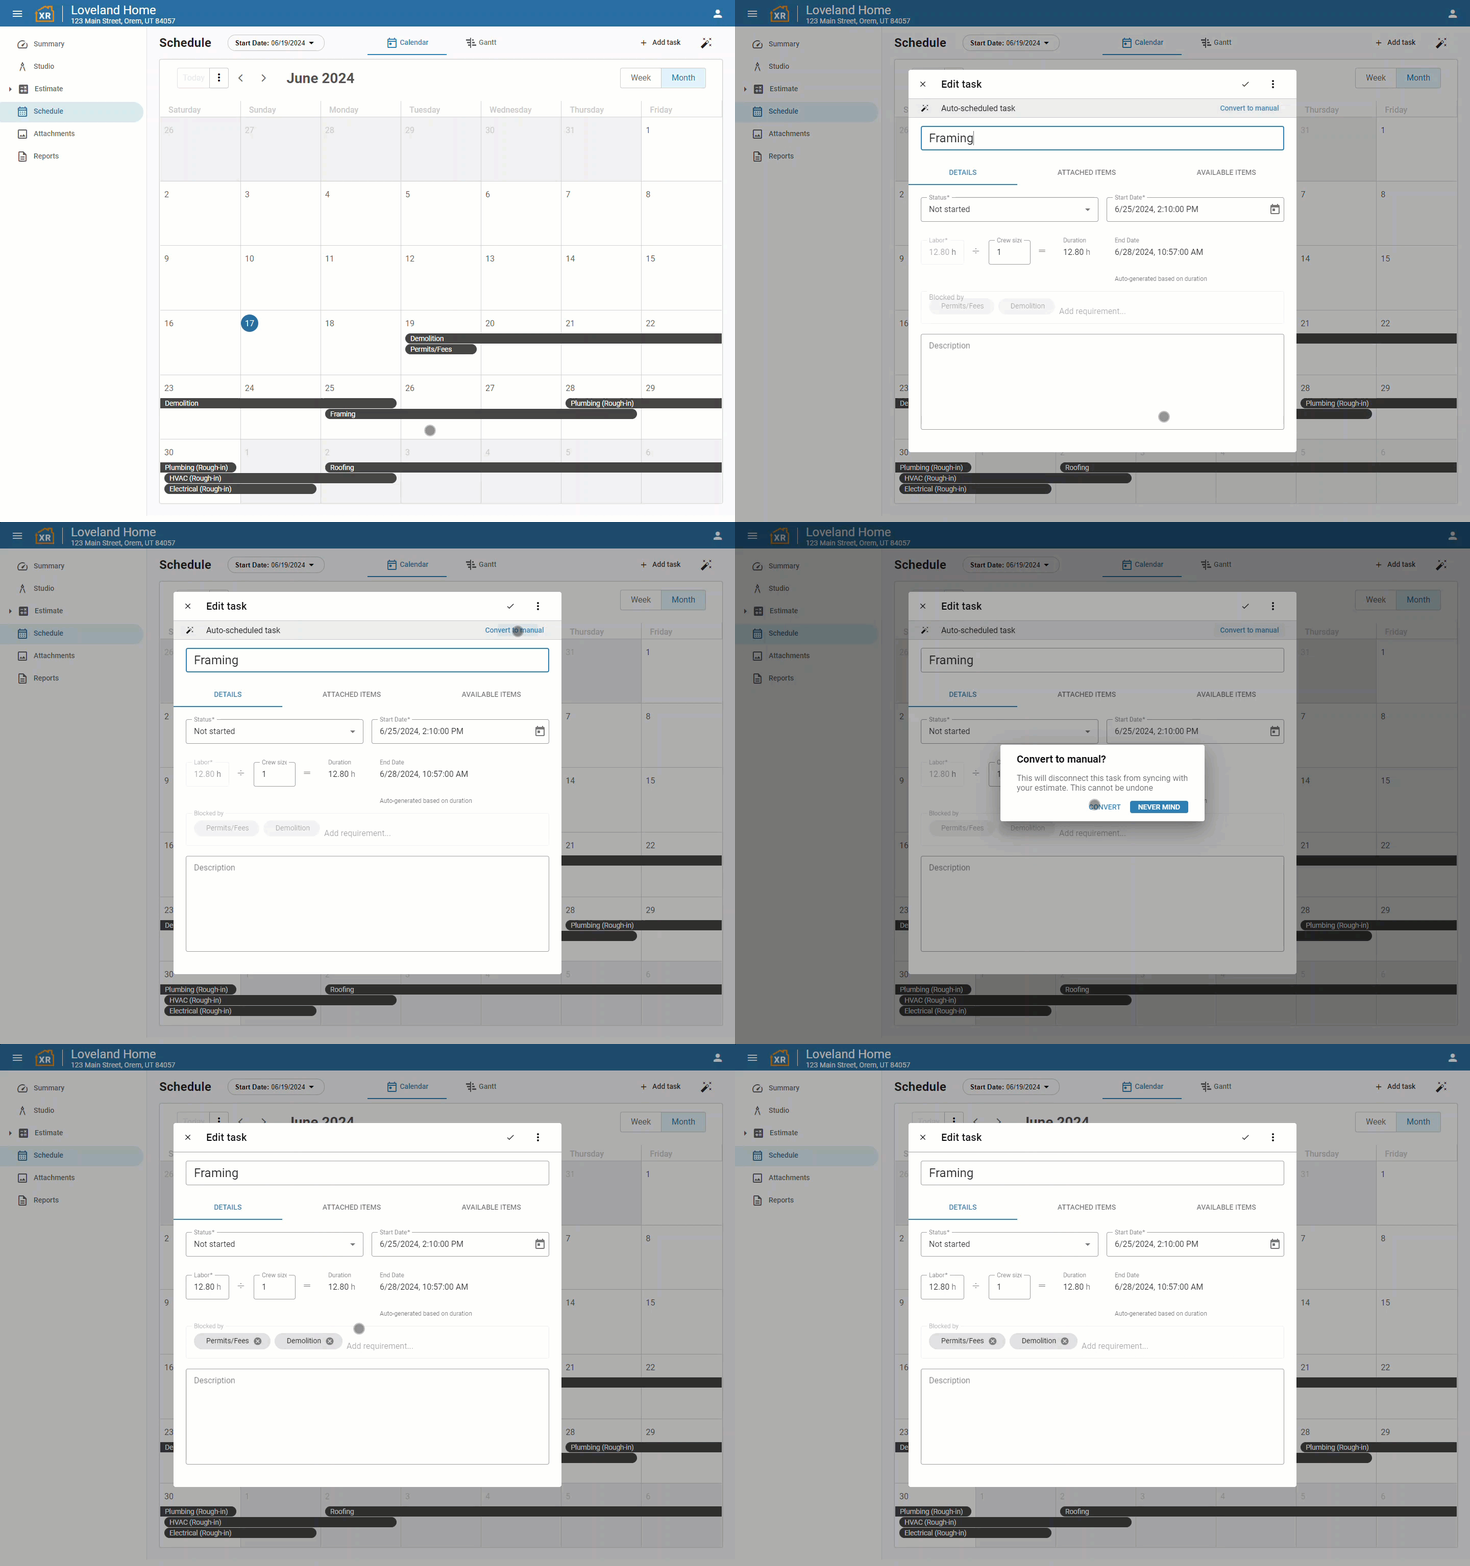
When dealing with auto-scheduled tasks, certain constraints limit users from modifying elements such as blocked by, labor hours, duration, and item assignments. If you wish to have more flexibility in editing these aspects, you can follow these steps to convert a task to manual:
- Begin by clicking into the task you wish to convert.
- Look for the "Convert to Manual" option and click on it.
- This action will prompt a popup message, explaining that once the task is converted to manual mode, it will no longer synchronize with your estimate, and this conversion is irreversible. If you are ready to proceed, click on the "Convert" button to confirm the switch.

Resyncing and Clearing your Schedule:
There might be occasions when you have to adjust or clear your project calendar to accomplish this, follow these steps:
- Select the magic wand icon.
- Choose "sync" or "clear schedule."
