Draw roofs
 Updated
by Russell B.
Updated
by Russell B.
The Roof tool within XactRemodel and XactRestore Studio allows you to add multiple types of roofs to the Studio canvas. To see examples of the roof types, see our Types of roofs document.
Note: See our Working with levels and Manage multiple floor plans in Studio documents for assistance with adding either a new level or floor plan for your roof.
Add roofs
Follow the below steps to add roofs to the Studio canvas.
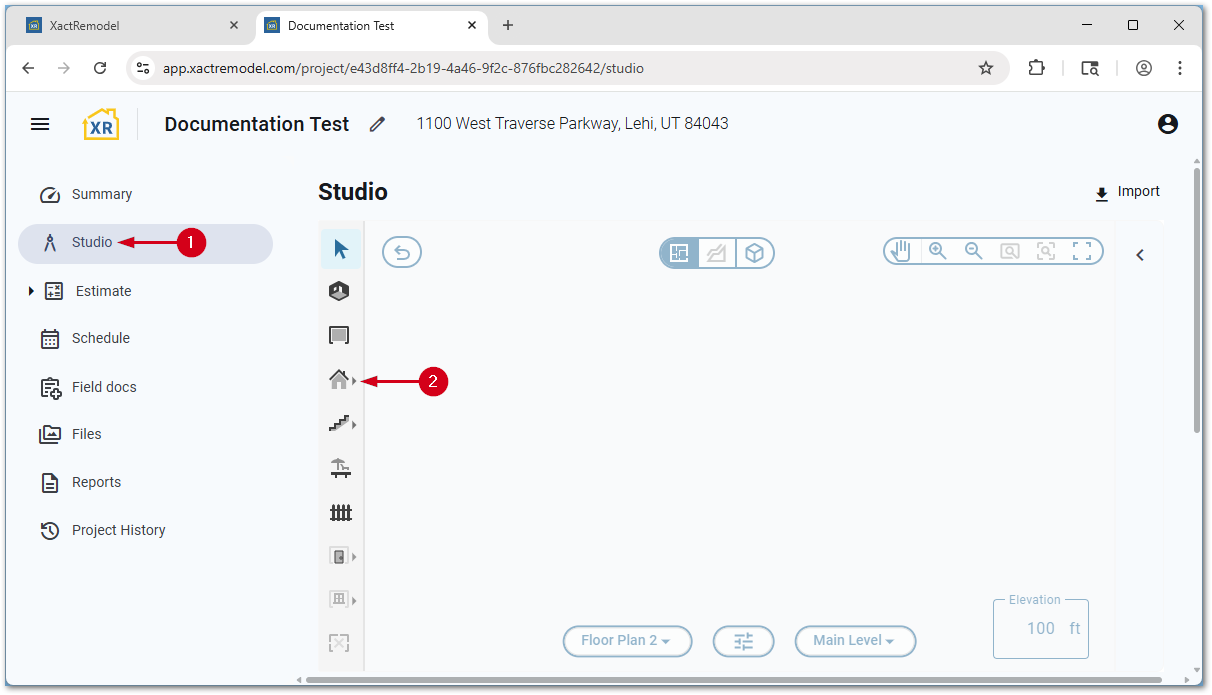
- Within a project, select Studio.
- Select the Roof tool icon.
Note: Select the arrow next to the roof tool to choose a roof type other than gable. Alternatively, press the F key on the keyboard to quickly add a gable roof.
Resize roofs
You can resize roofs by dragging a roof edge, editing their dimensions, dragging a vertex, or using the square break tool.
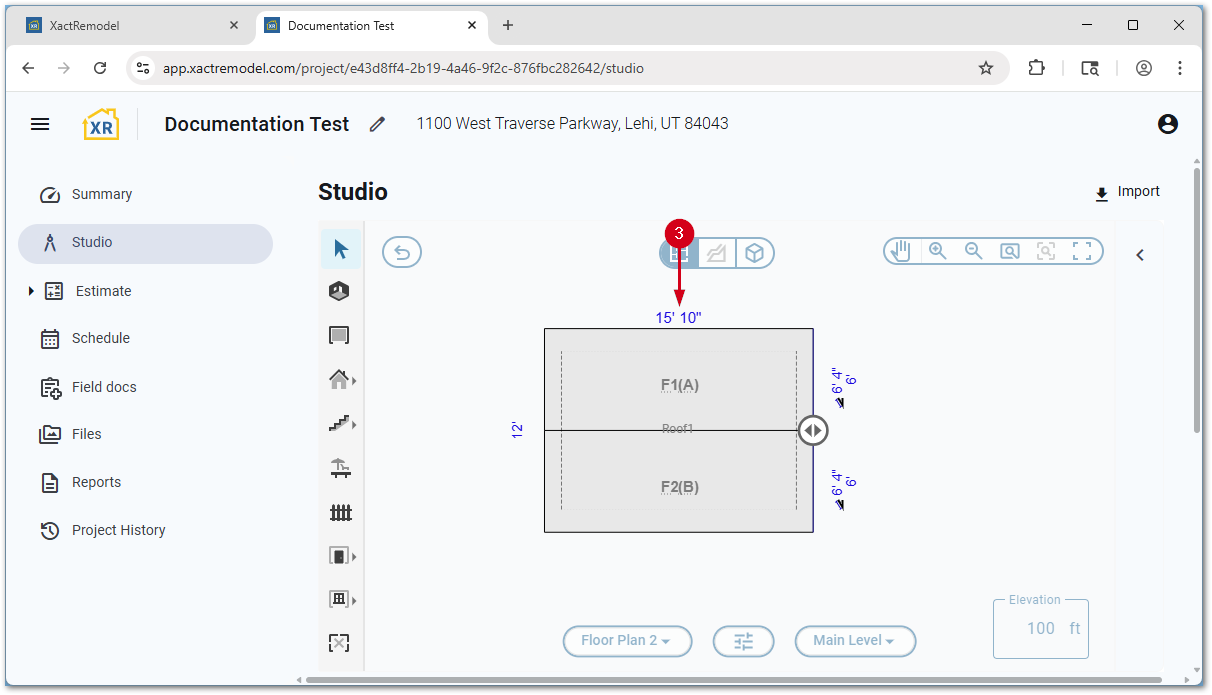
By dragging a roof edge
Once a roof is placed, dragging one of the edges allows it to be quickly resized.
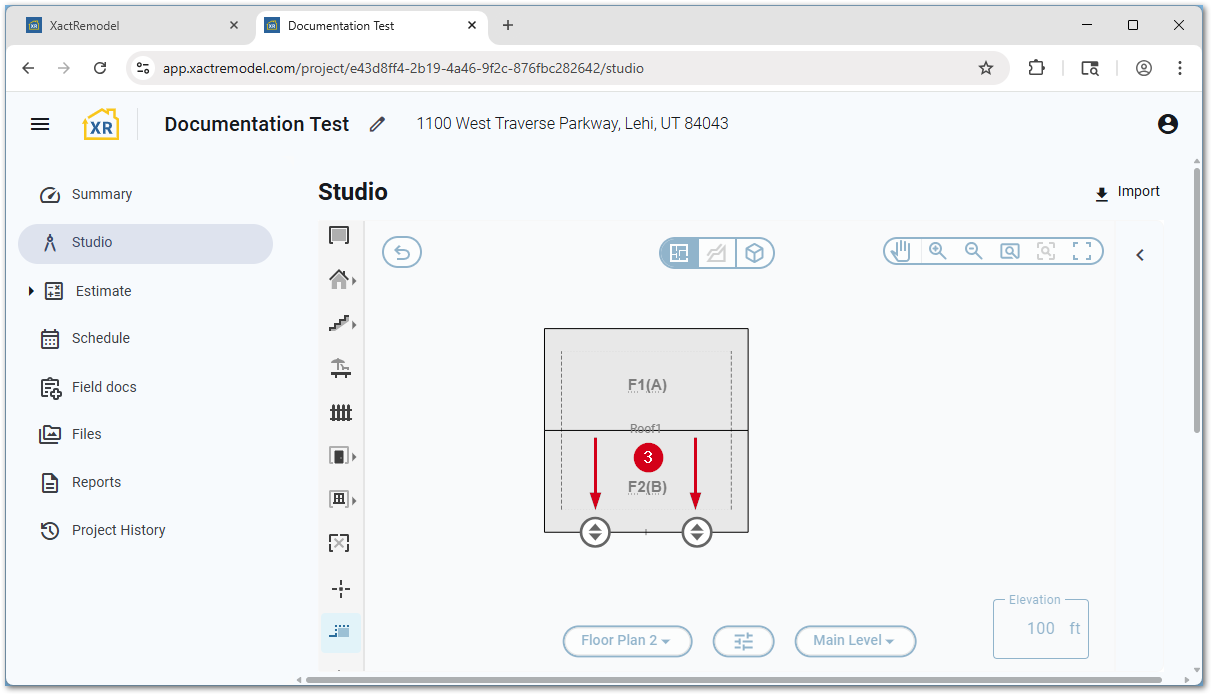
- Within Studio, select the desired roof.
- Select and drag one of the arrow icons.
- Once to the desired length, let go of the mouse button.
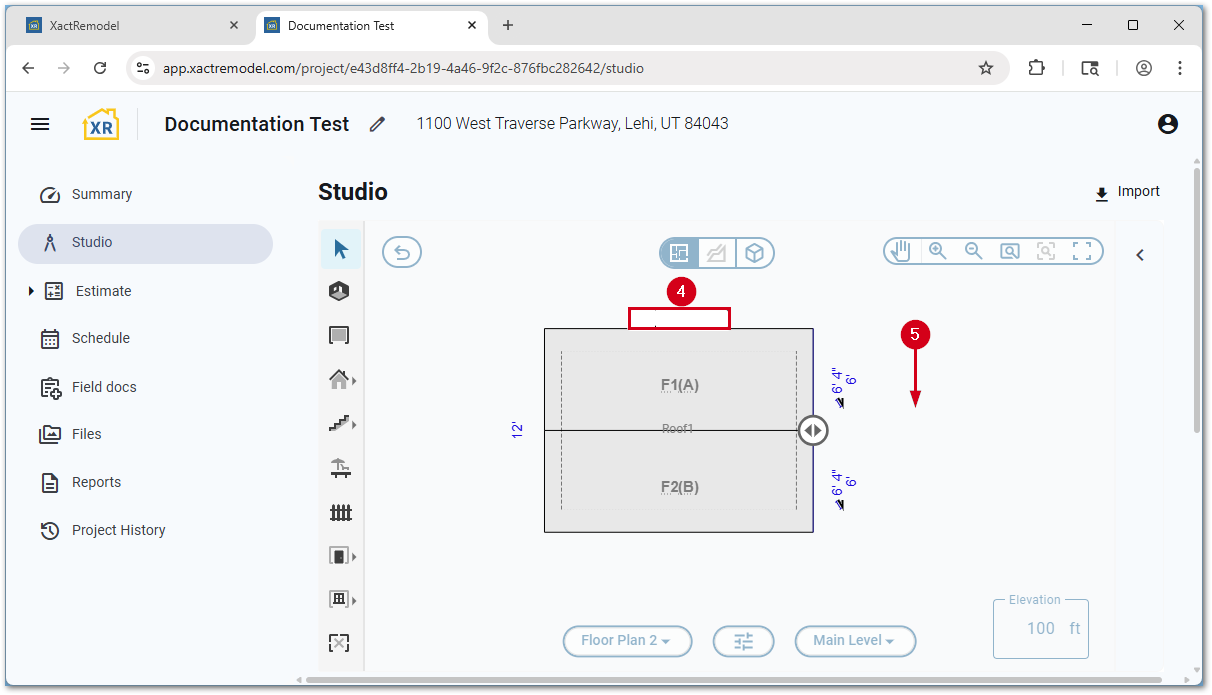
By editing dimensions
Once a roof is placed, dragging one of the edges allows it to be quickly resized.
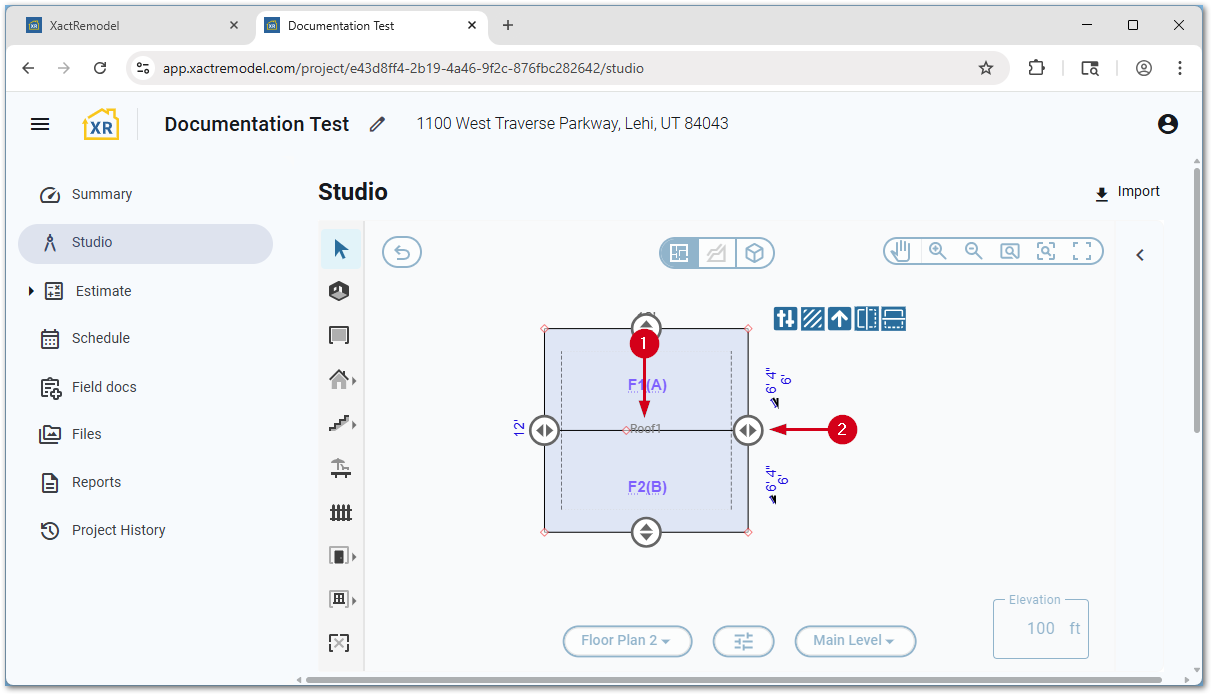
- Within Studio, select the desired roof.
- Select and drag one of the arrow icons to activate the measurement fields.
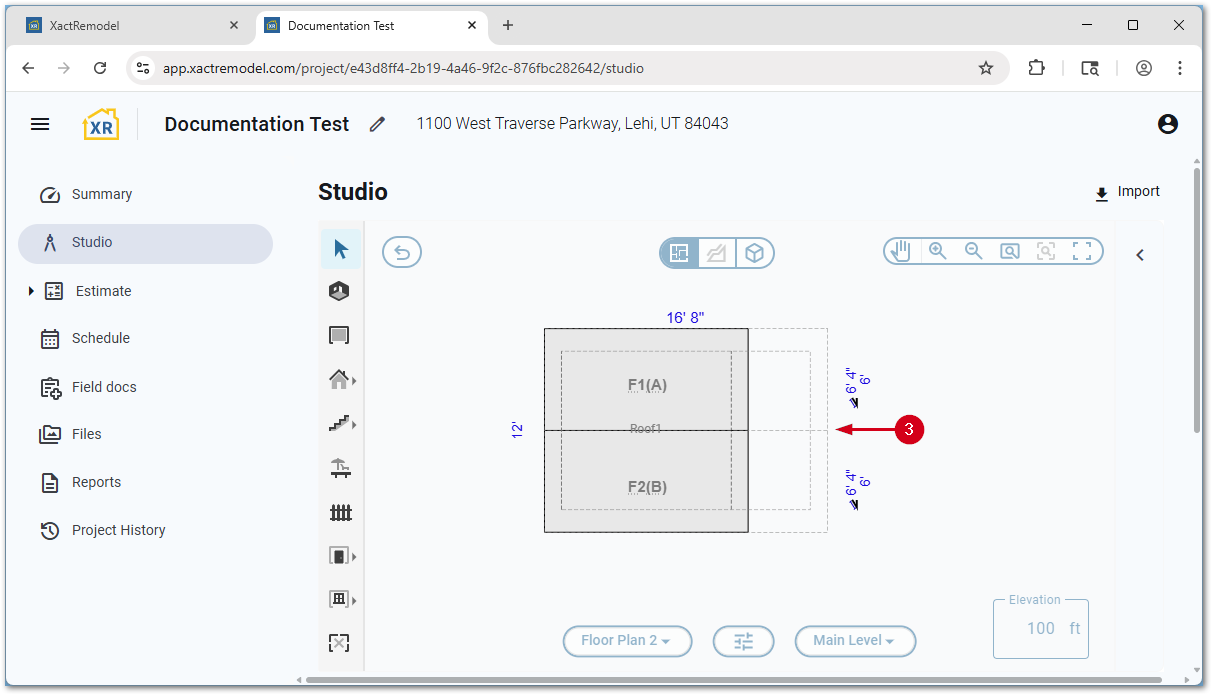
- Select the dimension to edit.
- Enter the new dimension.
Note: Enter feet and inches with a comma between them or in decimal format. For example, 20 feet 6 inches can be entered as 20,6 or 20.5.
- Select a whitespace on the Studio canvas to save.
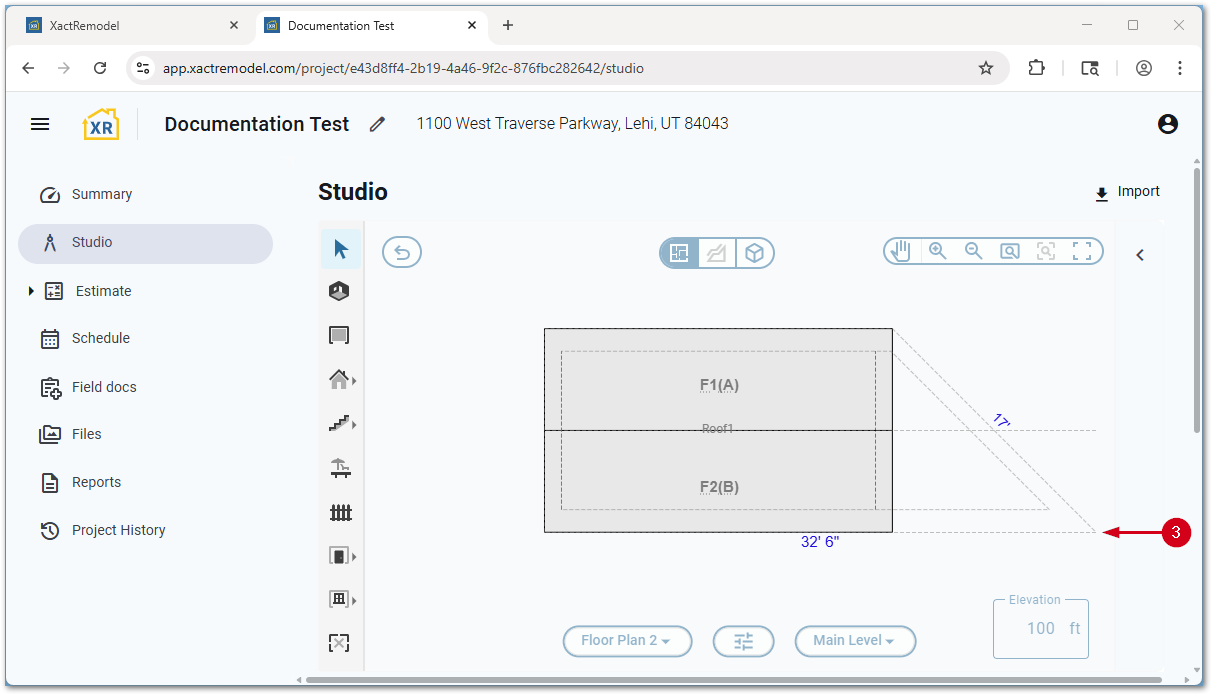
By dragging a vertex
Roofs can be reshaped by dragging a vertex.
- Within Studio, select the desired roof.
- Select and drag the desired red vertex.
Note: Additional vertices can be added if desired. For assistance, see our Vertex tool document.

- Once the vertex is in the desired location, let go of the mouse.
By using the Square Break tool
You can use the Square Break tool to extend an existing roof or add a secondary roof.
Note: For more information about the Square Break tool, see our Square Break tool document.
- Within Studio, select the Square Break tool icon.
Note: Alternatively, press the B key on the keyboard.
- Select the location where you want to create the break.
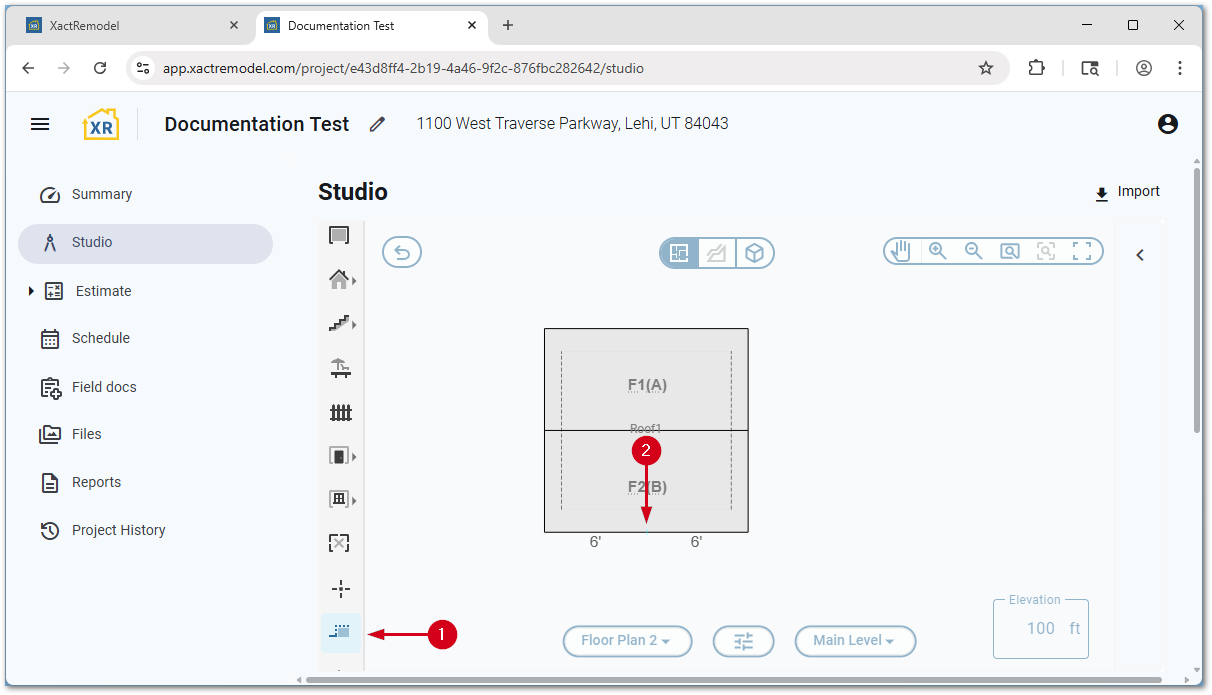
- To extend an existing roof, select and drag the arrow icon.
Note: To create a secondary roof, press and hold the Ctrl key while selecting and dragging the arrow icon.