Working with levels
 Updated
by Russell B.
Updated
by Russell B.
Studio allows you to add multiple levels to a single floor plan. Levels are used to separate floors and roofs of a building. You can, for example, create a basement, main level, and roof levels in a floor plan.
Add new levels
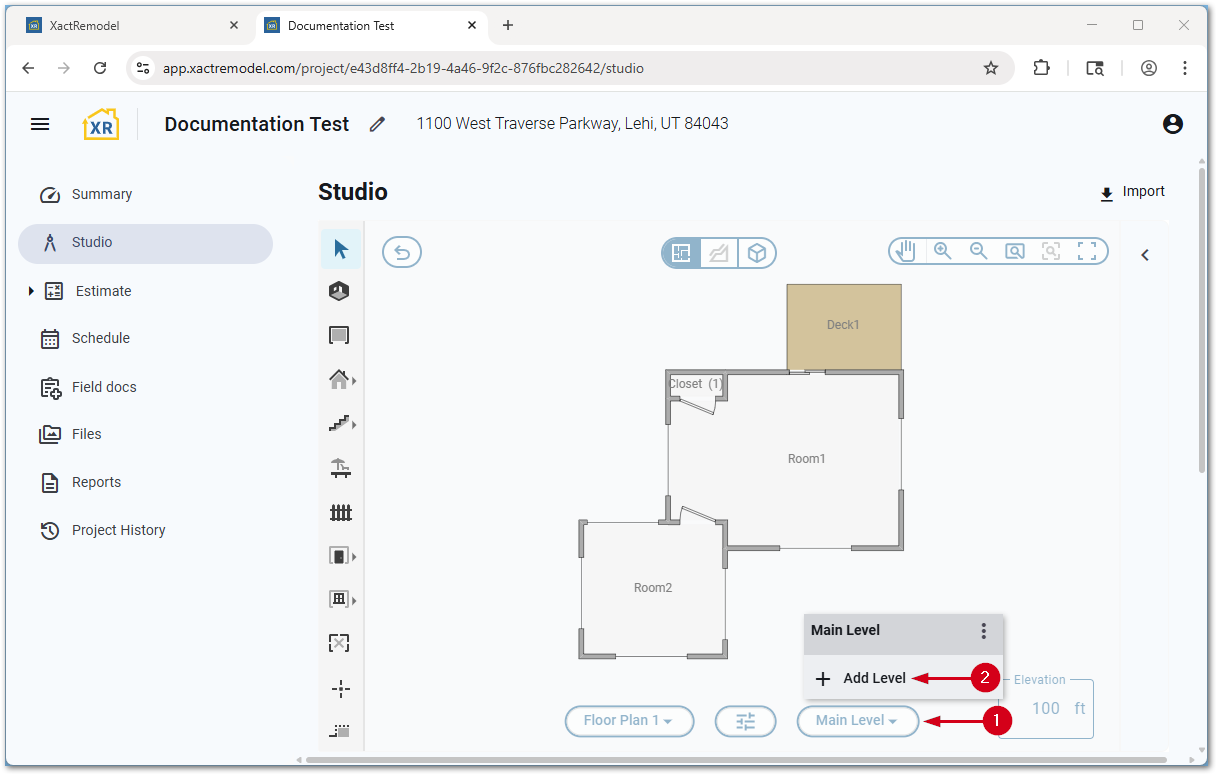
Follow the steps below to add new levels in Studio.
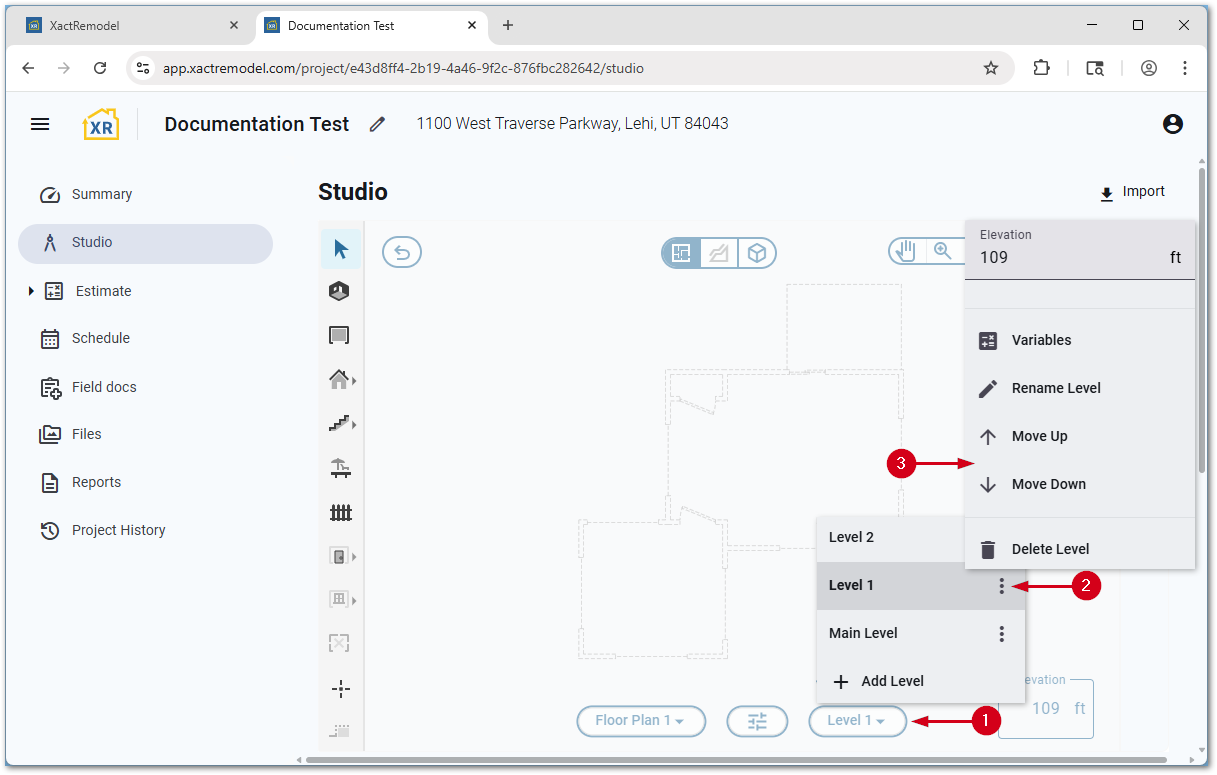
- Within the Studio section of a project, select the Select and modify levels button.
- Select Add Level.
Level options
Rename levels
You can rename levels in Studio as desired.
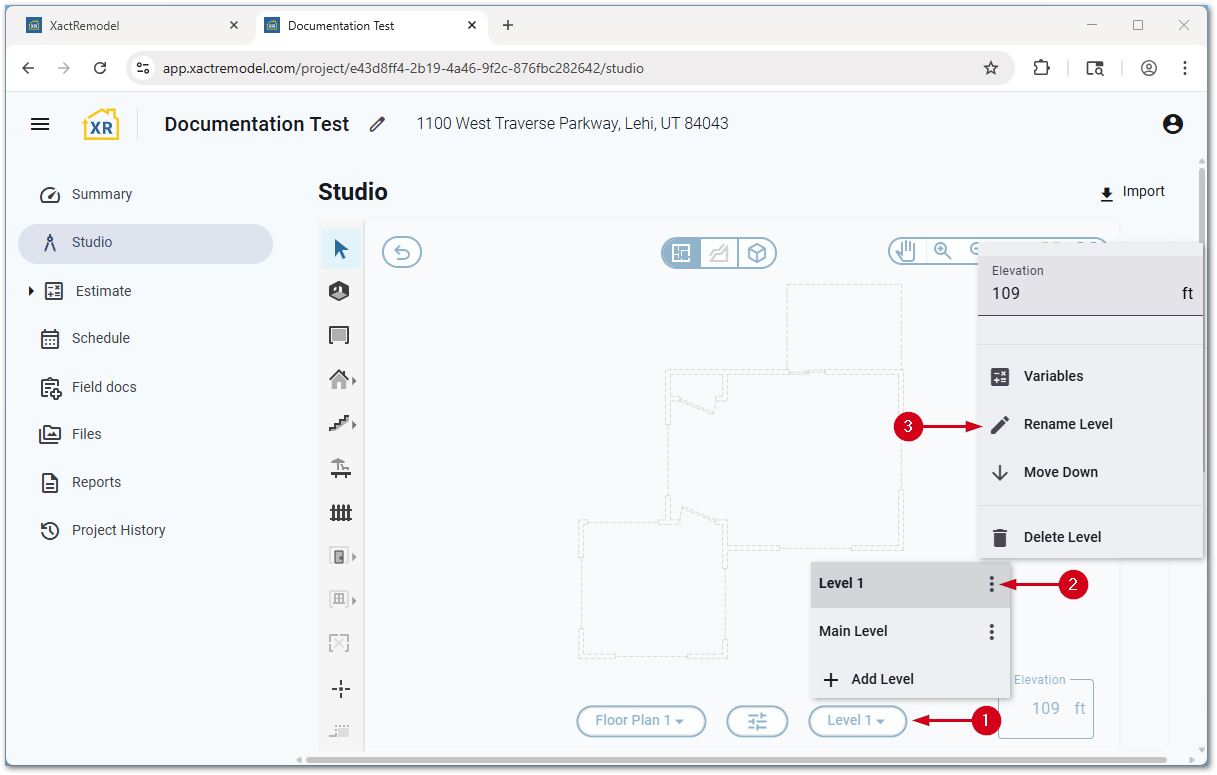
- Within the Studio section of a project, select the Select and modify levels button.
- Select the menu icon next to the level you want to rename.
- Select Rename Level.
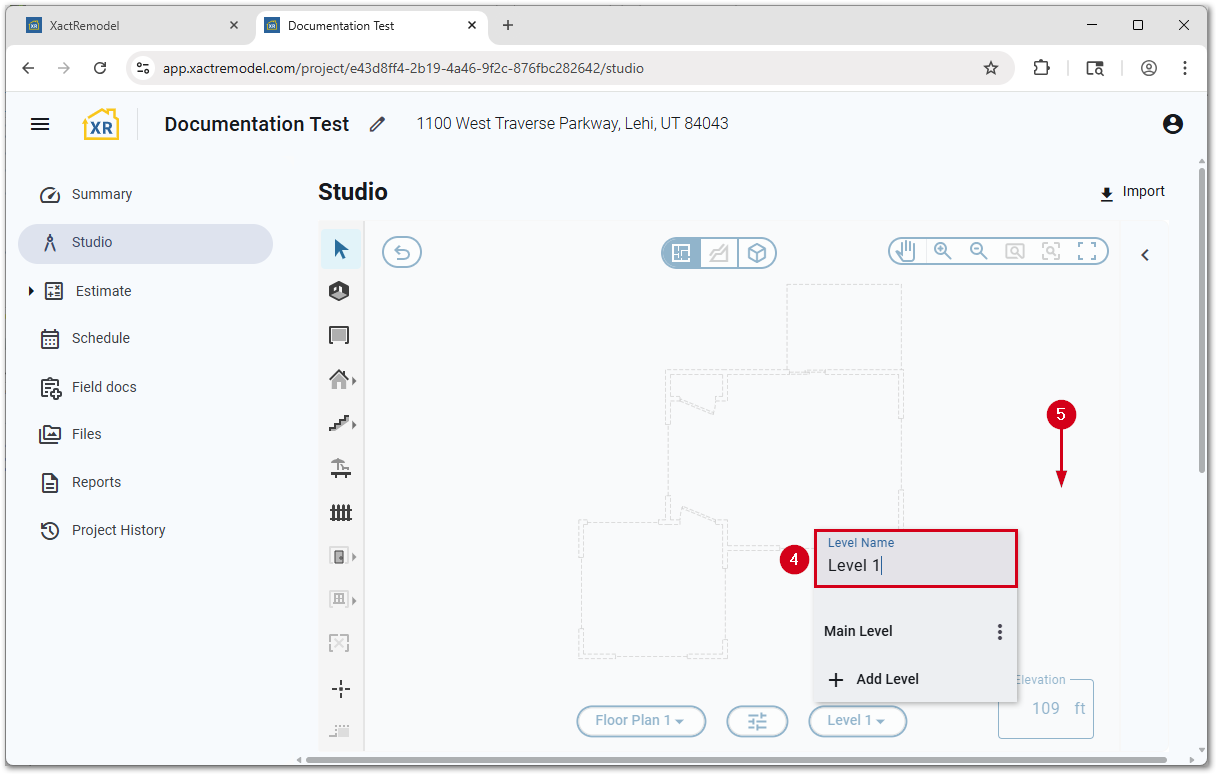
- Enter the new Level Name.
- Select a whitespace on the Studio canvas to save.
Delete levels
You can delete levels in Studio as desired.
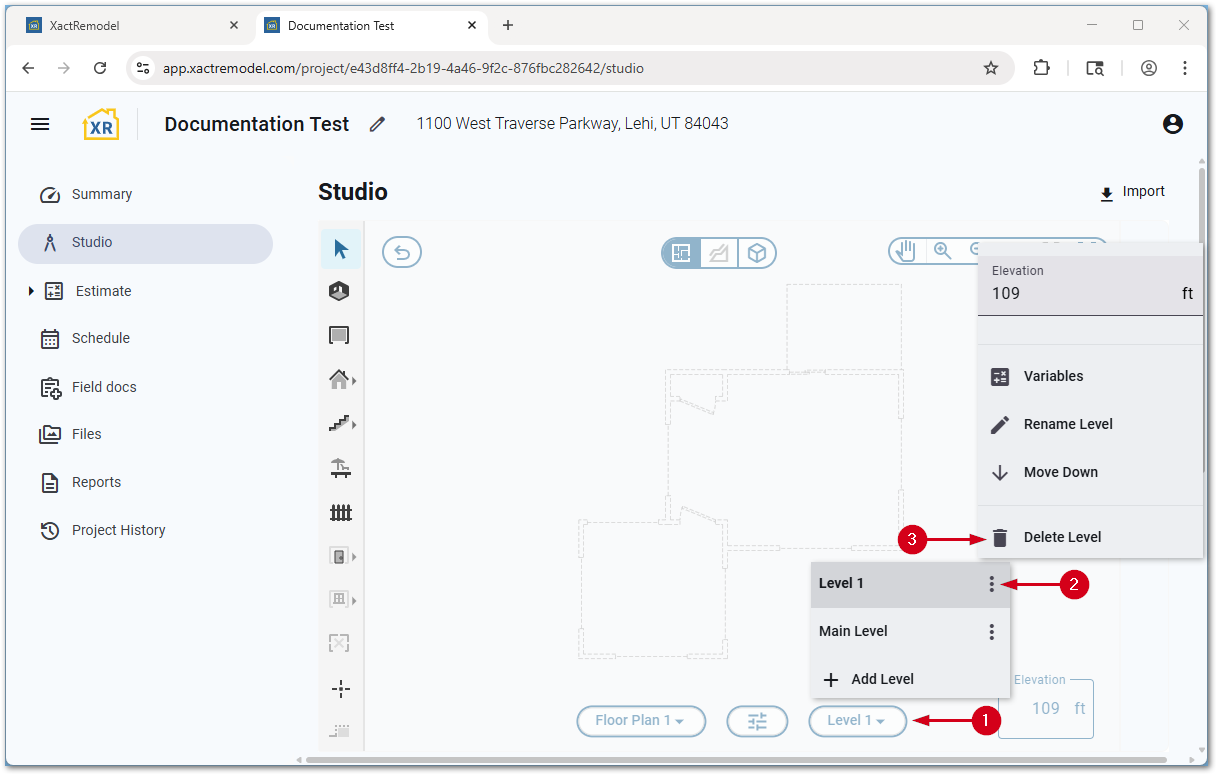
- Within the Studio section of a project, select the Select and modify levels button.
- Select the menu icon next to the level you want to delete.
- Select Delete Level.
IMPORTANT: Levels are deleted immediately after the option is selected and is not reversable.
Move levels
Levels in Studio are automatically ordered based on the elevation listed. The first level is created at 100 feet but can be edited. New levels are set 9 feet above the previous level.
If desired, you can re-sort levels manually.
- Within the Studio section of a project, select the Select and modify levels button.
- Select the menu icon next to the level to move.
- Select Move Up or Move Down.
Note: Depending on the number of levels or the position of the level, Studio may only show one option.
Level variables
You can view common level variables, showing common variables based on the sketch created.
- Within the Studio section of a project, select the Select and modify levels button.
- Select the menu icon next to the level to view the variables for.
- Select Variables.
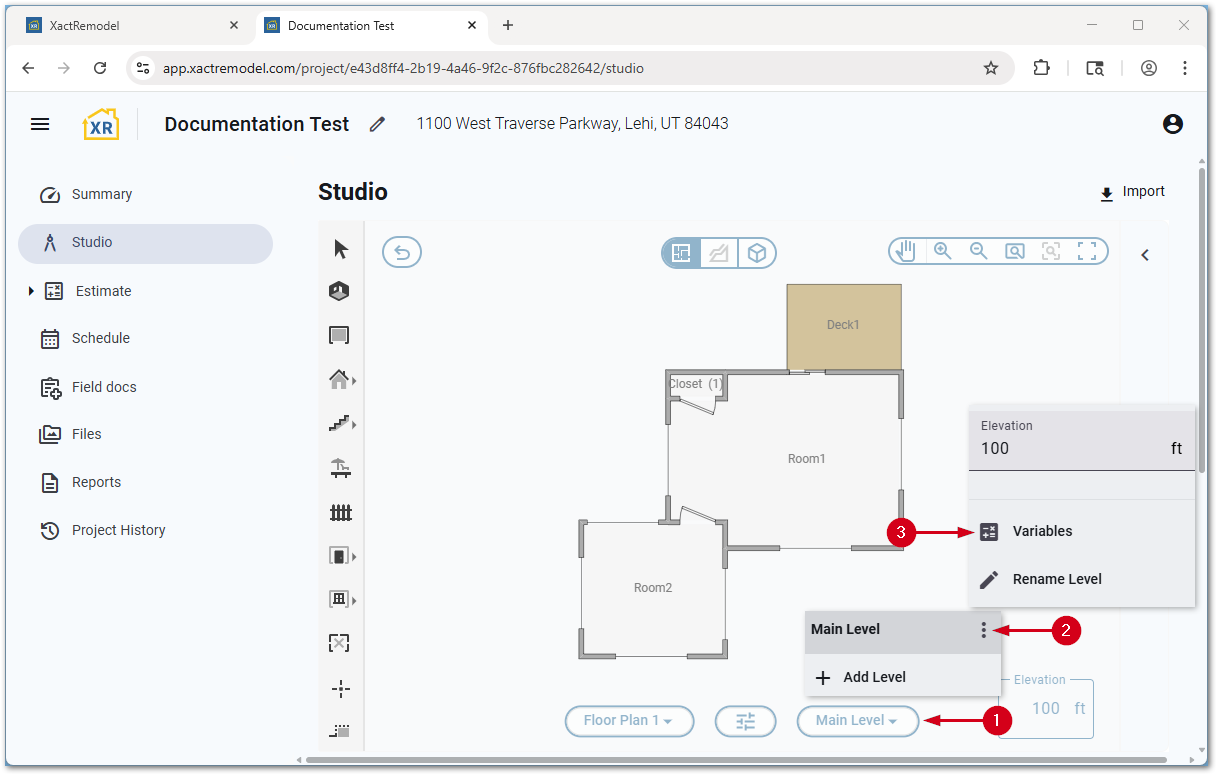
Level properties
For more information about level properties, which includes how to show or hide certain items on the Studio canvas, see our Level properties document.