Getting Started
Frequently asked questions (FAQ)
System requirements
Company info
Adjustments in XactRemodel and XactRestore
My Pricing
Line Item and Pricing Data
Create report statements
Create a project
Contact Support
XactRemodel and XactRestore subscription levels
XR Mobile overview
Unable to view quick estimates
Manage users and roles
Custom quick estimates
XactAI
Accounts and Contacts
Projects
Project Overview
Project summary
Reprice a project or change a tax jurisdiction
Export projects to Direct Supplier
Import contacts in XR Mobile
Project history log
Recover deleted projects
Groups
Line Items
Add line items from within an estimate
Reorder and delete line items
Line item details
Line item quantity calculations
Edit components
Add a line item note
Use the Verisk XactRestore connector in Claude
Duplicate line items, groups, floorplans, and projects
AI Estimator
Studio
Getting Started
Studio overview
Share floor plans
Build an estimate
Import image underlays in Studio
Level properties
Manage multiple floor plans in Studio
Reference objects
Tools
View sketch in 3D in Studio
Working with levels
Rename a sketch in XactRemodel and XactRestore Studio
Framing in Studio
Rooms
Room basics
Room properties
Subgroups
Square Break tool
Create a vaulted or attic ceiling
Ceilings
Stairs
Vertex tool
Openings
Roofs
Snap line tool
Zoom controls in Studio
Annotations
Add line items in Studio
Rotate an object
Scheduling
Attachments
Reports
Integrations
Release Notes
Account management
Cancel or change a subscription
Account Deletion
Subscribe to XactRemodel or XactRestore
Update account information
Transferring from XactRemodel Desktop
XactRestore
Field docs
Field docs - Admin
Field docs initial job setup
Add levels in Field docs
Add rooms in Field docs
Add equipment in Field docs
Reporting in Field docs
Field Docs completion and final review
Take daily readings in Field docs
Pick up equipment in Field docs
XactRestore now available!
Set project dates
Type of loss
Import Xactimate estimates (ESX) in to XactRemodel and XactRestore
Manage users and roles in XactRemodel and XactRestore
Lead creation in XactRestore
XactRestore Pro integration with XactAnalysis
- All Categories
- Attachments
- Attachments
Attachments
Manage All Your Project Files with XactRemodel
The Attachments section now supports floor plans, images, documents, and spreadsheets, making it easy to stay organized and access everything you need. Depending on your subscription tier you can add in spreadsheets and documents and photos.
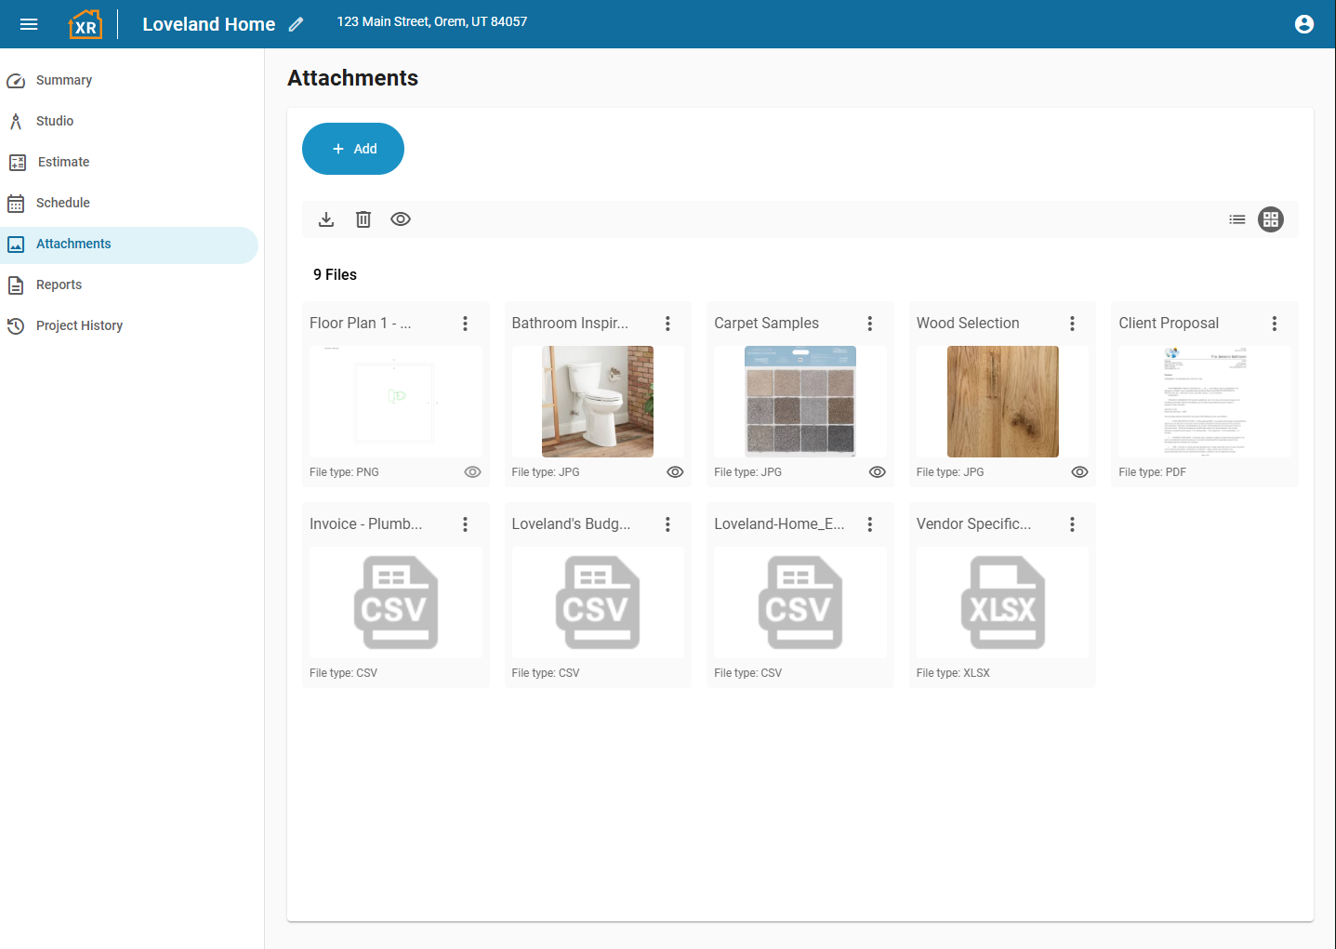
Attachment Views
XactRemodel offers two ways to view attachments:
- Grid View: Displays a preview of supported files (images, PDFs, and TXT files).
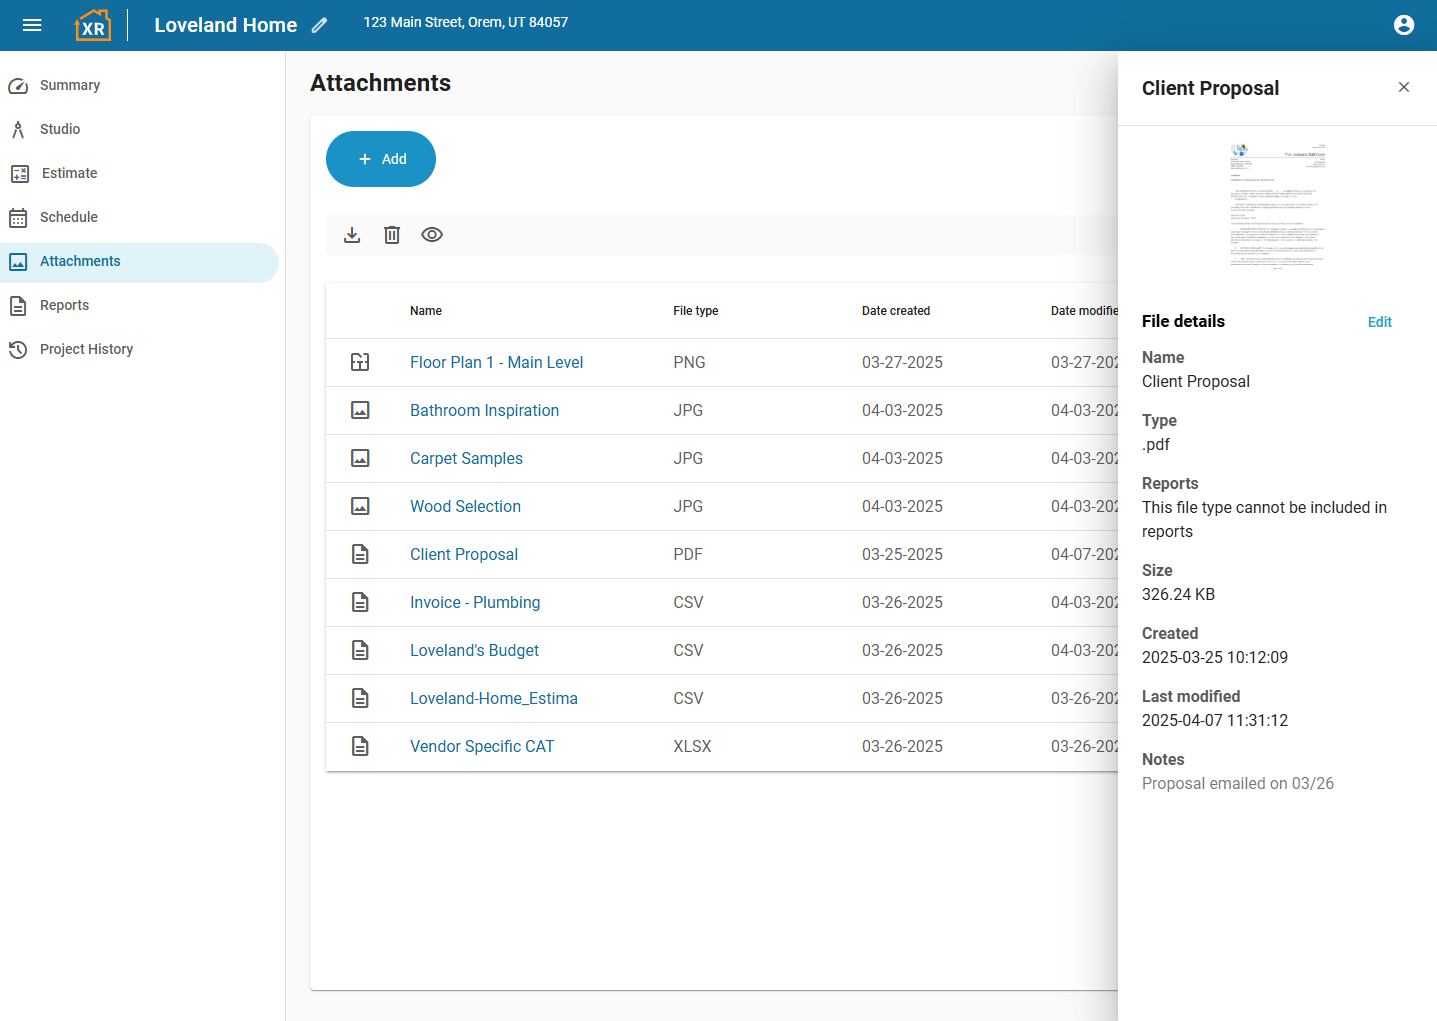
- List View: Shows all attachments in a simplified list with names and details.
Managing Attachments
Adding an Attachment
- Open your project in XactRemodel.
- Navigate to the Attachments page.
- Click Add, then select File Upload.
- Choose the files you want to attach.
Note: Upload time may vary depending on file size and quantity.
Opening an Attachment
Grid View:
- Open your project in XactRemodel.
- Go to the Attachments page.
- Double-click the thumbnail to open the preview.
List View:
- Open your project in XactRemodel.
- Go to the Attachments page.
- Double-click the attachment icon to open the preview.
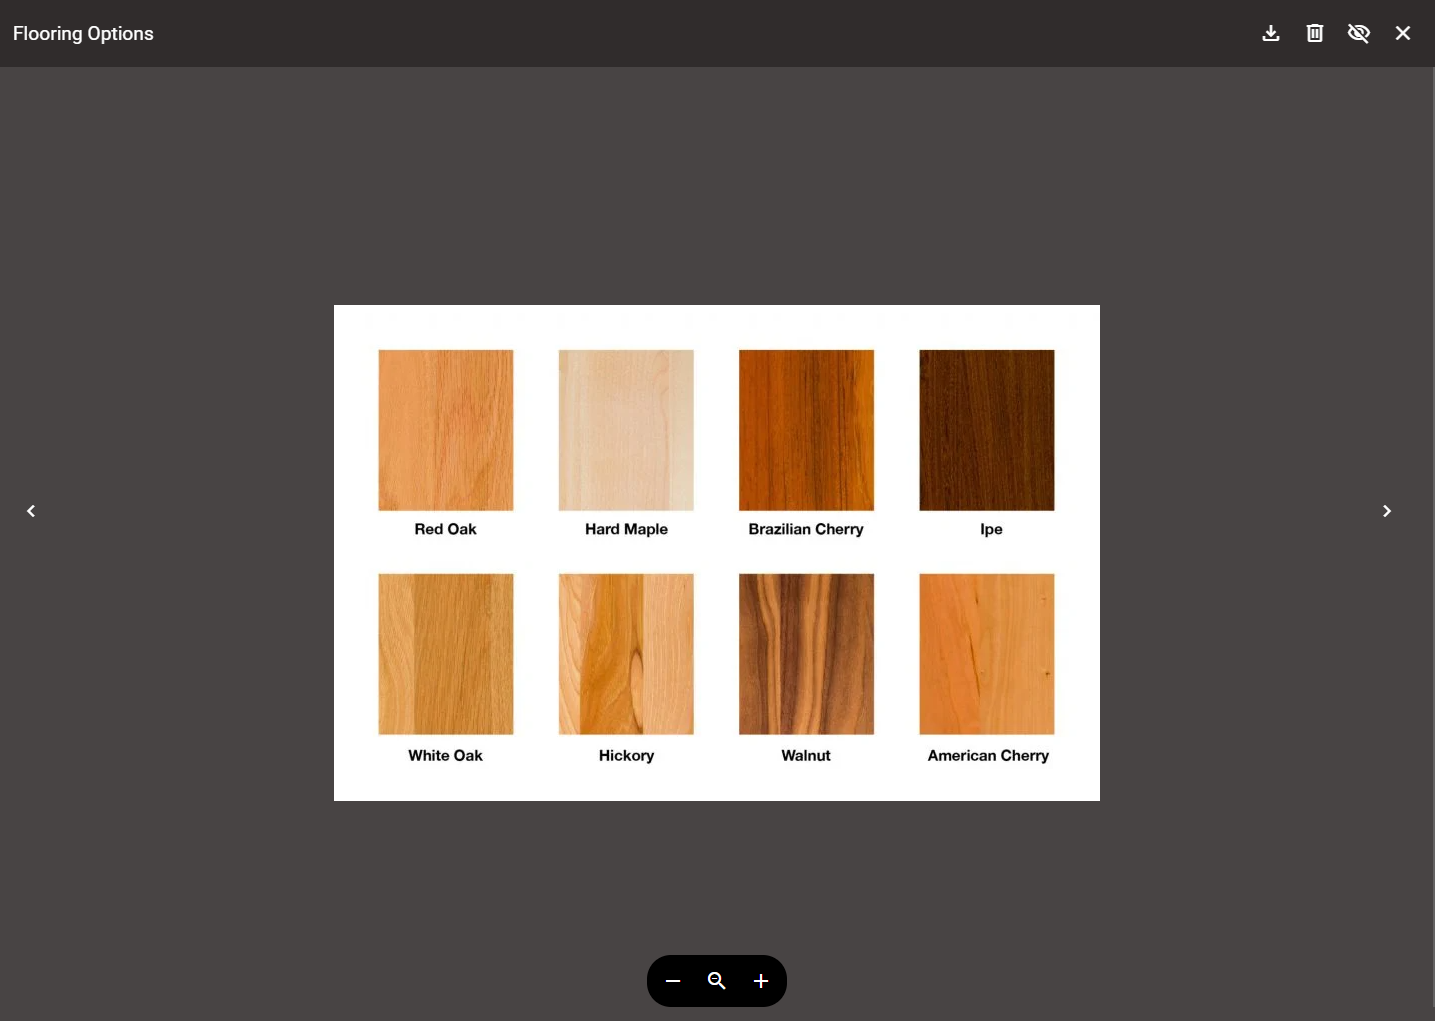
Preview Options:
- Zoom in/out
- Navigate between attachments using arrows
- Download or delete attachments
- Mark images as viewable on the report
Editing an Attachment
- Open your project in XactRemodel.
- Navigate to the Attachments page.
- Click the three dots next to the attachment’s name (available in both Grid and List views).
- Select File Information, then click Edit.
- Update the name or add notes, then click Save.
Bulk Editing, Downloading, or Deleting Attachments
- Open your project in XactRemodel.
- Go to the Attachments page.
- Click on the file border to select multiple attachments.
- Use the toolbar to adjust report visibility, delete, or download files.