Add rooms in Field docs

This document goes over how users can add rooms to a job in Field docs.
![]() Field docs is part of the XactRestore Pro subscription tier. To upgrade, please speak with our Sales Department by calling 833-352-9228.
Field docs is part of the XactRestore Pro subscription tier. To upgrade, please speak with our Sales Department by calling 833-352-9228.
Before adding a room, there needs to be at least one level in the job. For assistance adding levels, see our Add levels in Field docs document.
- From within a project in XR Mobile, select Field docs.
- Select Areas.
- Select the Level button.
- Select the level to add the room to.
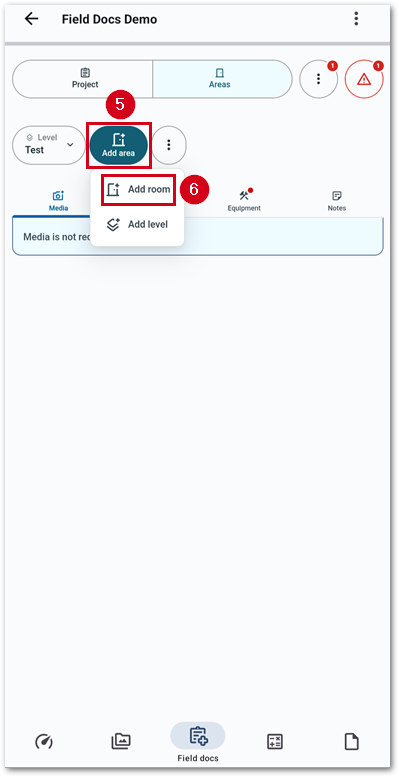
- Select Add area.
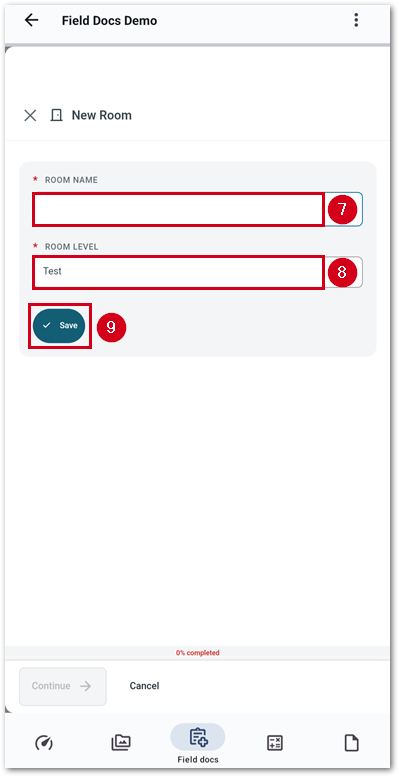
- Select Add room.
- Enter a room name.
- Confirm that the level is correct.
- Select Save.

A new page opens, allowing users to add information about dimensions, media related to the room, and monitoring. The sections below go over those sections.
Note: The required options may be different depending on what an administrator sets as part of the initial setup or overrides when adding rooms themselves. In the below example, room dimensions, media, and ambient and moisture readings with media are required.
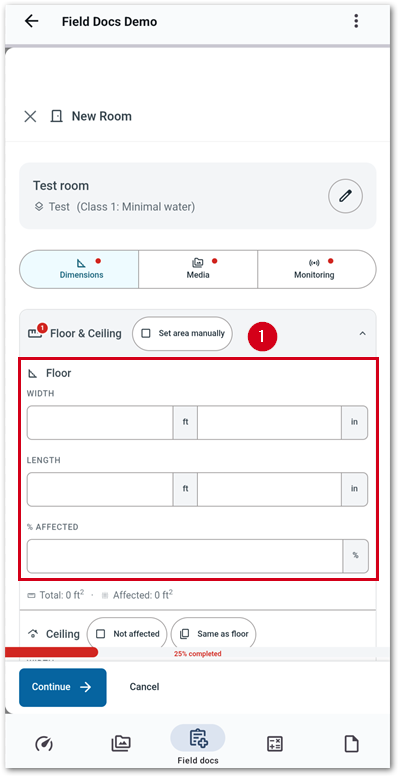
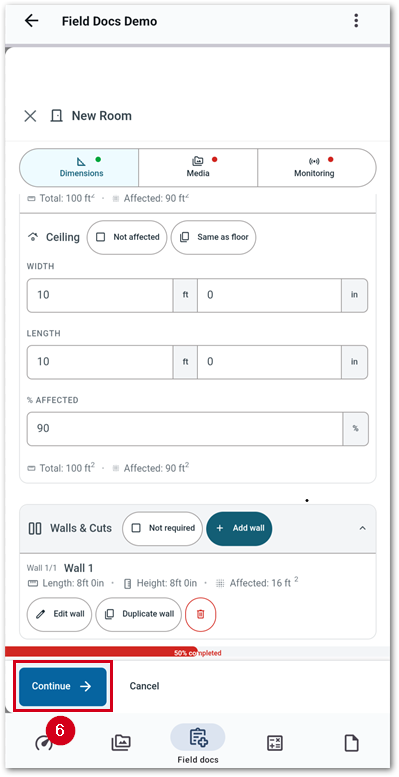
Dimensions
Follow the steps below to add dimensions to a room.
- Enter measurements for the floor.
Note: If desired, select the set area manually option to enter square footage directly.
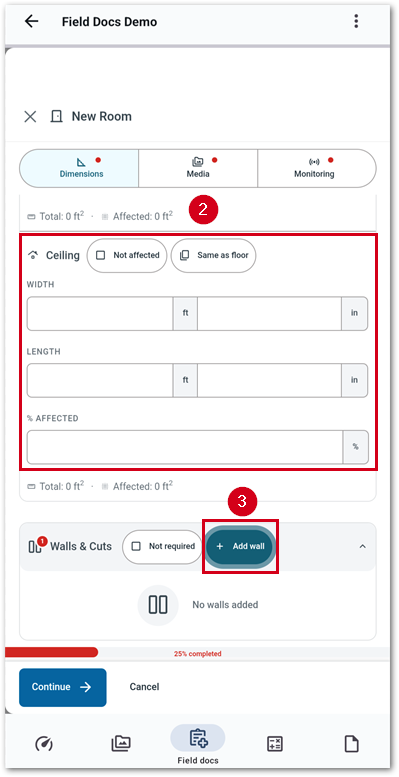
- Enter measurements for the ceiling.
Note: If the ceiling is not affected, select not affected. If the ceiling is the same as the floor, select the same as the floor to copy the measurements.
- Select Add wall. A new section appears.
Note: If walls are not affected, select not required and skip to step 6. If this is selected, a new field to add the height of the wall will replace the add wall button.
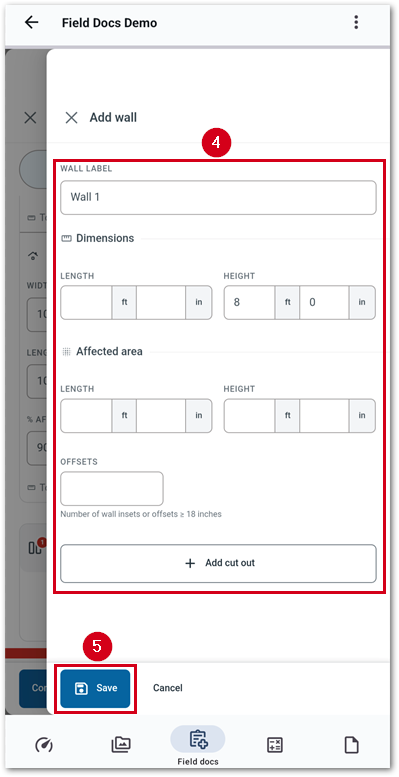
- Fill out the form.
- Wall label: The name for the wall.
- Dimensions: The dimensions of the wall.
- Affected area: The size of the affected area on the wall.
- Offsets: The number of insets or offsets that are greater or equal to 18 inches.
- Add cut out: Adds measurements for a cut out on the wall for windows, doors, etc.
Cutouts will reduce the overall size used when calculating equipment recommendations.
- Select Save.
Note: Additional cut outs and walls can be added as needed. A duplicate button can be utilized to speed up additional entries.
- Select Continue. The media section appears. Follow the steps in the next section for assistance with this.
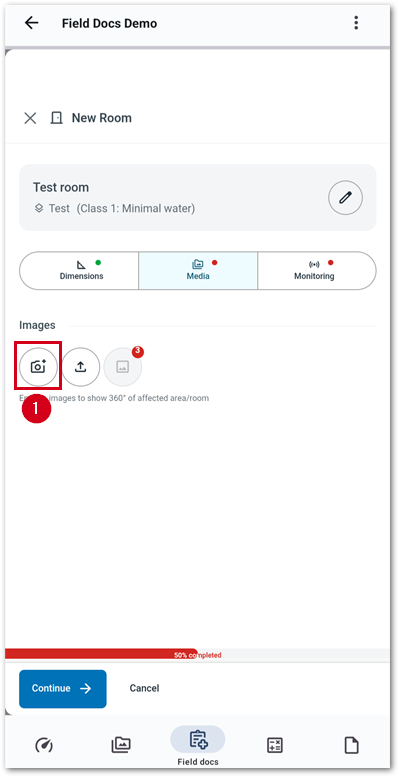
Media
Add media
Images can be added either directly from the device camera or from storage. The steps below cover how to add images from the camera.
- From the media section, select the camera button.
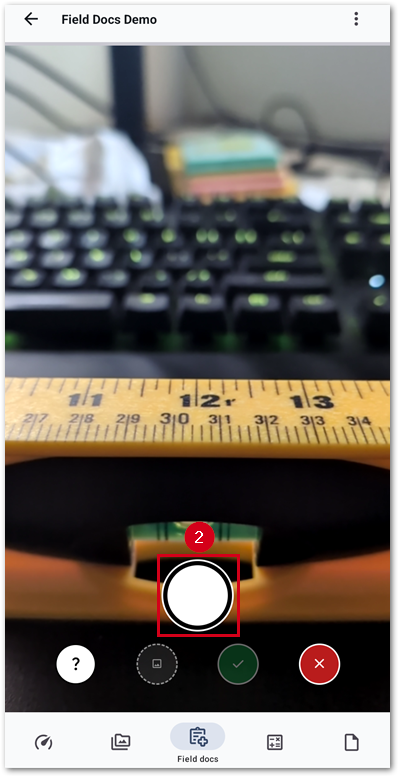
- Select the shutter button to take image(s).
Note: Multiple images can be taken at once without the need to reopen the camera between captures.
55 - Once all images have been captured, select the green checkmark button.

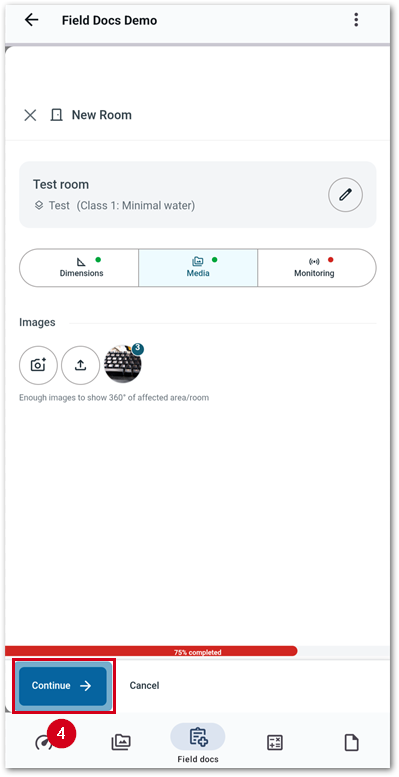
- Select Continue. The Monitoring section appears. Follow the steps in the next section for assistance with this.
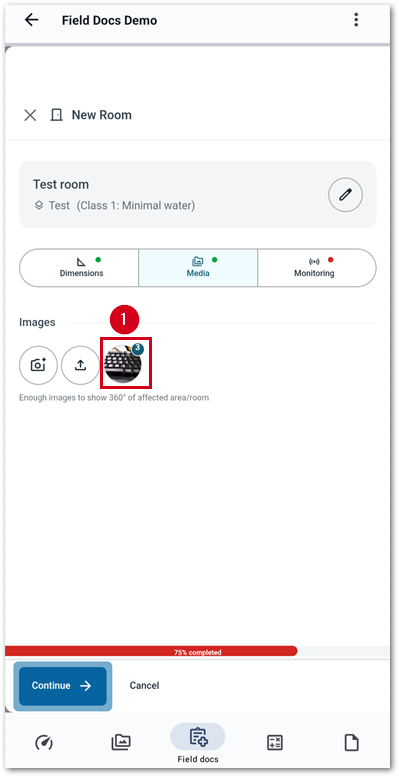
Delete media
To delete images, follow the steps below.
- From the media section, select the icon with the photo and the red or green bubble.
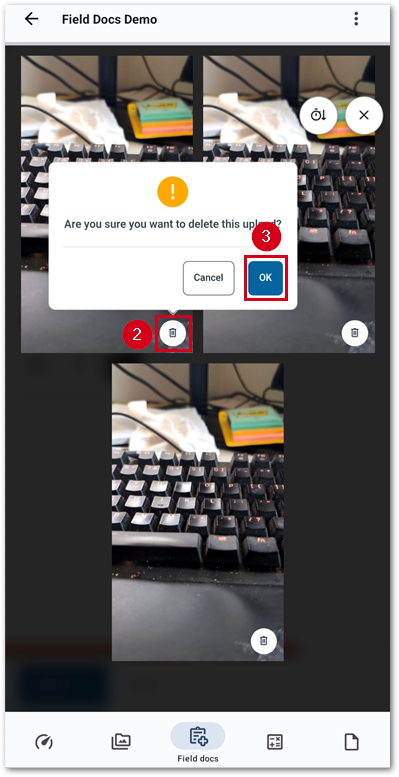
- Select the trashcan icon in the bottom right of the image to delete.
- Select OK.
IMPORTANT: Once photos are deleted, they are not recoverable.
- Once done, select the X button to return to the media section.

Monitoring
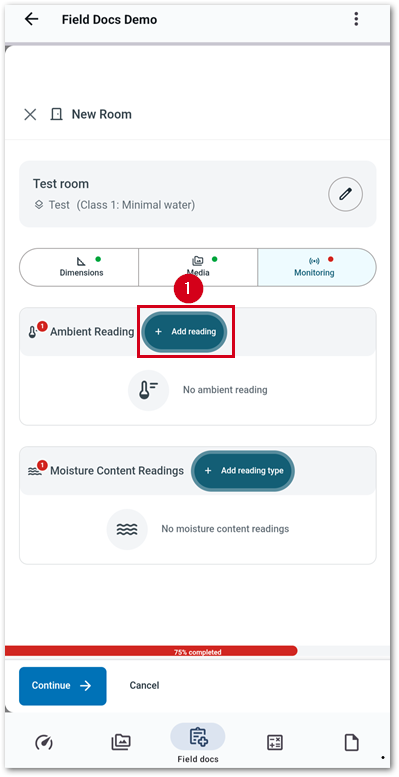
Ambient Reading
Follow the steps below to add ambient readings.
- From the Monitoring section, select Add reading in the Ambient Reading section.
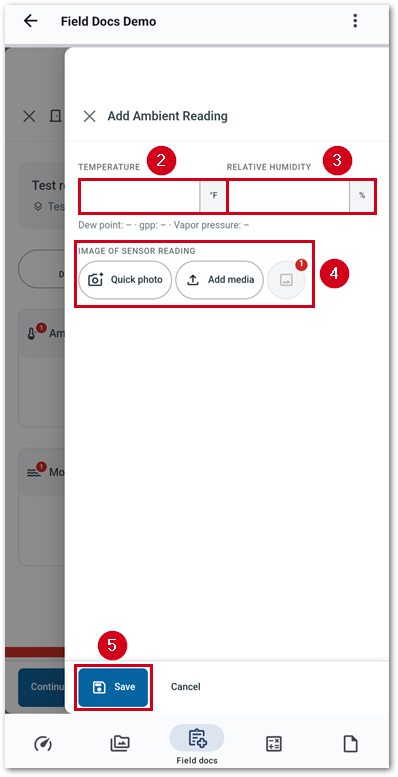
- Enter the Temperature.
- Enter the Relative Humidity. The dew point, gpp, and vapor pressure automatically calculate.
- Add an image of the sensor reading.
- Quick photo: Add images from the camera directly.
- Add media: Add images from storage.
- Preview media: Once images have been added, they are stored here. Select the button to view or delete media.
- Select Save. The Add reading section closes, and the Monitoring section reappears.
Note: To edit an existing reading, select the Edit button.
Moisture Content Readings
Follow the steps below to add moisture content readings.
Note: Repeat the steps below for additional reading types if needed after saving the first reading by selecting add reading type.
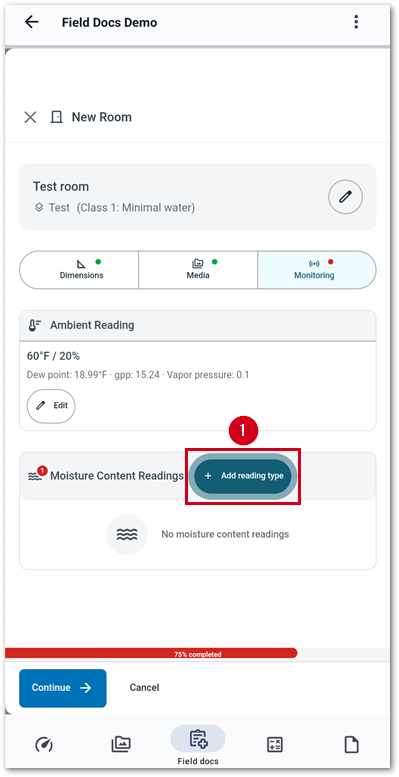
- From the Monitoring section, select Add reading type in the Moisture Content section.
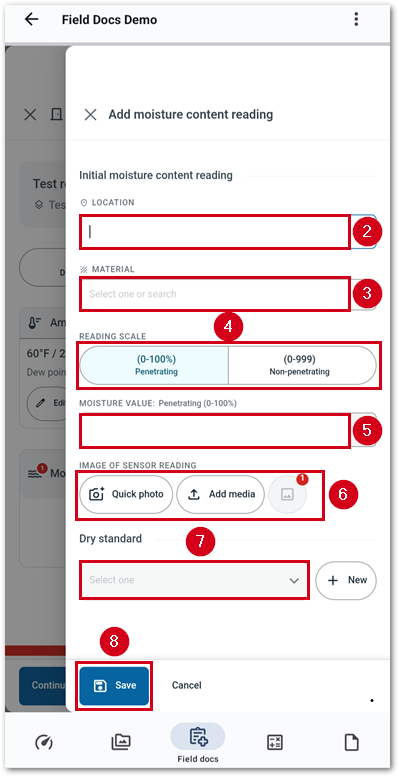
- Enter a location.
- Select the material.
Note: Start typing into the field or select the field and pick from the drop-down menu that appears.
- Select the type of equipment used to gather the reading.
- Enter the moisture value reading.
- Add an image from the equipment with the reading.
- Quick photo: Add images from the camera directly.
- Add media: Add images from storage.
- Preview media: Once images have been added, they are stored here. Select the button to view or delete media.
- Select a dry standard.
Note: If a dry standard is not available, select New and fill out the form that appears.
- Select Save.
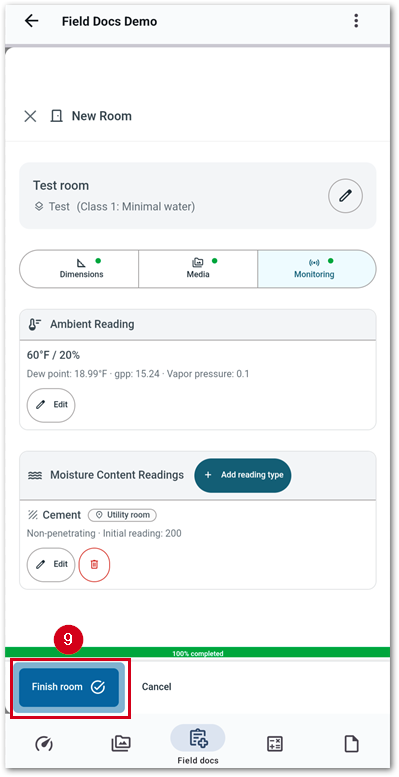
- Select Finish room.