Getting Started
Frequently Asked Questions (FAQ)
System Requirements
Company Info
Add Company Markup
My Pricing
Line Item and Pricing Data
Create Report Statements
Create a Project
Contact Support
XactRemodel subscription levels
XactRemodel Mobile App
Unable to view Quick Estimates
Admin Users Control
Accounts and Contacts
Manage client and vendor Accounts in XactRemodel
Manage Contacts in XactRemodel
Associate projects with Accounts in XactRemodel
Projects
Project Overview
Project Summary
Duplicate a Project
Reprice an Estimate
Sending Projects to Direct Supplier
XactRemodel Mobile: Import Contacts
Project History
Restoring Deleted Projects
Groups
Line Items
Studio
Getting Started
About Studio
Share floor plan in XactRemodel
Building an Estimate
Import image as underlay
Level Properties
Multiple Floor Plans in Studio
Reference Objects
Tools
View Levels in 3D
Working with Levels
3D View
Rename a sketch in XactRemodel and XactRestore Studio
Framing in Studio
Rooms
Openings
Roofs
Add line items from within Studio
Scheduling
Schedule Work Week Setup
Adding Tasks to your Project Schedule
Company Schedule
Task Report in Scheduling
Schedule Views
Creating a Project Schedule with Auto-Scheduling
Attachments
Manage attachments in Proposal reports
Manage photos and documents in XactRemodel and XactRestore
Attachments
Reports
Integrations
Release Notes
January 2025 New Features
Upcoming Features
November 2024 New Features
June 2024 New Features
February 2024 New Features
2023 Release Notes
November 2023 New Features
September 2023 New Features
XactRemodel PRO Release
November 2025 New Features
Account management
How do I cancel or change my subscription?
Account Deletion
Subscribe to XactRemodel
Updating Account Info
Transferring from XactRemodel Desktop
Import projects from XactRemodel desktop
Transfer data from XactRemodel Desktop to Xactimate
Back up your data in XactRemodel Desktop
XactRestore
Field docs
Field docs - Admin
Field docs initial job setup
Add levels in Field docs
Add rooms in Field docs
Add equipment in Field docs
Reporting in Field docs
Field Docs completion and final review
Take daily readings in Field docs
Pick up equipment in Field docs
XactRestore now available!
Set project dates
Type of Loss
Import Xactimate estimates (ESX) in to XactRemodel and XactRestore
Manage users and roles in XactRemodel and XactRestore
Lead creation in XactRestore Pro
Adjustments in XactRemodel and XactRestore
- All Categories
- Attachments
- Photo Attachments
Photo Attachments
Updated
by Justin Jackman
Integrating visuals into a remodeling estimate is a game-changer in the bidding game. It's not just about the numbers; it's about painting a vivid picture of the project. These photos aren't just snapshots; they're a roadmap for all parties involved in the project (contractor, sub-contractor, client, etc.). They cut through the confusion, making sure everyone's on the same page. It's not just an estimate; it's a visual story that communicates trust, skill, and a dedication to getting the job done right.
Adding Photos to a Project
On Web
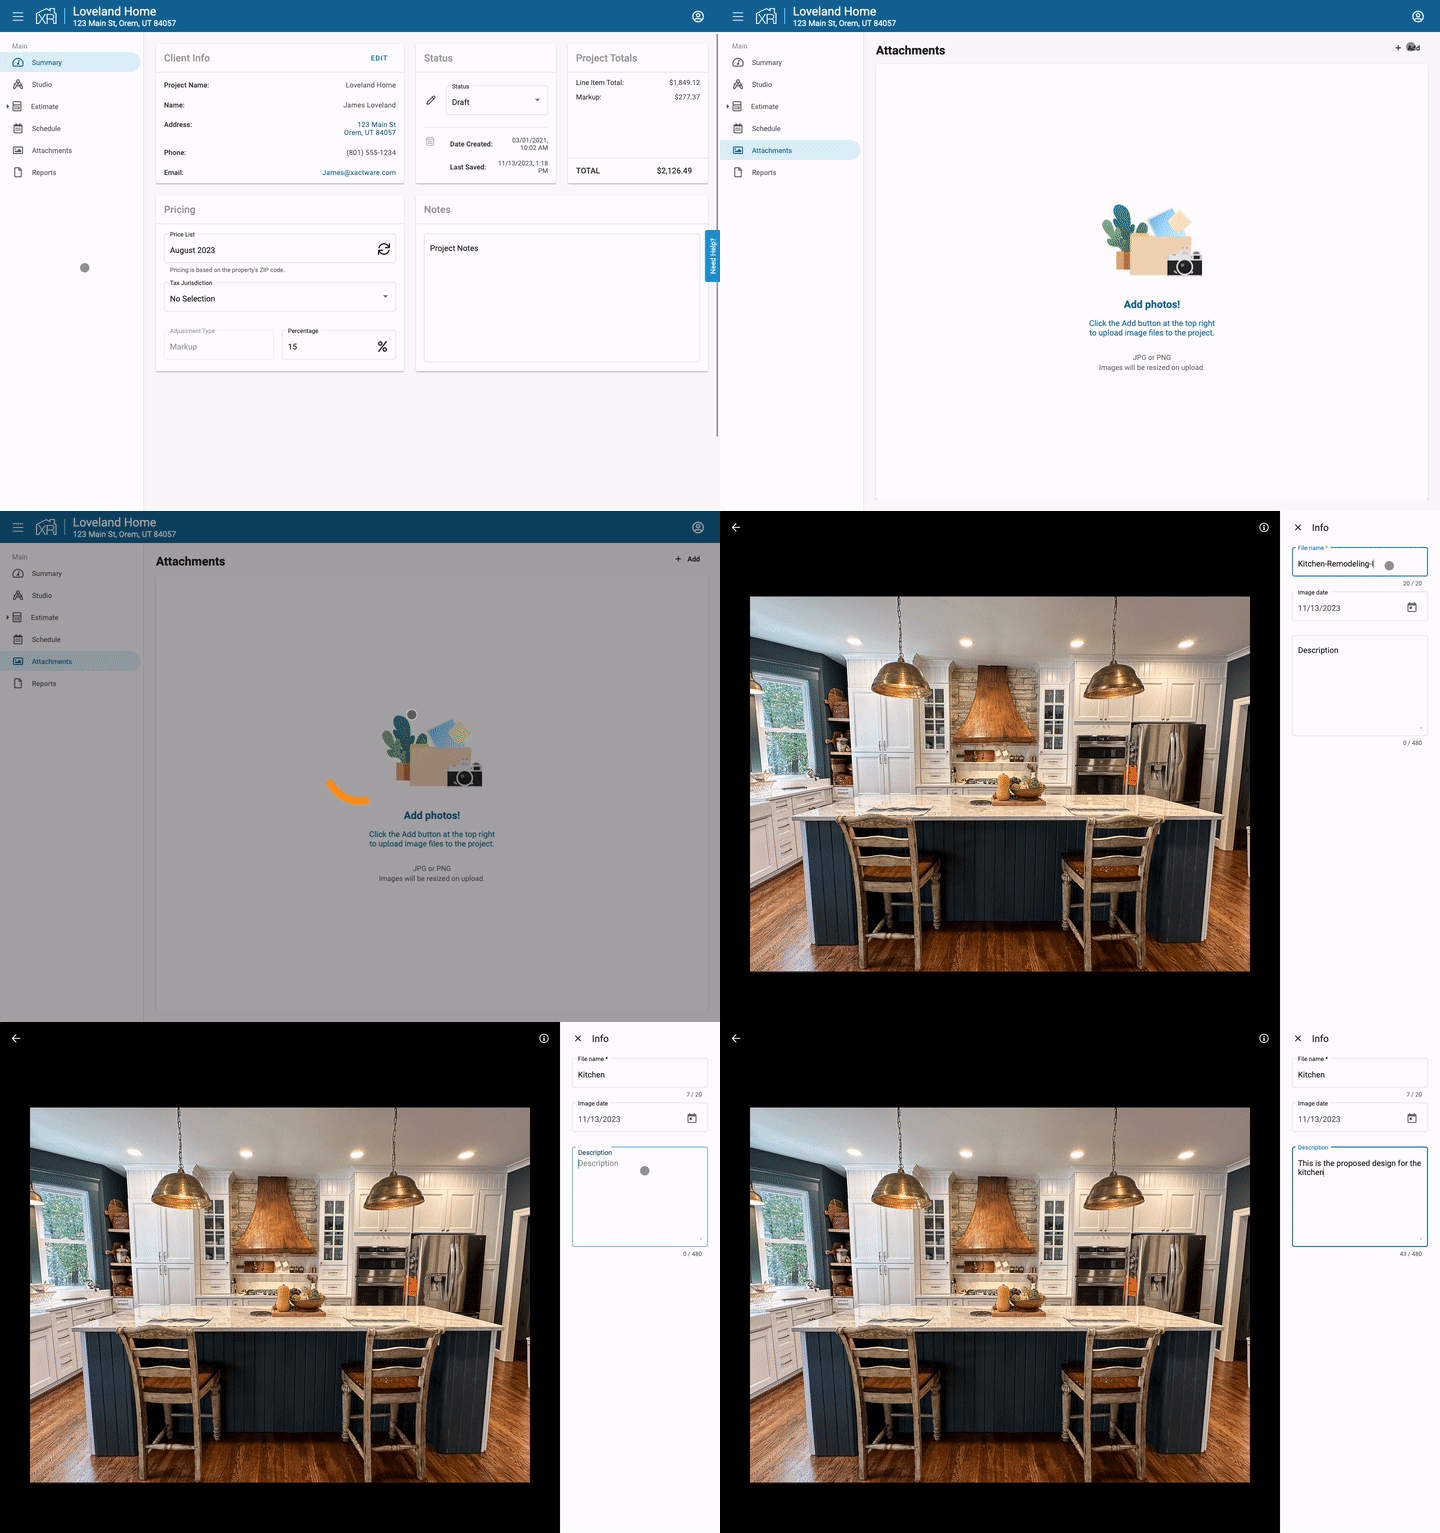
To add photos to a project via your web browser:
- Go to the Attachments tab
- Click the "+ Add" button at the top right
- Navigate to the destination of the photos on your computer
- Finally, select which photos you want to upload to your project
Once the photos have been uploaded to your project, you can preview the images in full screen, customize the name of the image, the date the image was captured, and add a detailed description of the photo. Photos will be displayed in alpha numeric order.

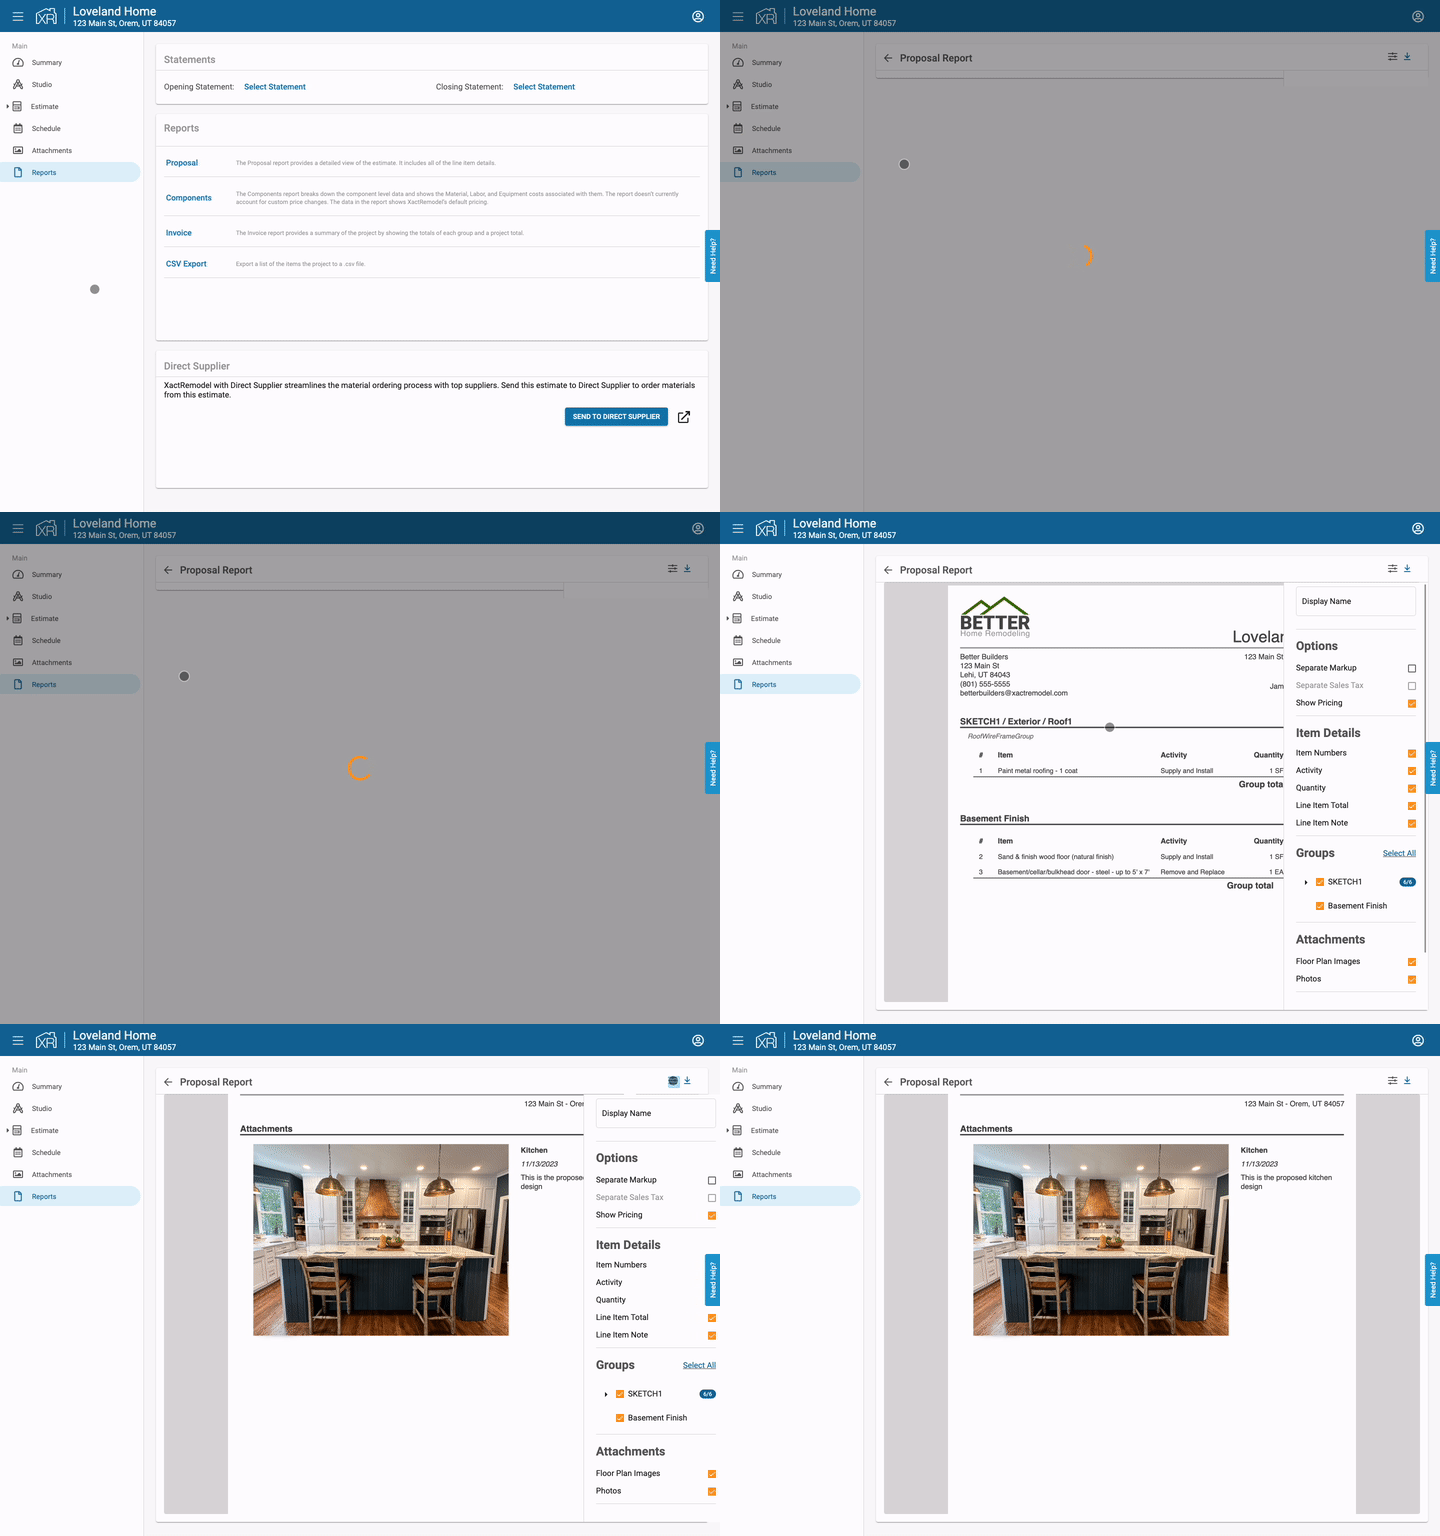
When generating the Proposal report, users have the option to include or exclude the photos on the report. To do so:
- Navigate to the Reports tab within a project
- Select the Proposal report
- If not already visible, expand the Report options panel to the right of the report preview
- Toggle on/off the Photos and click Apply
- The Proposal report preview will be updated to align with the desired setting.

On Mobile
To add photos to a project via XactRemodel mobile:
- Tap on the Attachments tab icon at the bottom
- Click the "Add +" button
- Select to either capture an image directly using your camera, or to pick an existing image that already exists in your camera's photo library
- You will need to grant access to your camera and/or your photo library to be able to add photos from your mobile device
Once the photos have been uploaded to your project, you can preview the images in full screen, customize the name of the image, the date the image was captured, and add a detailed description of the photo.
Sharing Photos from a Project
XactRemodel makes it easy to share your project photos, whether you’re using the web or mobile app.
On web
You can download photos or include them in your proposal report.
Downloading Photos
- Navigate to the Attachments tab within your project.
- Select the photo(s) you want to download.
- Click Download.
Displaying Photos on the Proposal Report
- Ensure the photos you want to include have been added to the project.
- Go to the Reports tab and select the Proposal report.
- Under Attachments, make sure the Photos option is selected.
- For details on excluding or displaying specific photos, refer to Managing Attachments in Your Proposal Report.
On Mobile
Easily share photos directly from the XactRemodel mobile app:
- Log in to the XactRemodel Mobile app.
- Open the project containing the photos you want to share.
- Navigate to the Attachments page by tapping the image icon.
- Long-press a photo to select it.
- Select any additional photos you’d like to share.
- Tap the Share button and choose your sharing method.
