Import image as underlay
Updated
by Rose Gulley
There is an Xactware Xpert Tip that might help with part of this process. After clicking play, click the full-screen icon to make the video full-screen.
There is an Xactware Xpert Tip that might help with part of this process. After clicking play, click the full-screen icon to make the video full-screen.
See our XpertTips library for more Xpert Tips.
The Image Underlay feature allows users to upload an image of a floor plan directly onto the canvas in Studio within XactRemodel. This enables users to draw over the image using the tools in XactRemodel Studio to create a floor plan with accurate measurements for quicker and more precise estimates.
Show or hide the underlay image
Import an underlay image
- From within an XactRemodel project, open the project menu.
- Click Studio.
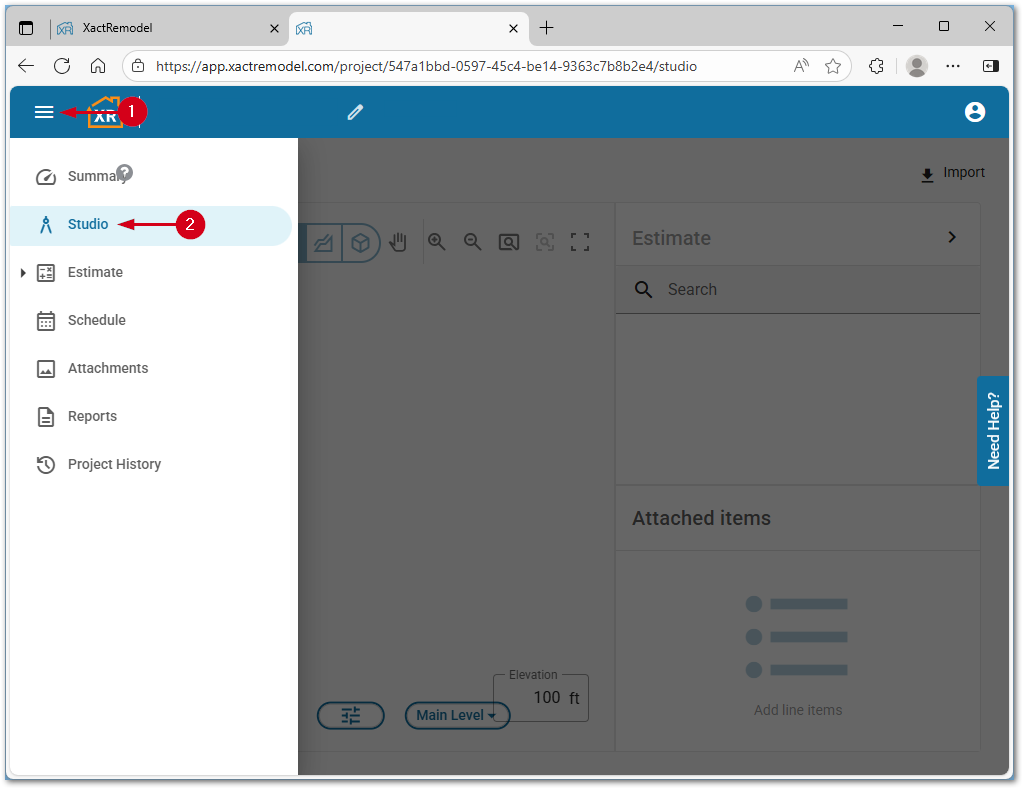
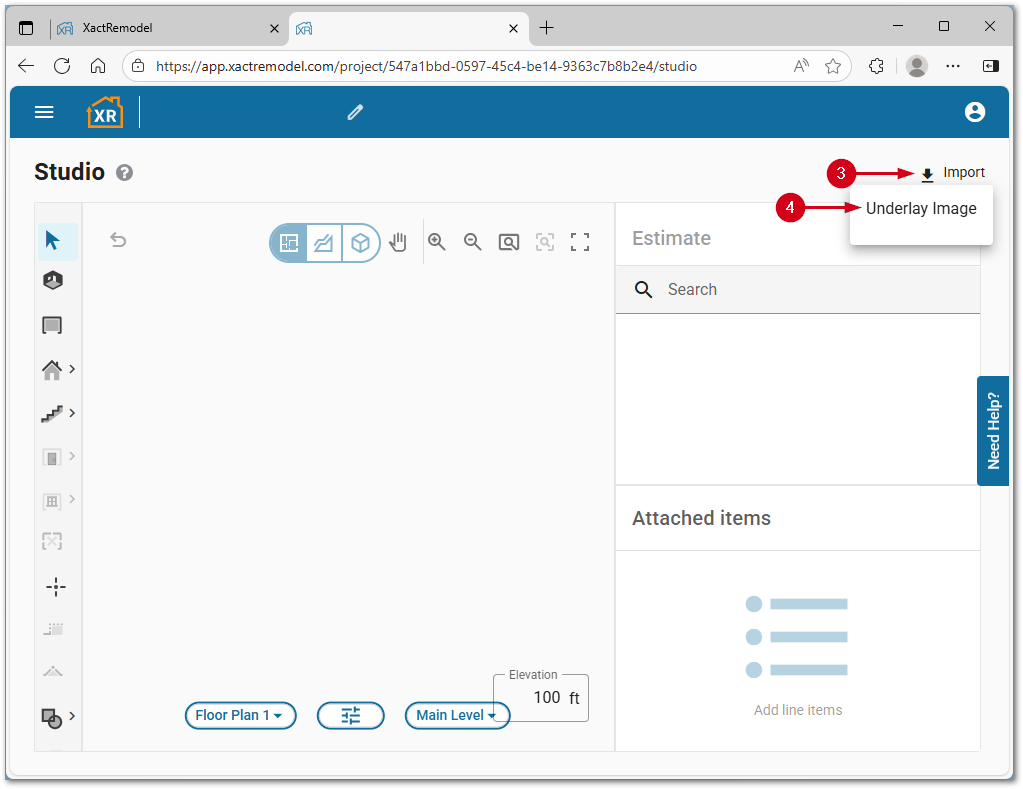
- Click Import.
- Select Underlay Image.
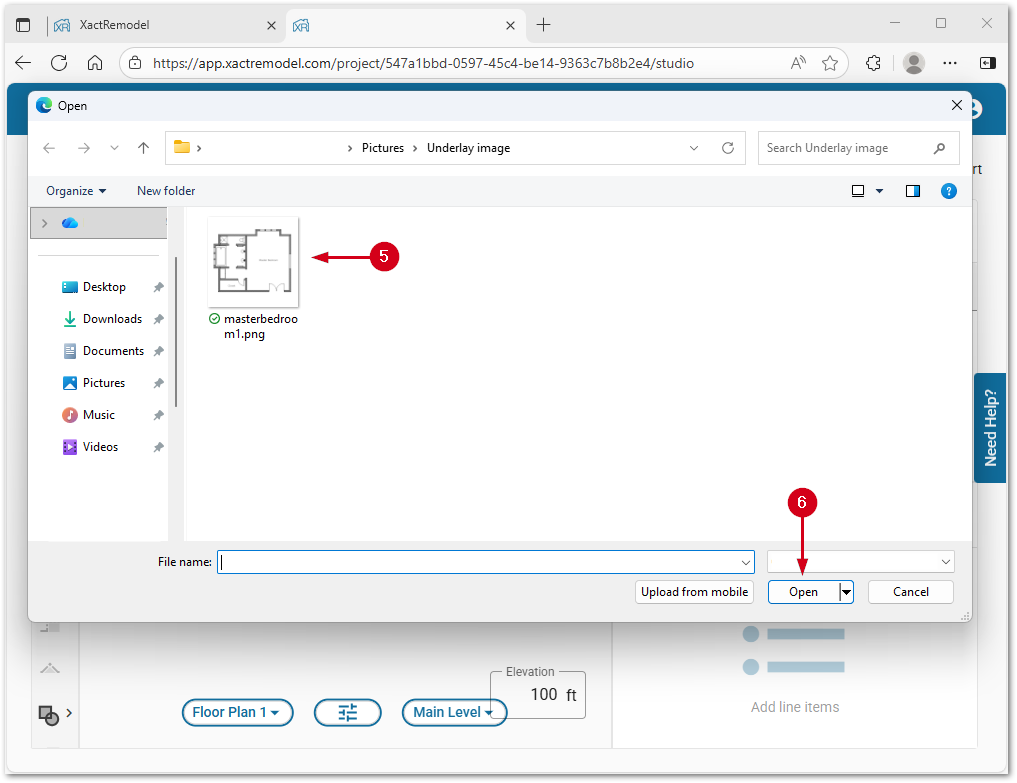
- Select the desired image.
- Click Open.
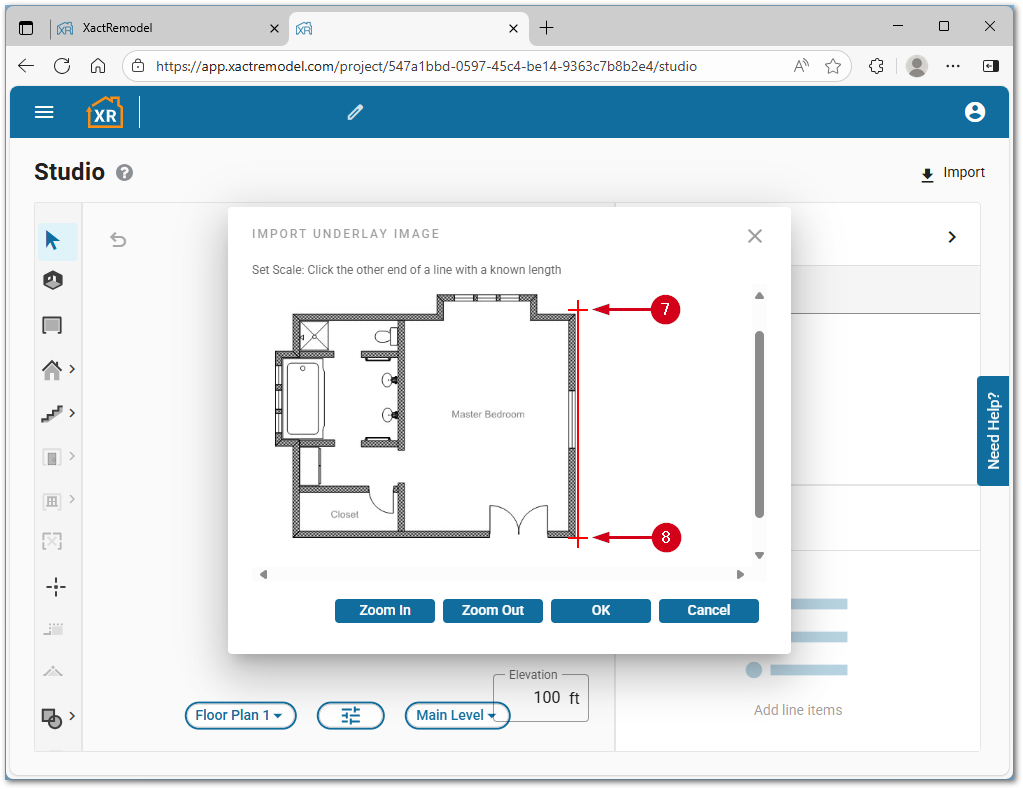
- Click one end of a line with a known length.
Note: It is recommended to use the longest known length.
- Click the second end of the line.
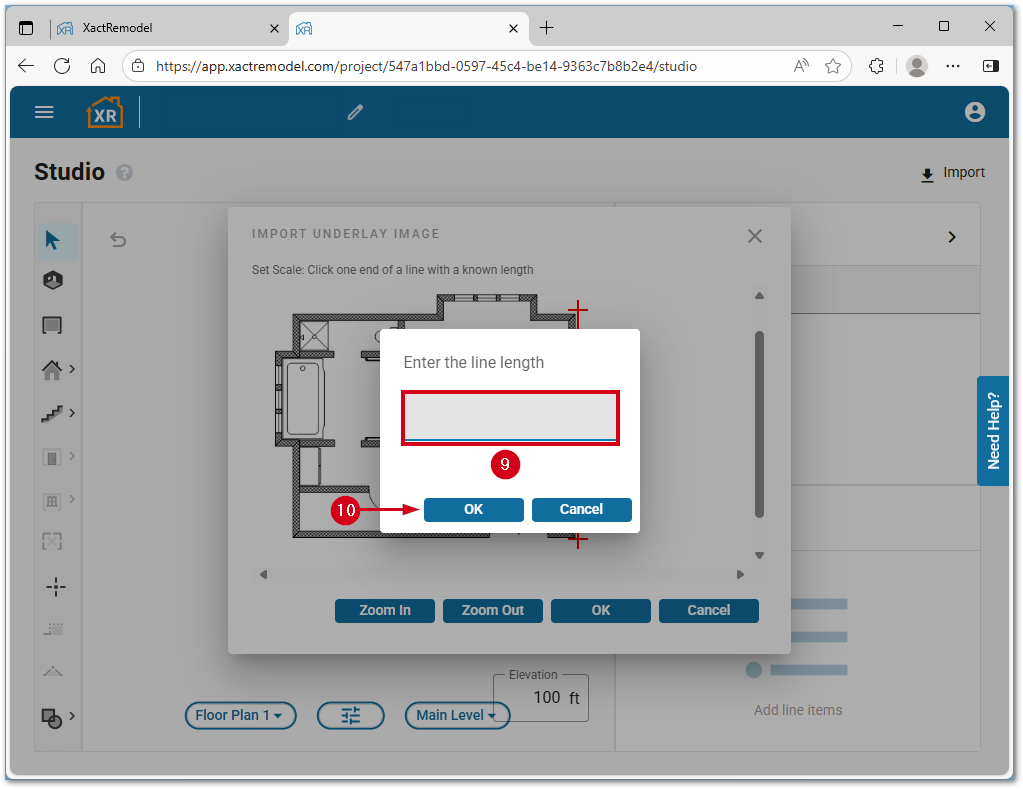
- Enter the line length.
- Click OK.
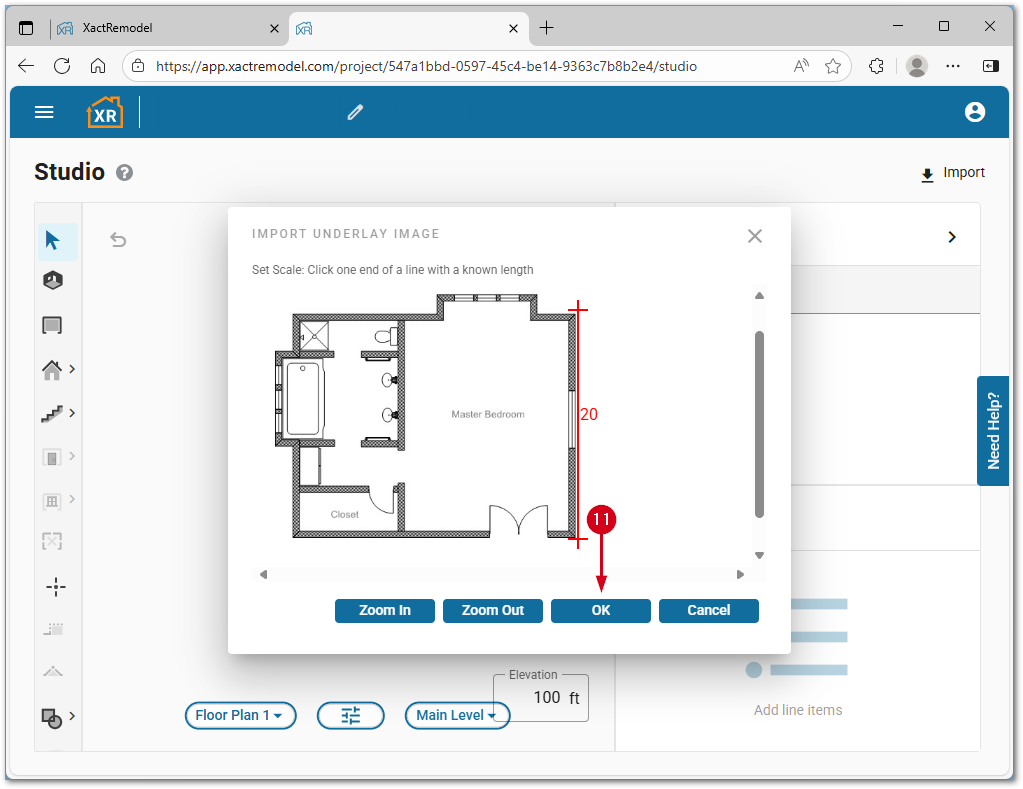
- Click OK.
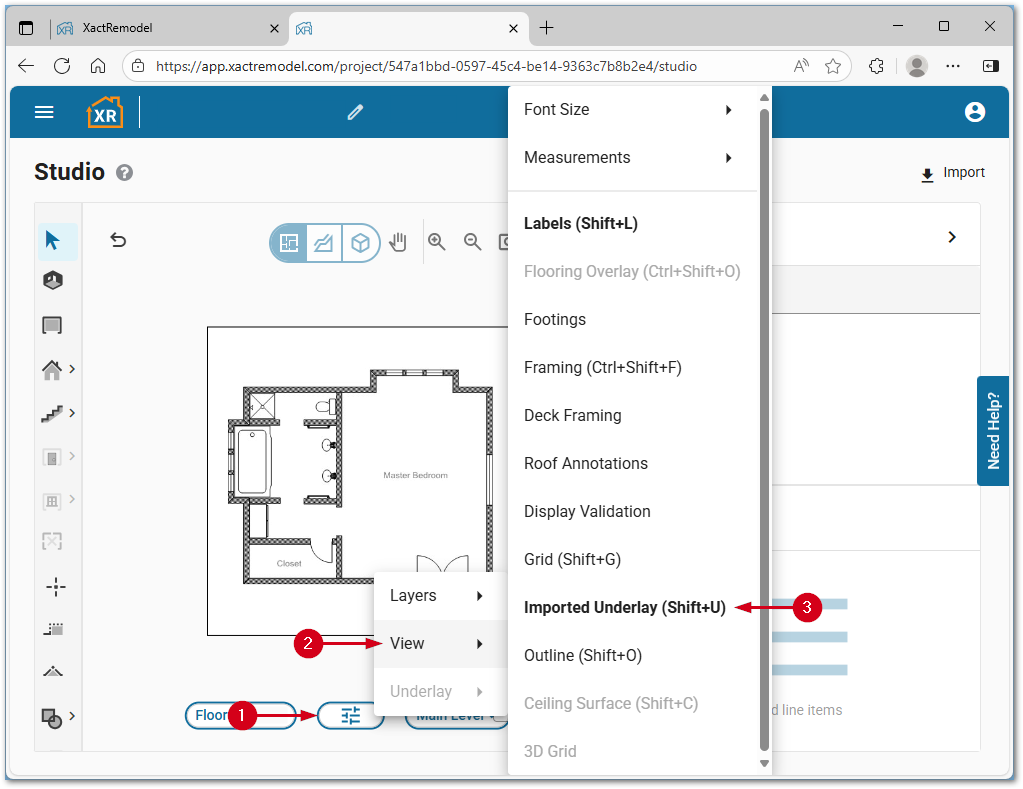
Show or hide the underlay image
- From within the Studio tab of a project, click the Level Properties icon.
- Select View.
- Select Imported Underlay.
Note: Alternatively, press the Shift and U keys to toggle the image from show to hide.
Remove the underlay image
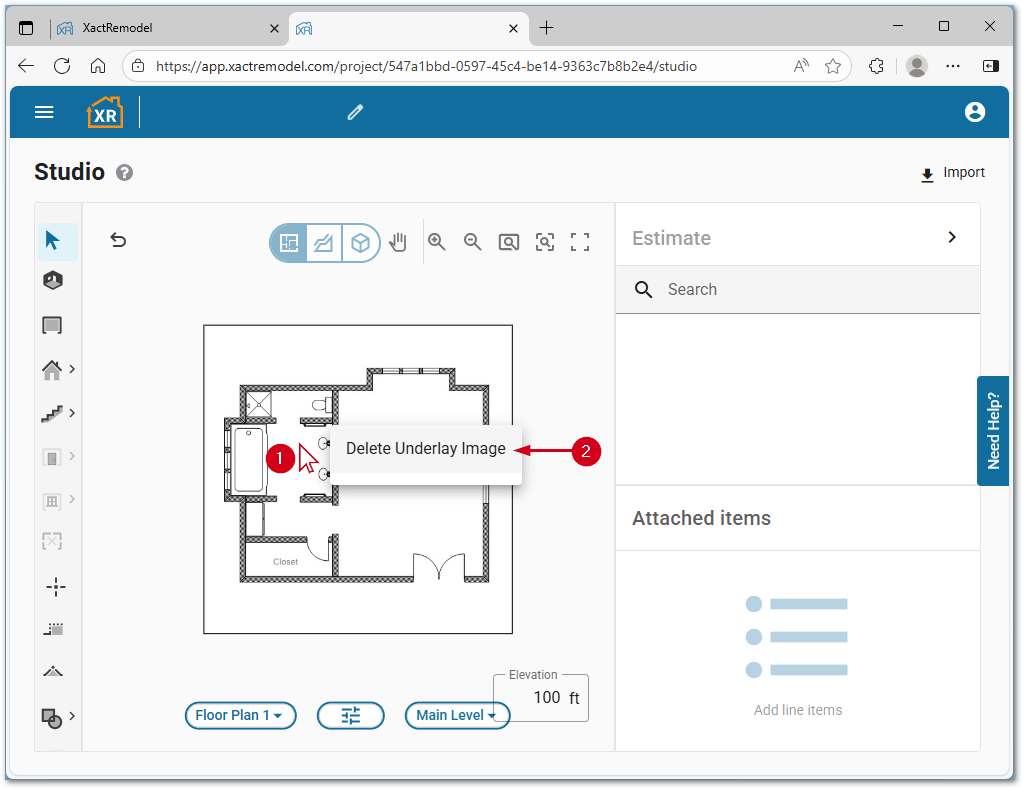
- From within the Studio tab of a project, right-click the underlay image.
- Select Delete Underlay Image.
